PRO version features
This is a generic guide for the PRO version of any Prompt Builder, and it is devoted only to the PRO features. All the Prompt Builder basics were covered in this guide.
Video version of this guide (based on Characters PRO Prompt Builder)
We will use the Fantasy PRO Prompt Builder as an example in this text version.
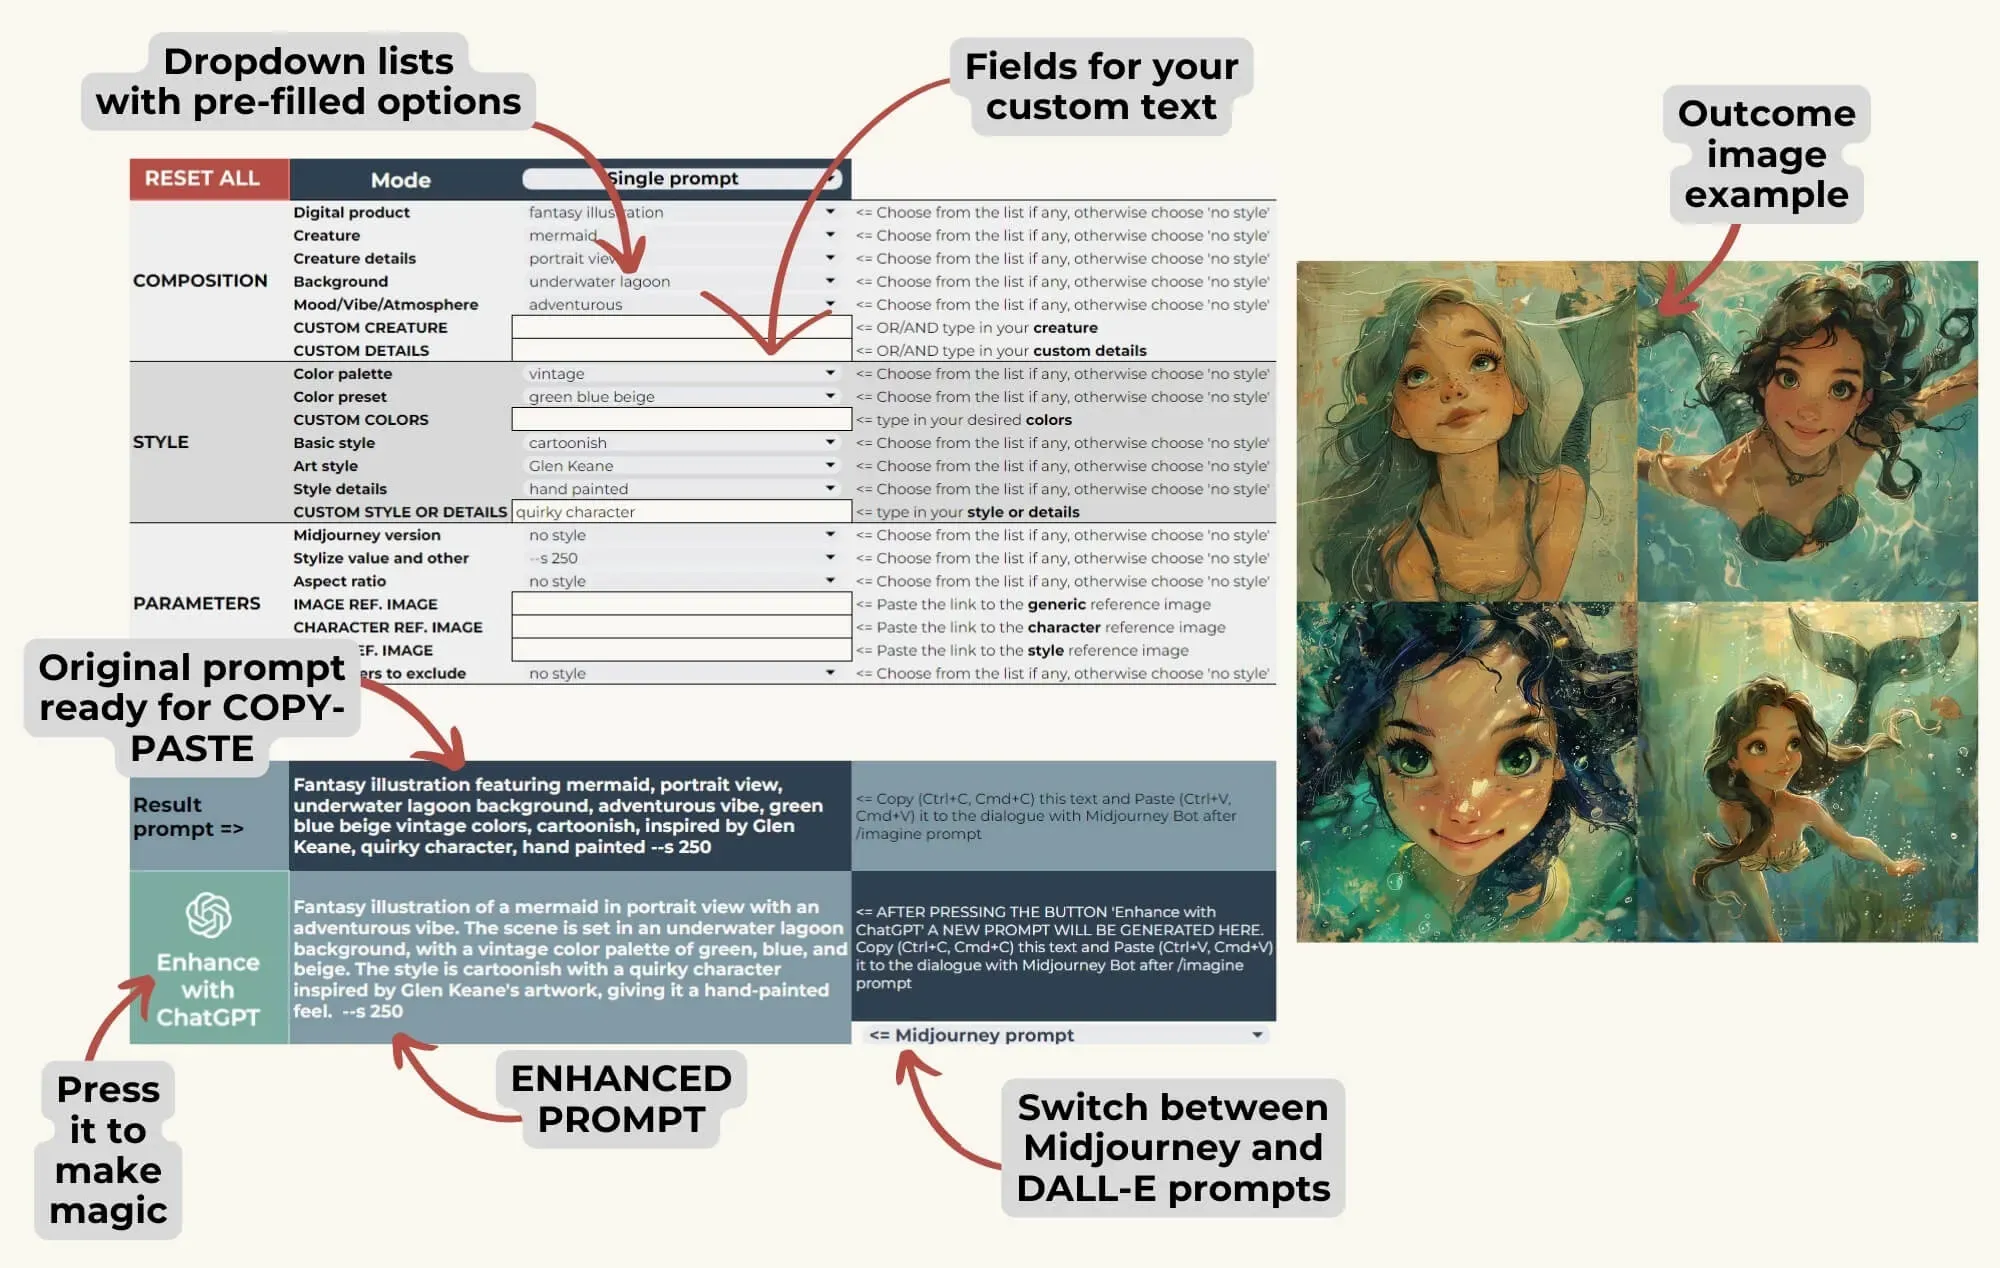
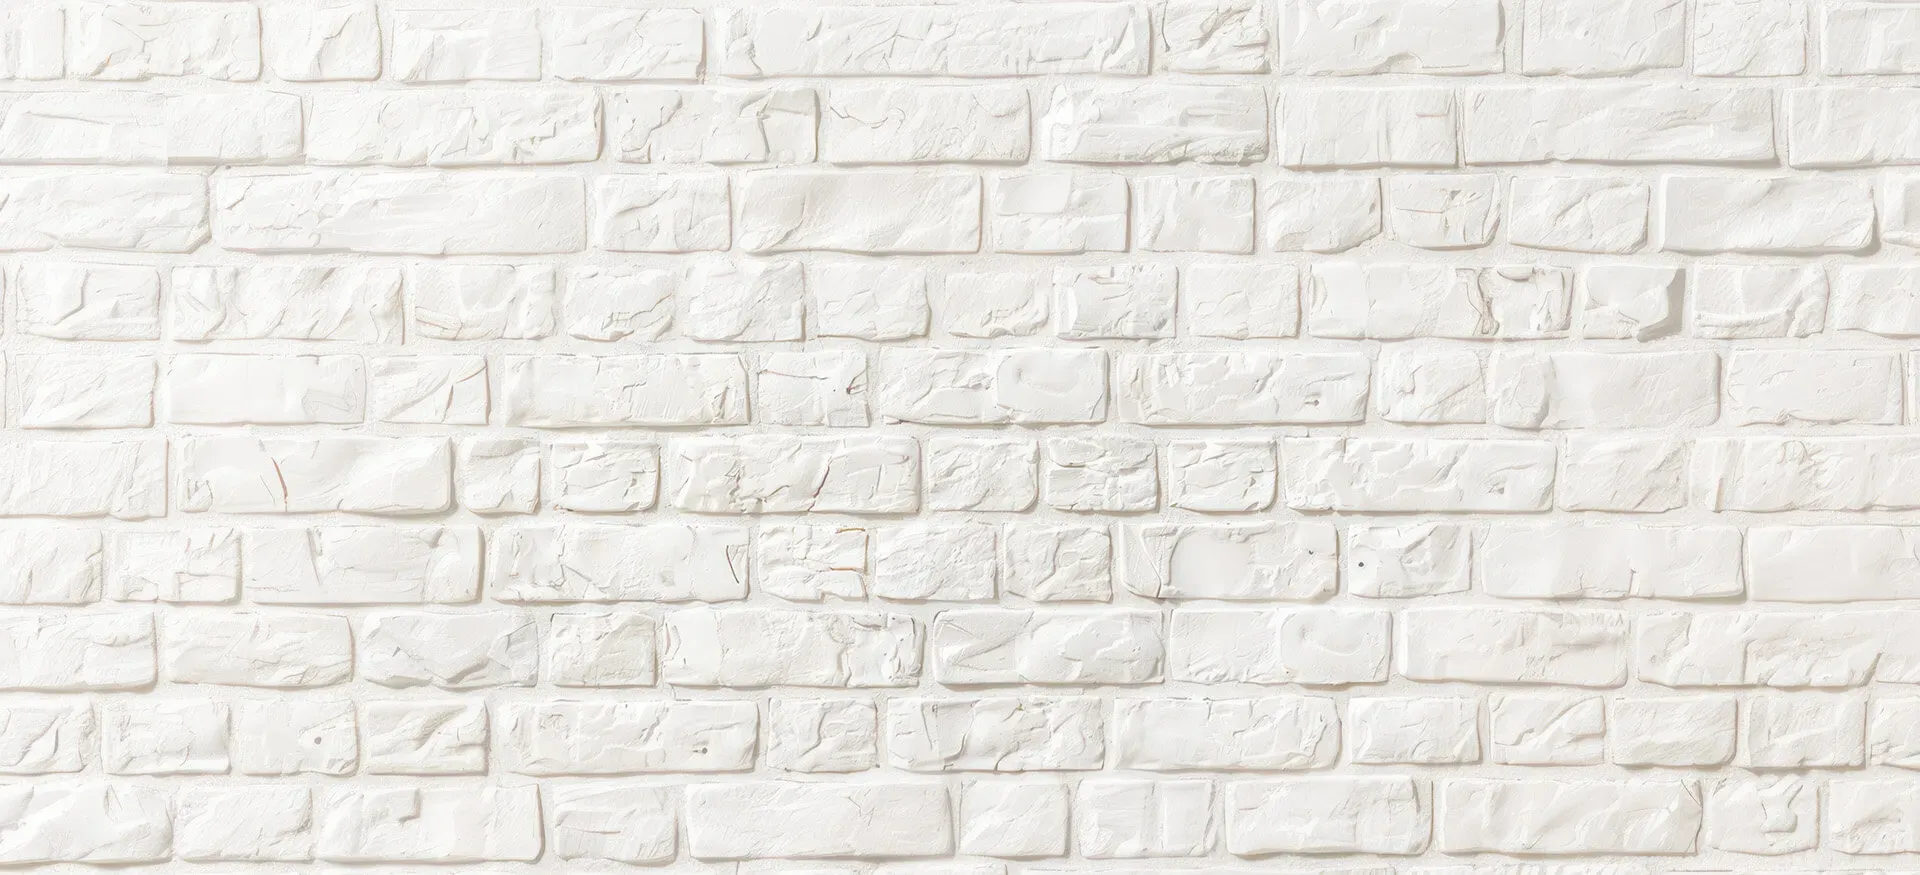
Prompt Builder (PRO version) overview
How to start using the PRO version
You should make a copy of the Prompt Builder and work in your copy further on, just like with the basic version.
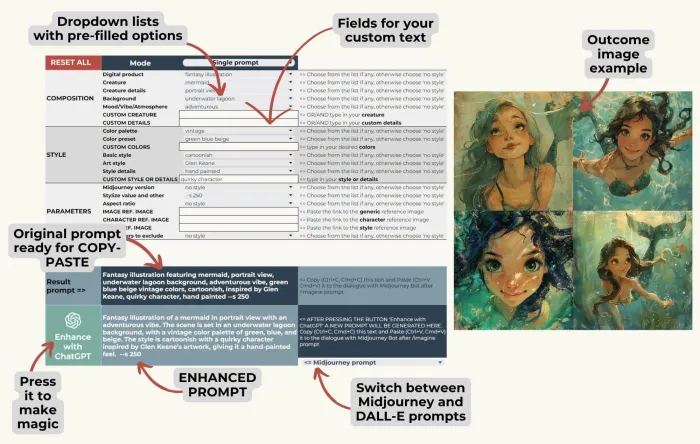
Go to File -> Create a copy, change the name if you need, and then press Make a copy. When you make a copy of a PRO version, you will have a small icon with an exclamation point. This is a warning that this file uses a script, which is necessary when you add features beyond the basic Google Sheets functionality.
The PRO features that use the script are:
- “ChatGPT” button
- “Reset all” button
- “Save prompt” button
- Bulk prompting and Multiple selection modes
- Presets

Script use warning
We may add some new ones in future, keep your eye on our latest updates and what we’re working on to get free updates of your products in time. In your copy, once you use one of these PRO buttons/functions for the first time, Google will ask for authorization. All our scripts are in the process of getting approval by Google, and even when it’s done you still will have to authorize them following the steps shown below.
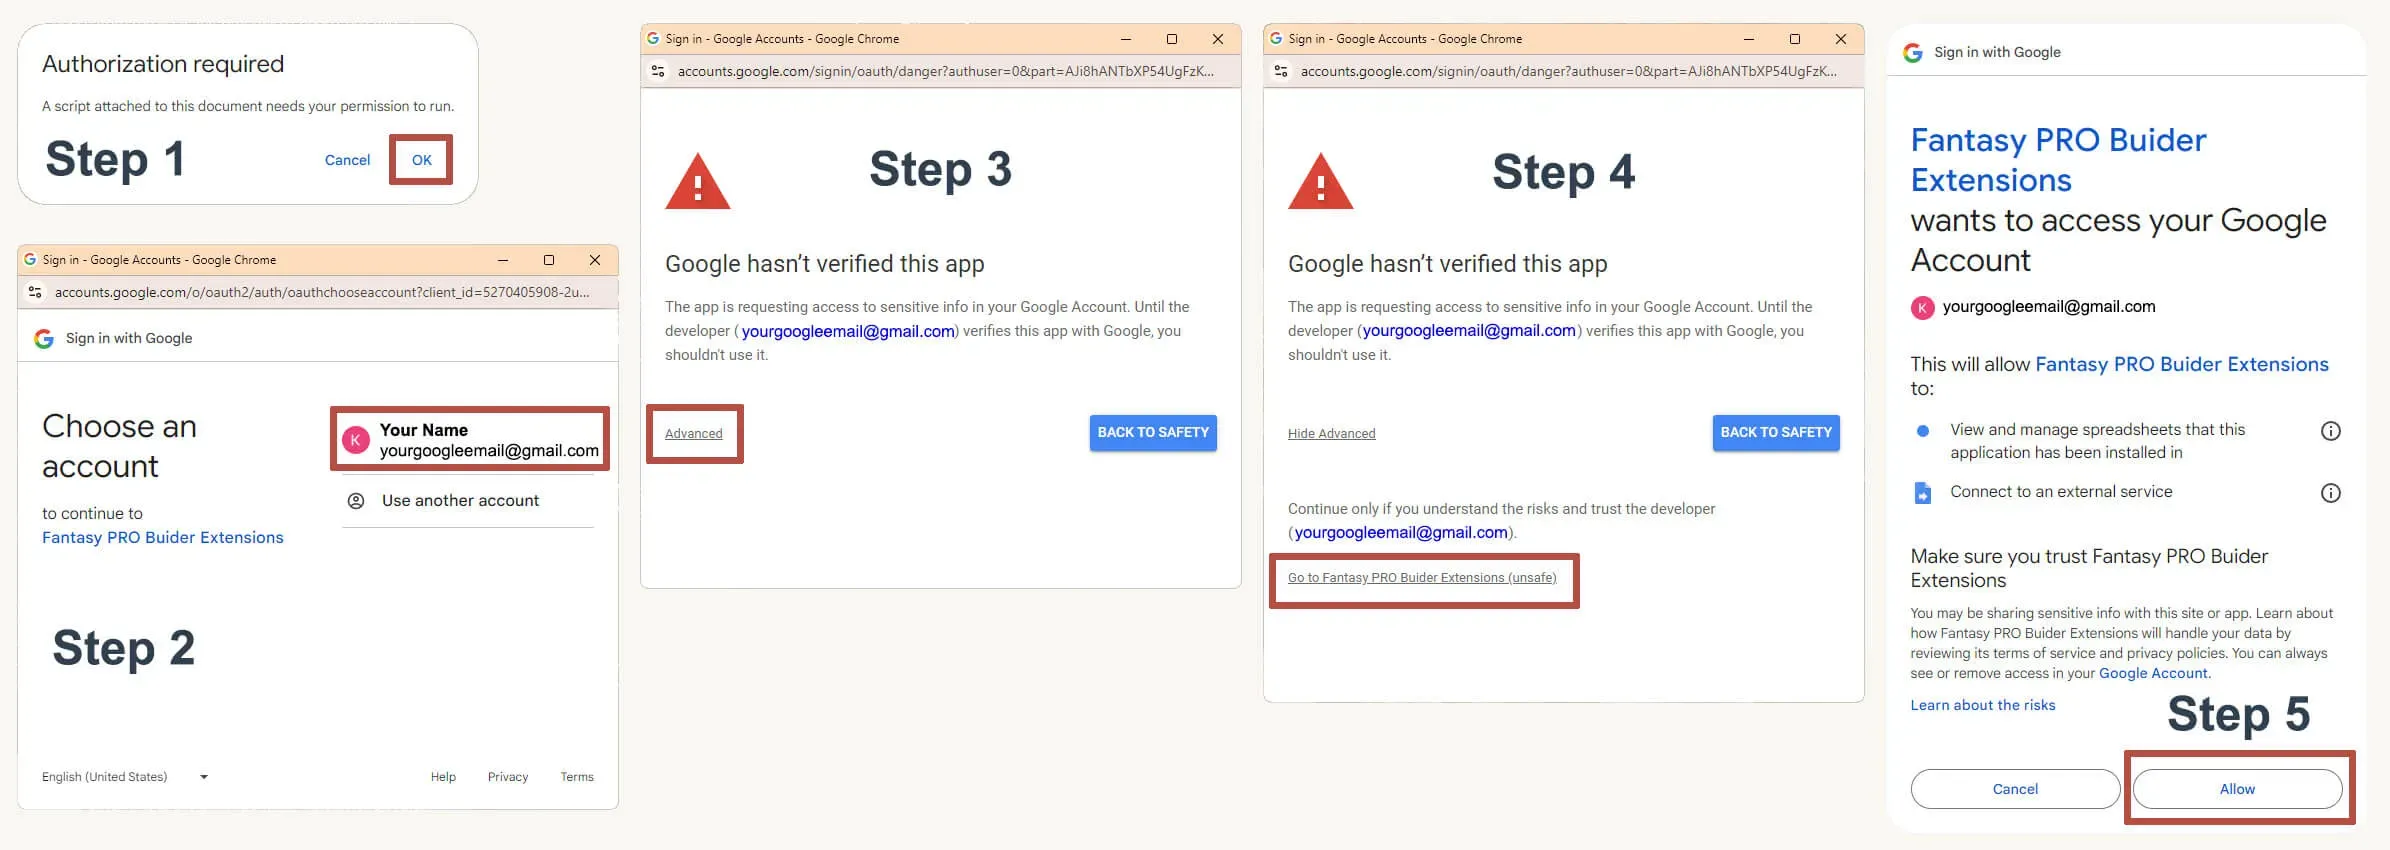
Authorization steps

Please note that the scripts will affect only the Prompt Builder Google sheet files, nothing else on your computer and browser. After you authorize the scripts you can use all the PRO buttons/features with no limitations, and Google will not ask you for any other permissions for this file.
If you encounter any issues with the Prompt Builder, create a new copy from the original file - this often resolves most problems. Regularly making a new copy also ensures you have the latest version. Learn more about versions here.
If the issue persists, please contact us on Etsy or via Instagram DM. We’re always here to help and appreciate your suggestions as we continually strive to improve our products.
Now let’s explore the PRO features.
FEATURE 1: Presets
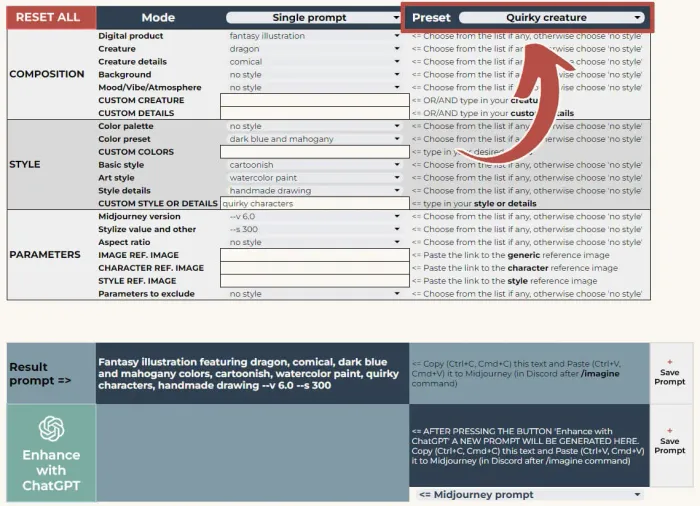
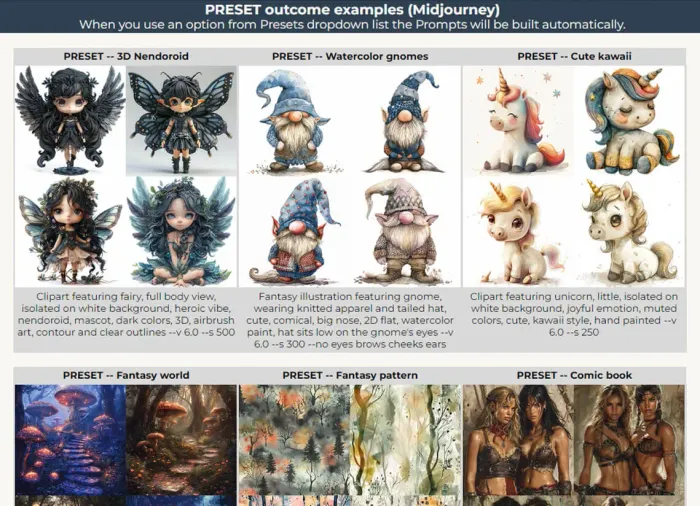
Presets dropdown list is located at the top. If you’re new to the Prompt Builders this is a perfect starting point. Pick something from here and see the builder setup for this particular task. You can preview the results in the Visual examples sheet. This feature is aiming to demonstrate the workflow with the builder, and also provide some ready decisions for good looking outcomes.
Don’t limit yourself to the prefilled options only. If you like the style of the preset outcome, feel free to change the object, colors, and so on. Be aware that when you use a preset, all previous selections will be cleared. You can undo this action by pressing Ctrl + Z (or Cmd + Z on Mac).
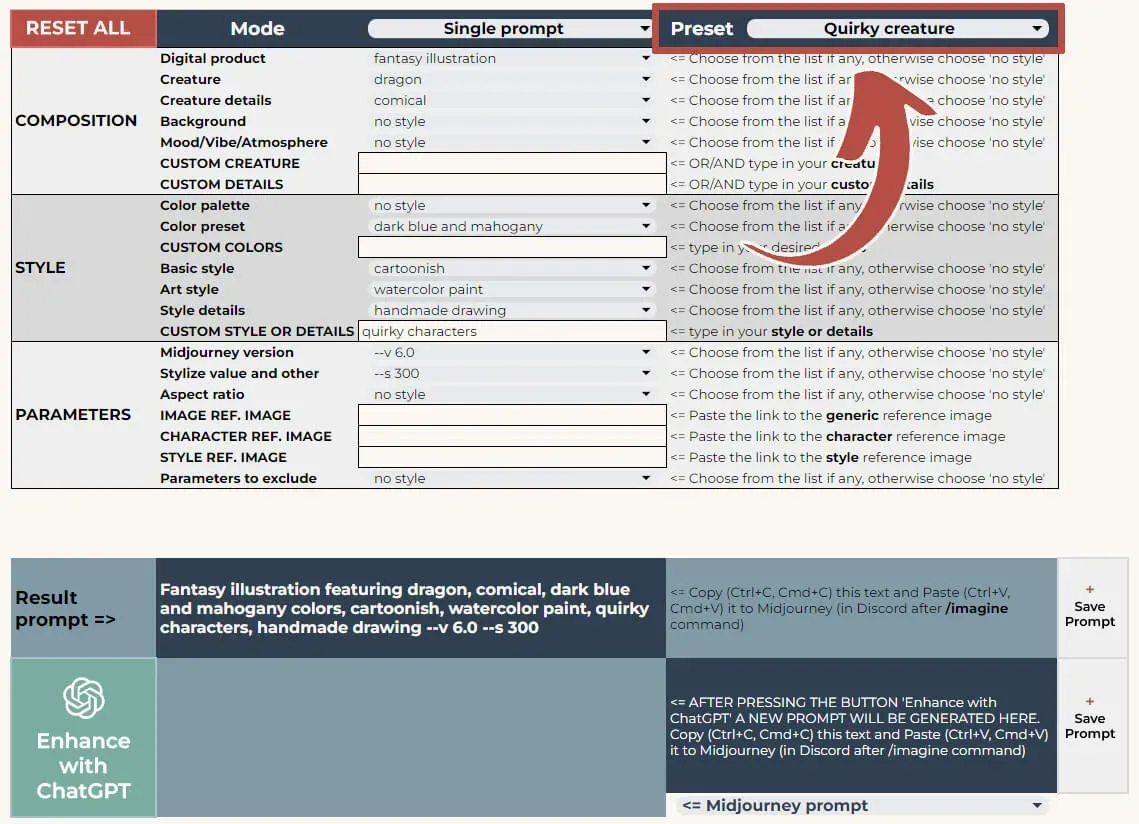
Preset dropdown list is located here
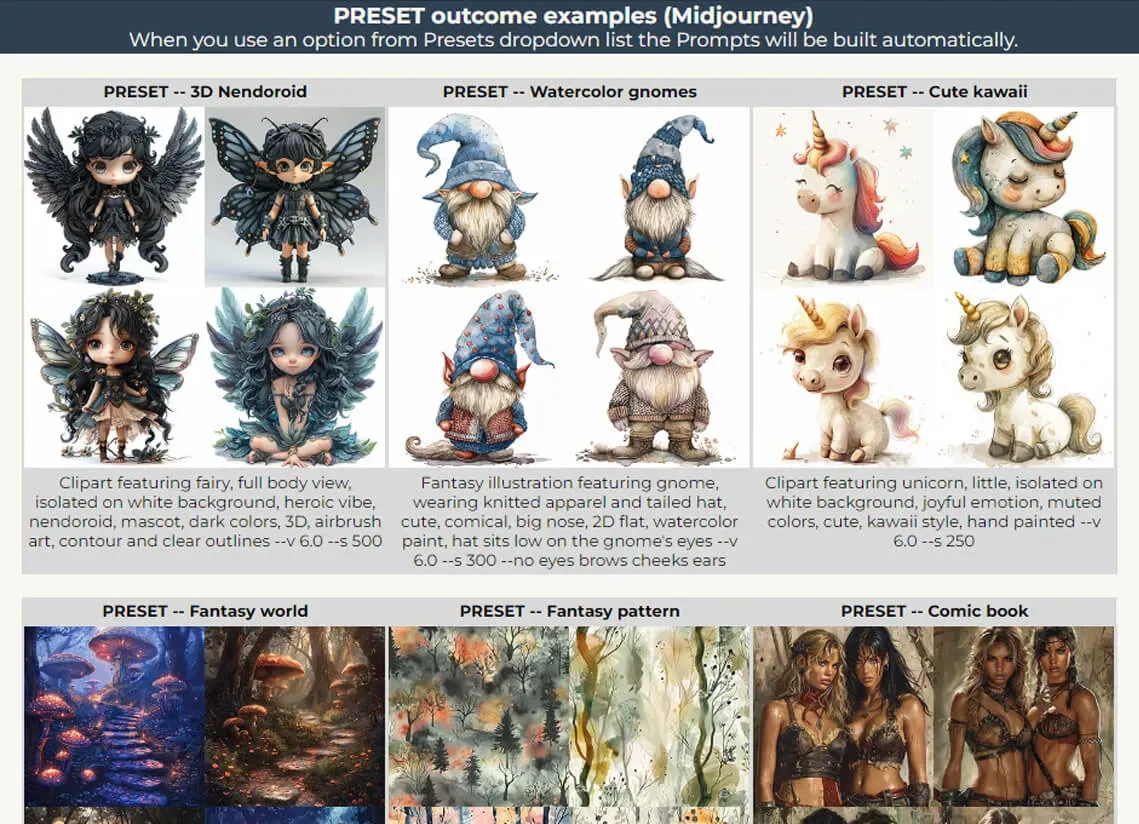
Presets outcomes in Visual examples sheet
FEATURE 2: Custom options
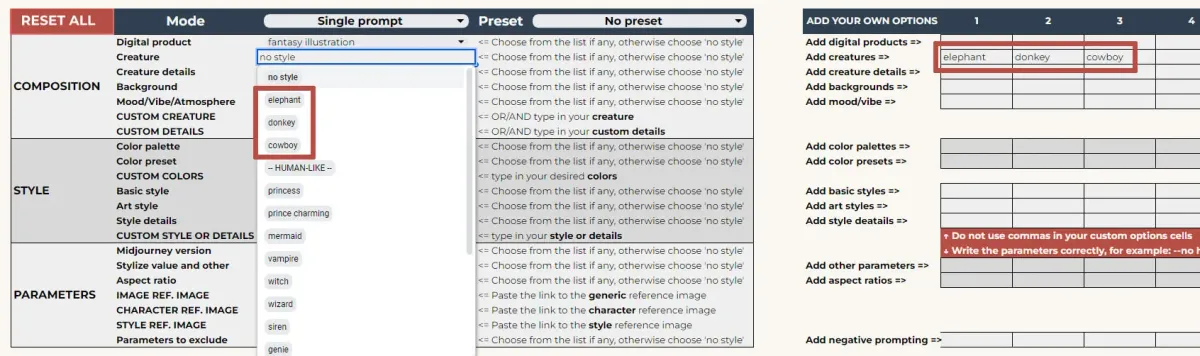
On the right from the Builder area, you will find a table for your custom options. Each line relates to a certain dropdown list according to the name of the line. You have 10 cells for 10 custom options for each dropdown list. Just write something down in these cells, and your options will immediately appear at the beginning of the corresponding dropdown list.
As you can see, this Custom Options Table is designed to make your Prompt Builder fully customizable and personalized. A great example of using this feature is creating a clipart collection with your own custom objects.
Some recommendations:
- Avoid using pure numerical values or commas in these cells.
- If you delete the currently selected option, the Result Prompt will display N/A as it won't be able to find the option in the list.
- Pressing the Reset All button will not clear the custom options in this area.
- You can undo your latest action by pressing Ctrl + Z (or Cmd + Z on Mac).
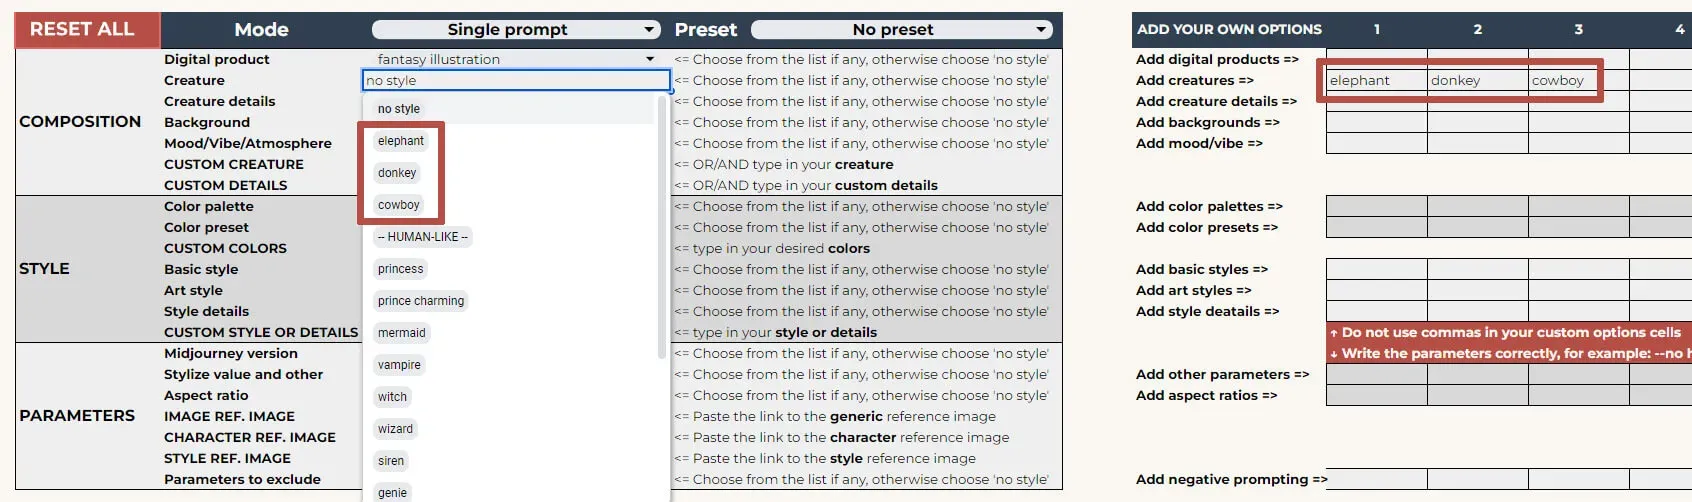
Where to find and how to use Custom options
FEATURE 3: “Enhance with ChatGPT” button
Right under the Result prompt you may find a magic button Enhance with ChatGPT. You can use it when the Result prompt field is not empty. Press the button and wait for a couple of seconds for the script to do its job. Please don’t click it once again until the script is done.
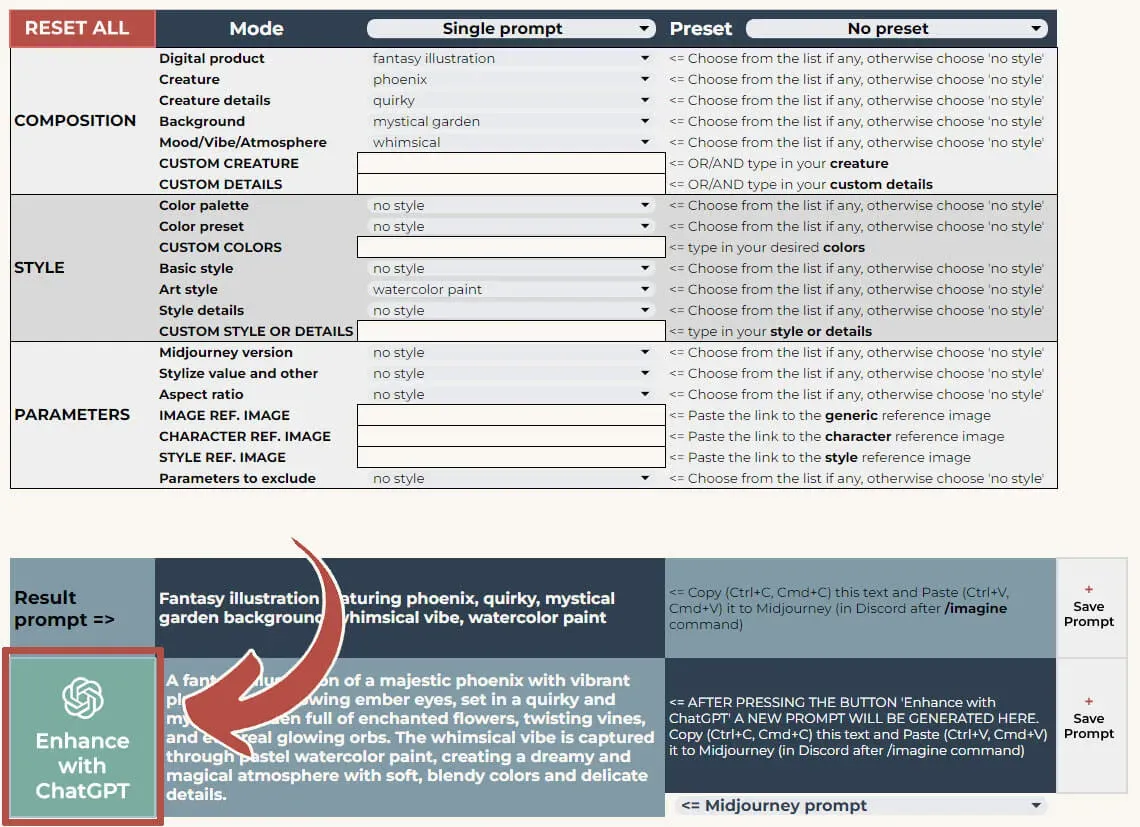
“Enhance with ChatGPT” button is right here
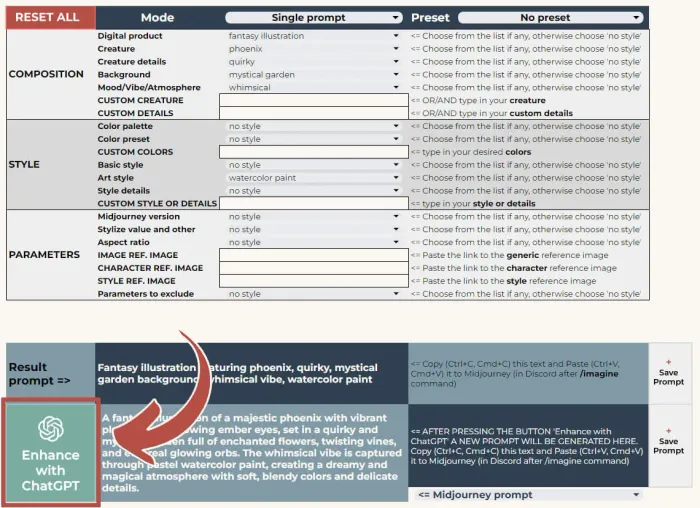
The script will create a variation of the original prompt, adding details and improvements from ChatGPT. The fewer details you provide in the original prompt, the more creativity ChatGPT will apply to the enhanced prompt. After crafting the first enhanced prompt you can use it as is, or press the button again to get another prompt. Here’s how you get an unlimited source of prompts, and your initial idea may have lots of outcome approaches. By the way, that's a great tool if you make prompts for sale.
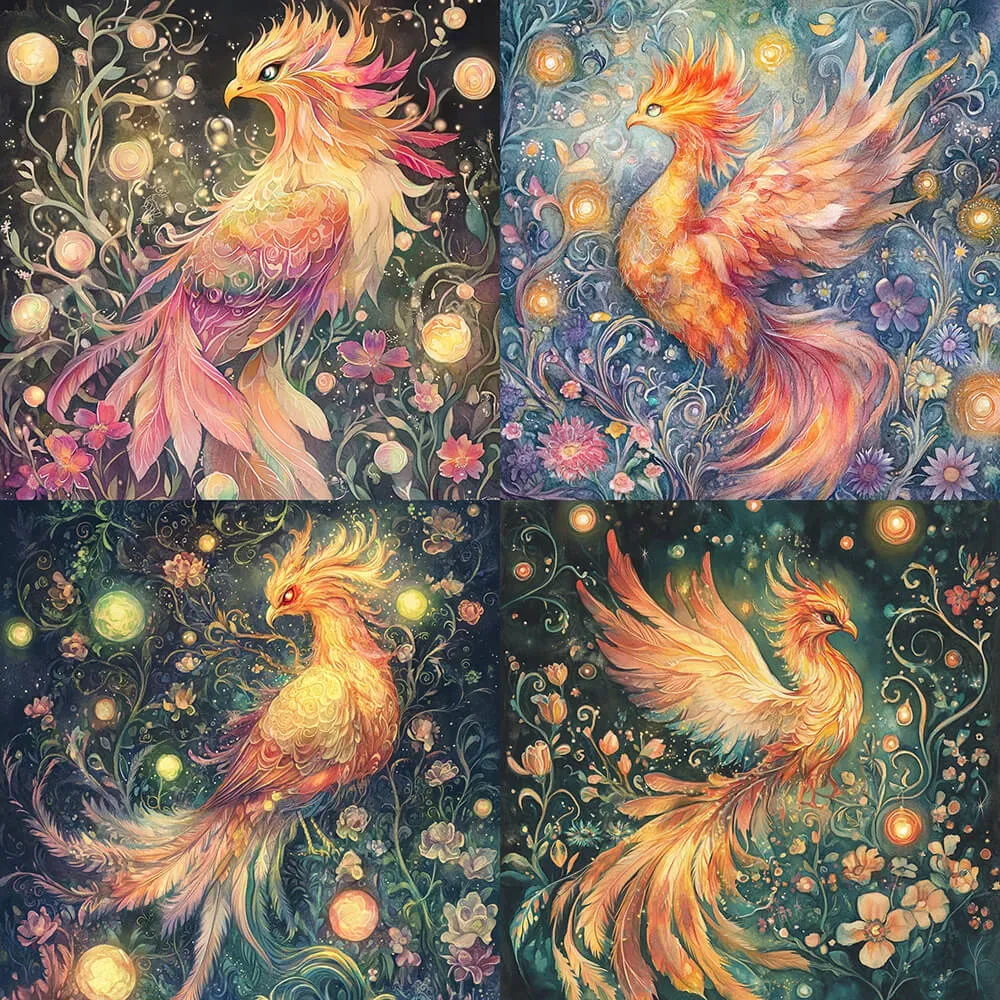
Midjourney outcome

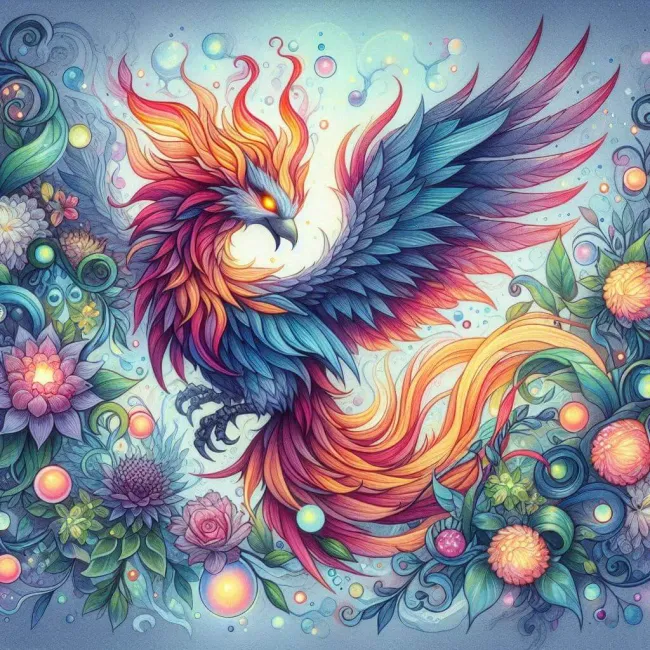
DALL-E outcome

Leonardo outcome


Use the dropdown list in the bottom right to switch the prompt version from Midjourney to other text-to-image AI generators, and vice versa. Yes, you can utilize the enhanced prompts not only in Midjourney - these prompts are more suitable for DALL-E or Leonardo than the original ones.
However, please keep in mind that other text-to-image AI generators were trained on different datasets, so their results will not be similar to those produced by Midjourney.
FEATURE 4: Bulk prompting
Bulk prompting allows you to use a single prompt to generate up to 40 jobs, making it perfect for:
- Quick mass testing (e.g., experimenting with different styles or colors for one object).
- Producing an entire clipart collection (e.g., varying objects while maintaining the same style and color palette).
Now, let's explore this feature in detail.
Permutation prompts
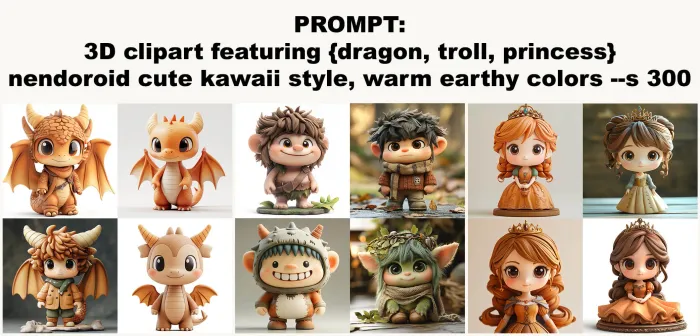
Typically, when you write a prompt, Midjourney runs one job and generates a grid of four images. However, by using permutation prompts, you can create up to 40 jobs (variations) from a single prompt. To do this manually, place terms of the same category within curly braces, separated by commas. Avoid using extra commas within each term. If you’re using the Prompt Builder, it handles the formatting for you, so no need to worry. Here’s an example: 3D clipart featuring {dragon, troll, princess} nendoroid cute kawaii style, warm earthy colors --s 300

Permutation prompt example with outcomes
Bulk prompting in the Prompt Builder PRO
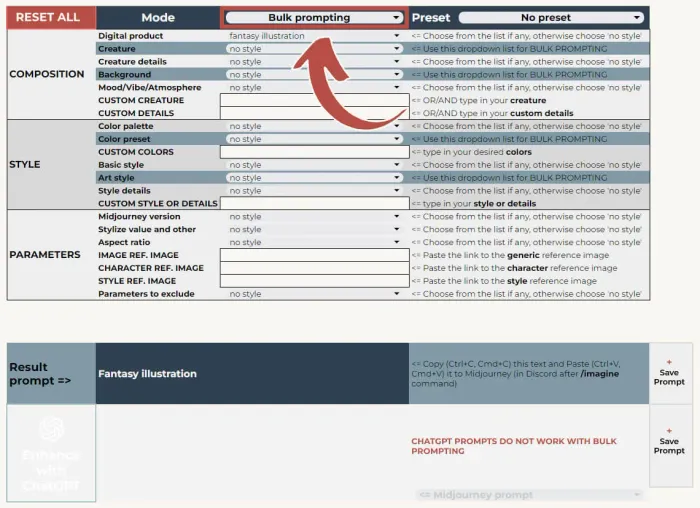
In our PRO versions, we use permutation prompts for Bulk prompting. To enable Bulk prompting mode, select it from the Mode dropdown list. You'll see that highlighted dropdown lists become available for Bulk prompting, allowing you to pick multiple terms.
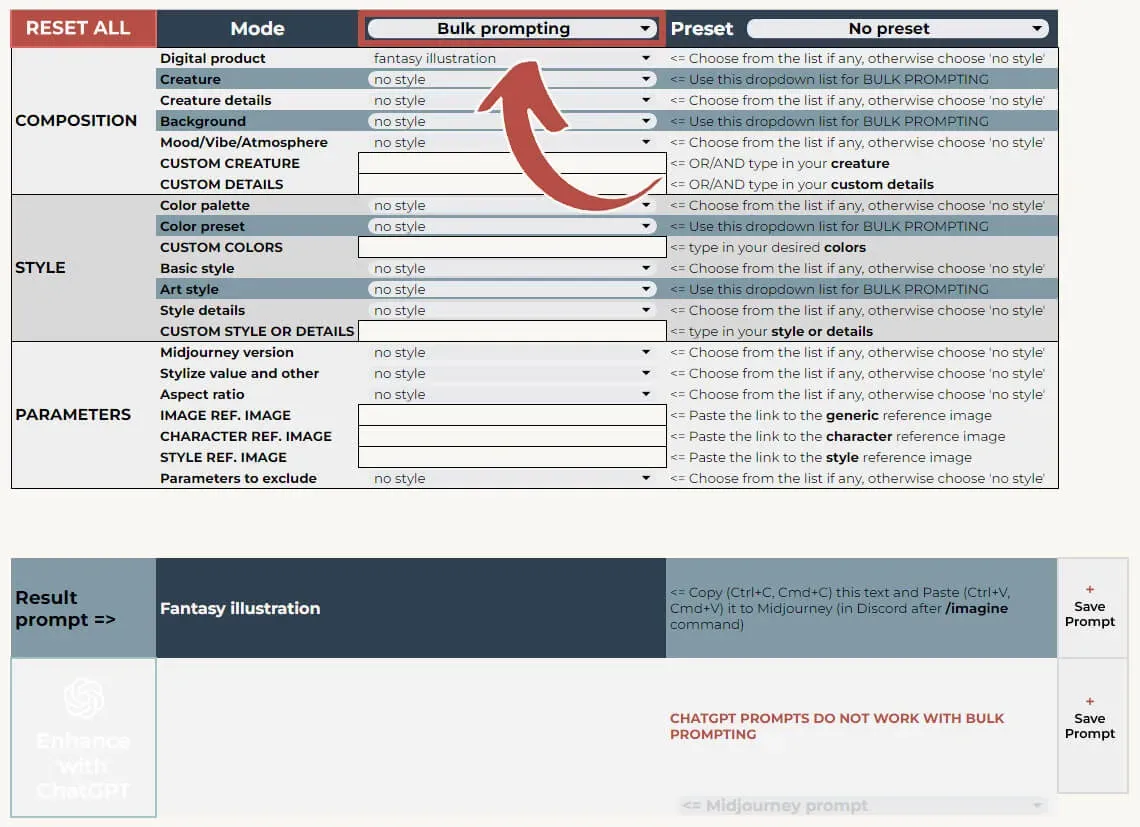
Pick "BULK prompting" from the Mode dropdown list
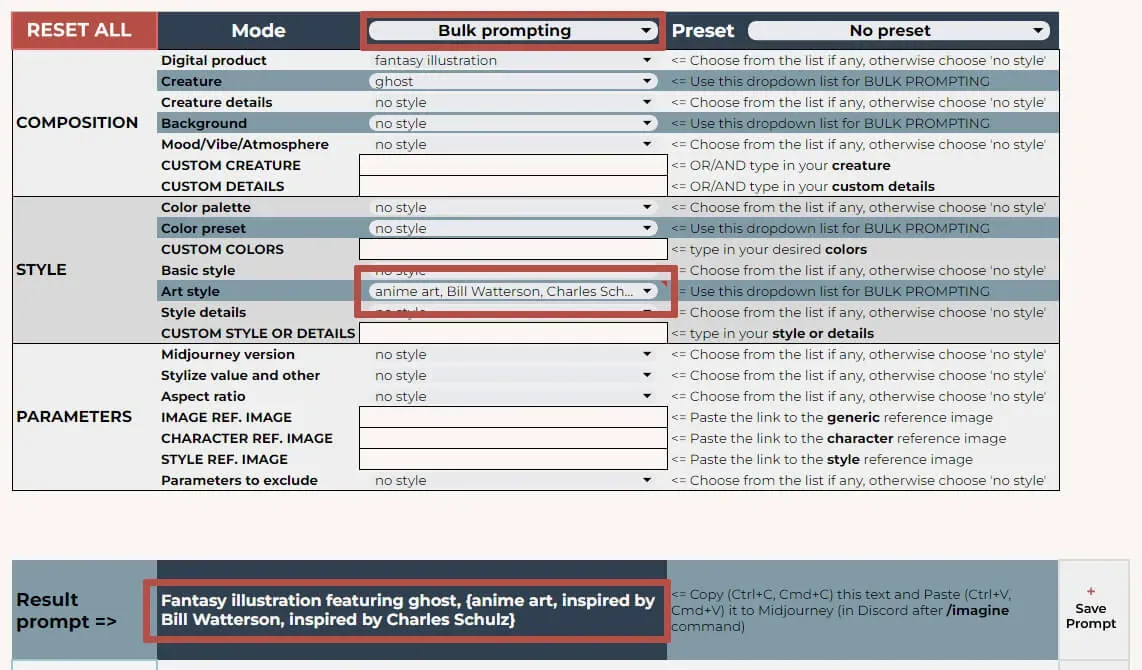
When you start selecting, wait a few seconds for the script to process each new term. Check the Result prompt field to see how your prompt is shaping up.
After copying the prompt and pasting it into Midjourney, the system will ask if you want to run multiple jobs. Select “Yes.” Once completed, you’ll see multiple image grids as outcomes. This is how Bulk prompting works in a nutshell.
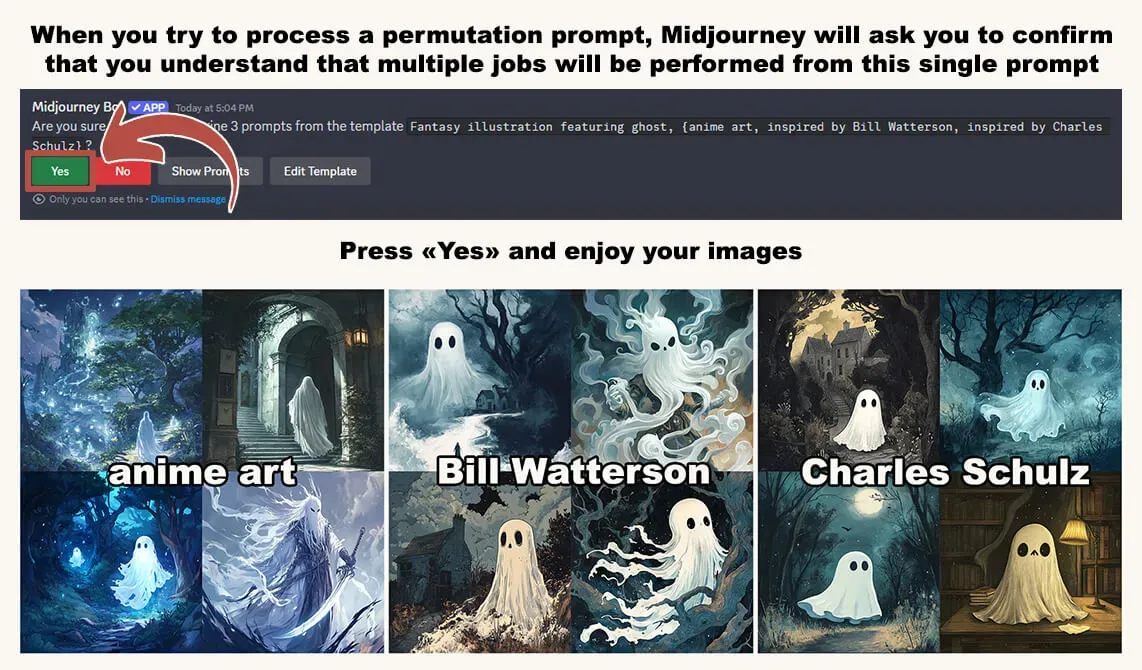
Swipe to view more
Each job uses the same GPU time as running these prompts individually. So, Bulk prompting saves your time, not Midjourney's.
Limitations and calculations
Permutation prompts are subject to quantity limits based on your subscription plan. You can find exact details on the official Midjourney website.

Permutation prompting limitations
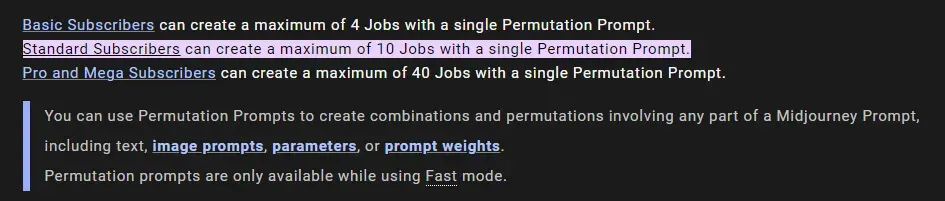
If you exceed the limit, Midjourney will display "Too many prompts" and won’t execute any jobs.
Using the Prompt Builder with these limits
- Single Dropdown List: If you're using Bulk prompting with one dropdown list, the math is simple: you can select up to 4 options with a Basic Midjourney subscription, up 10 with Standard, and up to 40 with Mega or PRO.
- Multiple Dropdown Lists: If you're using multiple dropdown lists, multiply the number of options from each list to check if you meet the limit. For example, choosing 3 objects, 2 colors, and 2 styles results in 3 x 2 x 2 = 12 outcomes. This exceeds the limit for the Basic and Standard plan, so you'd need to reduce your options. For instance, with 2 characters, the math is 2 x 2 x 2 = 8, which works for the Standard plan. If you have the Mega or PRO plan, you can have up to 40 outcomes.
Other instructions
- Enhance with ChatGPT button is not available in Bulk prompting mode at the moment.
- When you’ve picked several terms from the same dropdown list, you might notice a small error sign in the cell where Bulk prompting is used - don't worry, this won't affect the process. This simply means that the new “hybrid” term created by combining selections wasn't found among the predefined options for this dropdown list.
- If you switch to another Mode, all Bulk prompting cells will reset to “no style.” You can undo this with Ctrl+Z (Win) or Cmd+Z (Mac). Afterward, manually switch back to Bulk prompting mode to continue working.
- If you make a mistake picking another bulk promoting option, select no style in the cell and start over. Undo is not available for this action.
FEATURE 5: Multiple selection
The other option in the Mode dropdown list is Multiple Selection. When you activate this mode, it allows you to pick several terms from each of the highlighted dropdown lists. Unlike Bulk prompting, which generates multiple jobs, Multiple Selection produces just one image grid from the prompt. However, it lets you enhance your prompt by incorporating several styles or other details, giving your prompts a whole new level of diversity. Also, you have no limitations on the quantity of selections. Just imagine how creative and varied your results can be!
Multiple selection section: The instructions are almost the same as for Bulk prompting. Enhance with Chat GPT works fine with Multiple selection.
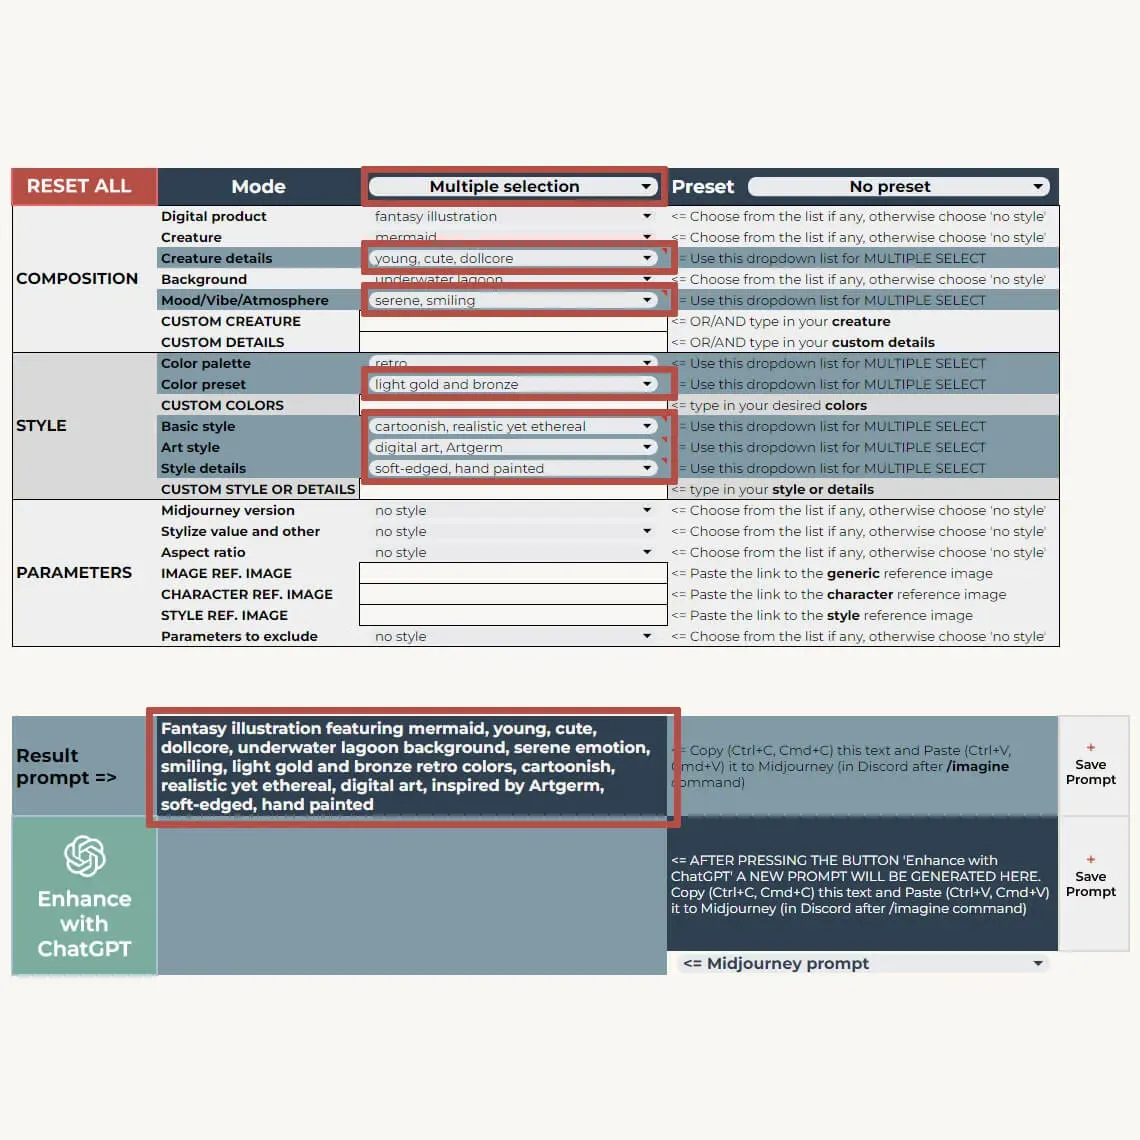
Multiple select Prompt Builder setup

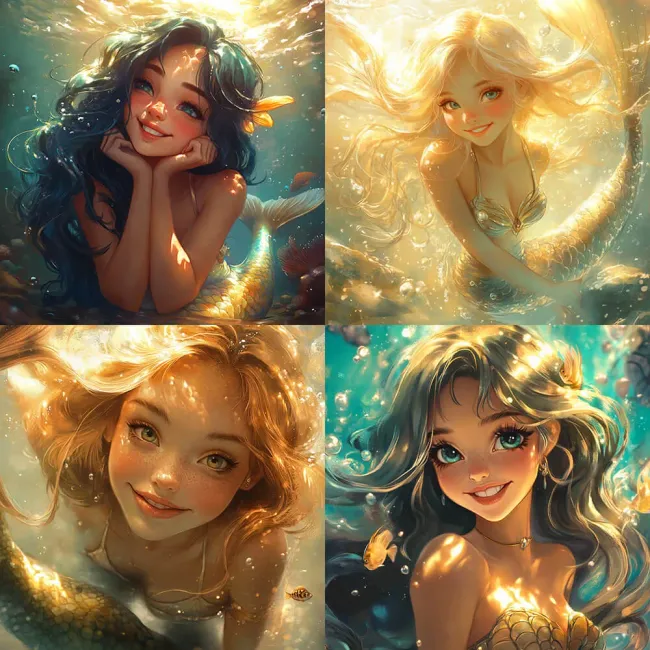
Midjourney outcome image grid

FEATURE 6: “Reset all” button
Reset All button is located at the top of the Builder. Pressing it will clear all selections in the dropdown lists and the custom text fields in the Builder area. The ChatGPT prompt will also be cleared. However, your customoptions on the right side will remain unchanged. You can undo this with Ctrl+Z (Win) or Cmd+Z (Mac).
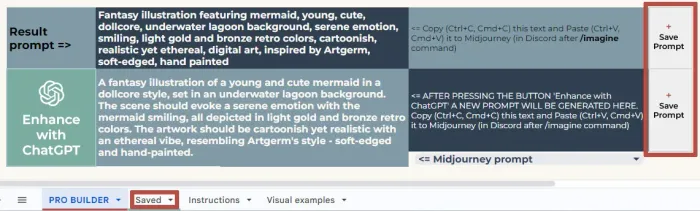
FEATURE 7: “Save prompt” buttons
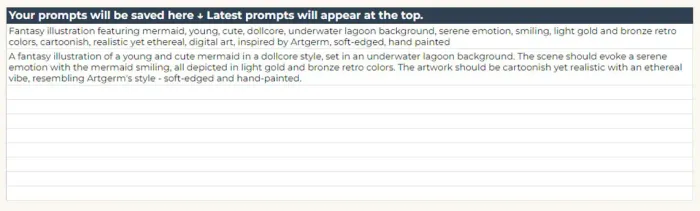
The “Save Prompt” buttons are located to the right of the Result prompt and the Enhanced with ChatGPT prompt. Pressing these buttons saves the corresponding prompt to a separate sheet called “Saved.” Here, you can find all your saved prompts, sorted by the time they were added, with the most recent at the top. When you no longer need certain prompts, you can simply select them and delete them.

“Save Prompt” buttons and “Saved” sheet location
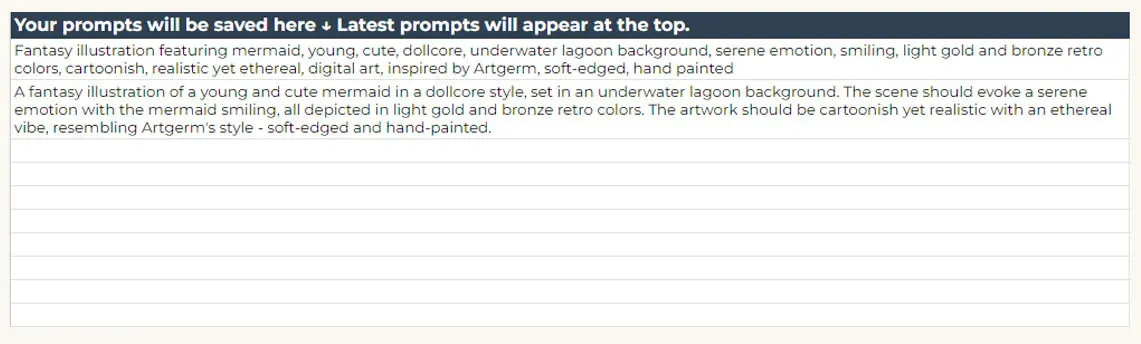
“Saved” sheet content
FEATURE 8: Extended Parameters
All PRO versions include an extended parameters block featuring separate dropdown lists for the Midjourney version, Stylize, and Aspect ratio. Starting from autumn 2024, custom fields for adding your own parameters are also available on the right side of the Builder.

Extended parameters

Additionally, depending on the Builder you've purchased, you’ll have one to three custom text fields: Image reference, Character reference, and Style reference.
- Image reference: This is a link located at the beginning of the prompt, influencing the overall style and character appearance. You can adjust the impact of the reference image using the image weight
--iwparameter in the “Stylize value and other” dropdown list. The default value is 1, with a minimum of 0 and a maximum of 3. - Character reference: Paste a link to your character image to this cell, it will be placed at the end of the prompt after
--crefparameter, allowing for the creation of consistent characters. You can adjust the impact of the reference character using the character weight--cwparameter in the “Stylize value and other” dropdown list. The default value is 100, with a minimum of 0 and a maximum of 100. A weight of 0 focuses Midjourney on the character's face, allowing for experimentation with hair, pose, and clothing. Higher values result in consistent use of the same hairstyle and clothing. - Style reference: Also uses your image link, which will be located at the end of the prompt after
--srefparameter, helping to create a collection of images with a consistent style. You can adjust the impact of the reference style using the style weight--swparameter in the “Stylize value and other” dropdown list. The default value is 100, with a minimum of 0 and a maximum of 1000. You can also type "random" in this text field in the Prompt Builder, allowing Midjourney to pick a random style and share its code when the job is completed.
Other Tips
- You cannot generate a job from a prompt that only contains a reference link; some text must be added to the prompt body.
- To copy a reference link:
- On the Midjourney website, drag and drop the image into the prompt text field in Explore mode. Hover over the image to choose whether to use it as an Image, Character, or Style reference. If you’re using Midjourney website you can skip adding links in the Prompt Builder.
- In Discord, right-click on the image and select “Copy link.” If using a non-Midjourney image, first drag and drop it into Discord.
- The best reference images are those created within Midjourney.
- You can use multiple reference images by dragging them to the prompt field on the Midjourney website or pasting links in Discord. For example:
--cref url1 url2 url3
FEATURE 9: More dropdown lists and options
All PRO versions come with additional dropdown lists compared to the basic Prompt Builders, enabling deeper customization of styles, colors, and object details. Additionally, some PRO Builders offer more options within specific dropdown lists. For instance, the Patterns PRO includes both Floral and Festive Pattern Prompt Builders, providing access to all the objects from both basic Builders.
CONCLUSION
That's all you need to know to start working with the PRO version of the Prompt Builder. Explore the full range of our Prompt Builders by pressing the button below.
As a reminder, if the builder isn't working as expected, please create a new copy from the original - this resolves 90% of potential technical issues. Additionally, creating a new copy periodically ensures you have the latest version of the builder, as we regularly make minor or significant updates to keep our products up to date.