Welcome, digital artists!
In this guide, we’ll explore all character consistency approaches and nuances that Midjourney offers today. This AI is still the best on the market for creating detailed and well-drawn character concepts and illustrations. But what it can offer in terms of consistency we’ll learn in this guide. You can also watch the video version if you prefer this format:
Video guide “HOW TO Use Midjourney for Consistent Character Creation - Complete Guide with Examples”
Character Creation Basics
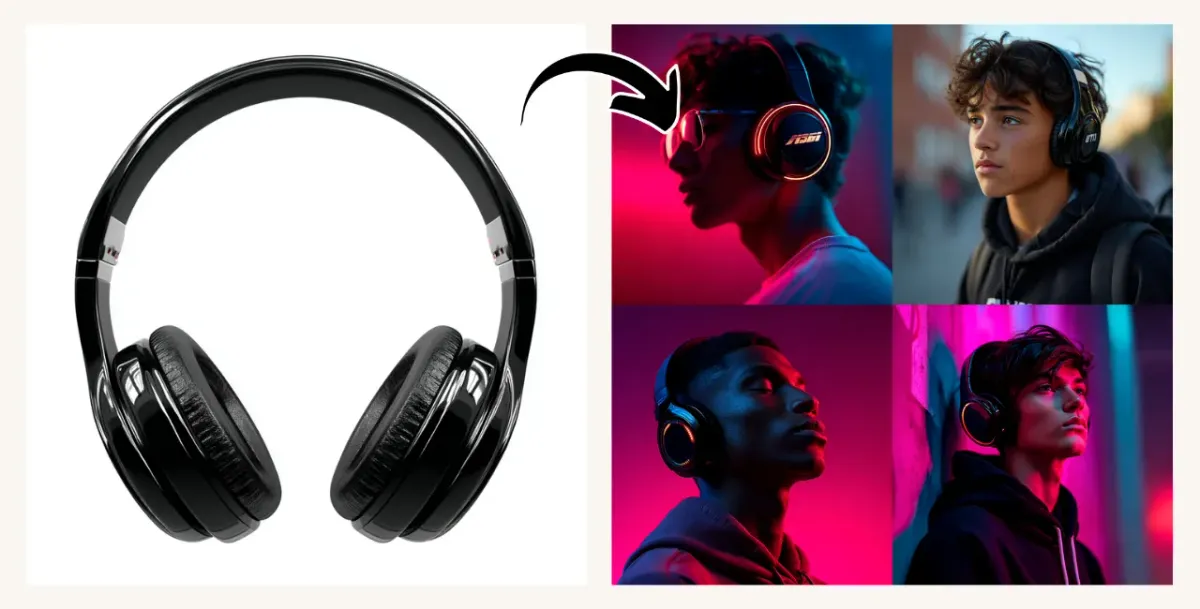
Omni reference (--oref parameter) is responsible for character consistency in Midjourney. It works for people, animals, vehicles, and other objects. Here are some examples:

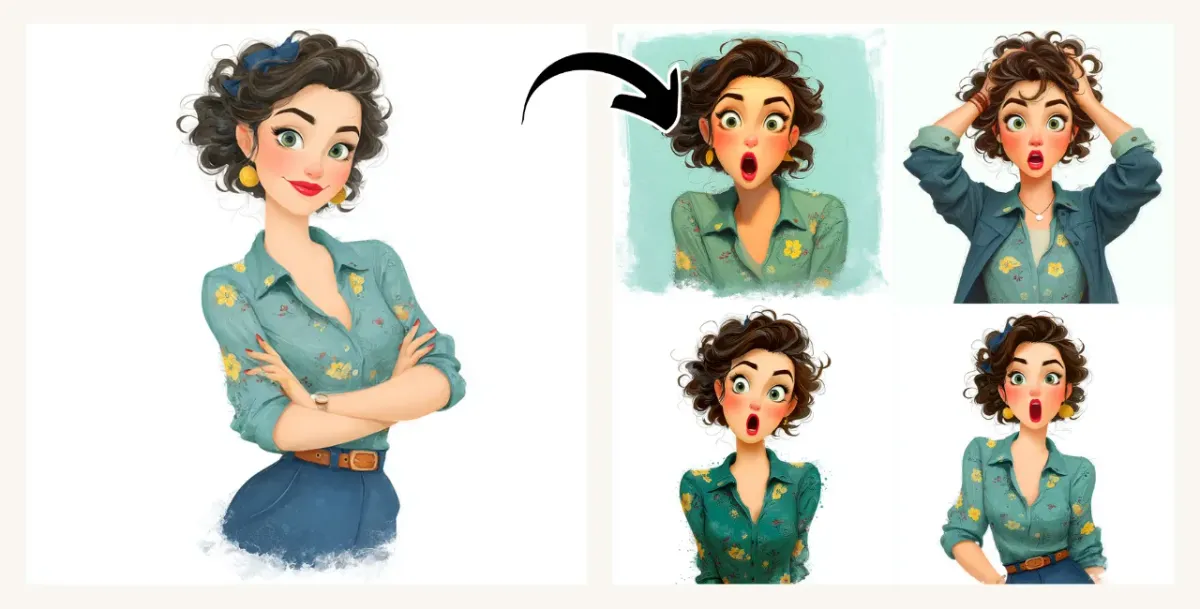
Prompt: A young lady with green eyes and short curly brown hair, surprised emotion --v 7.0
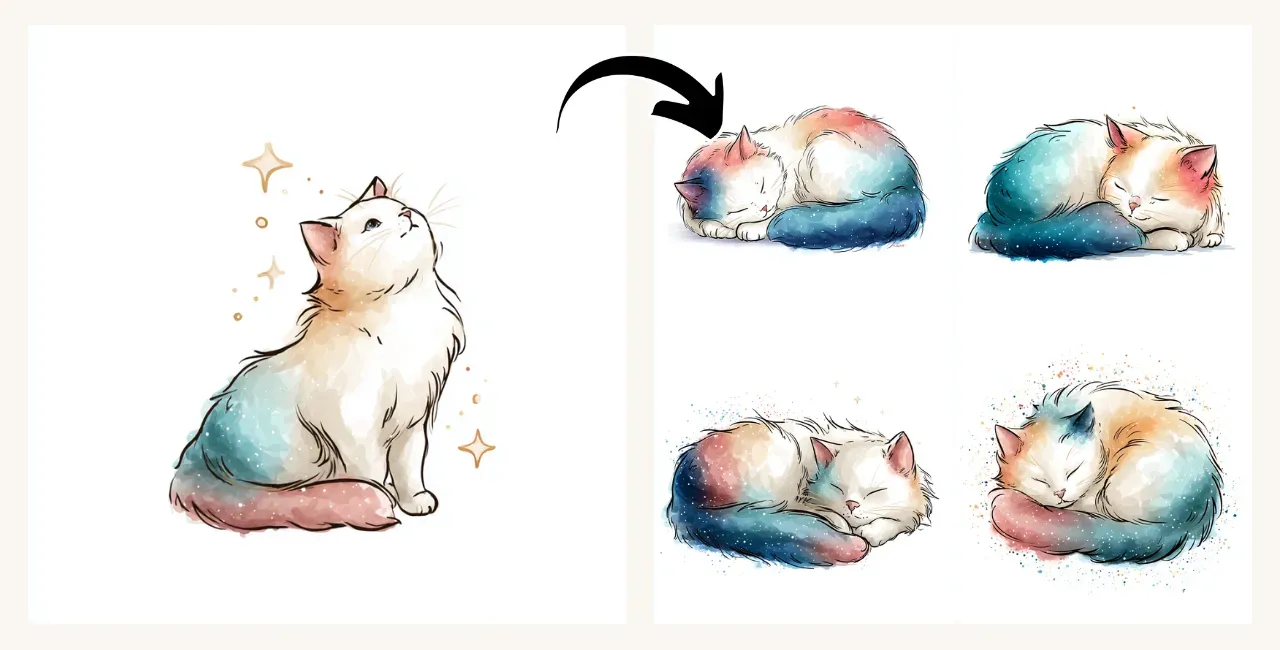
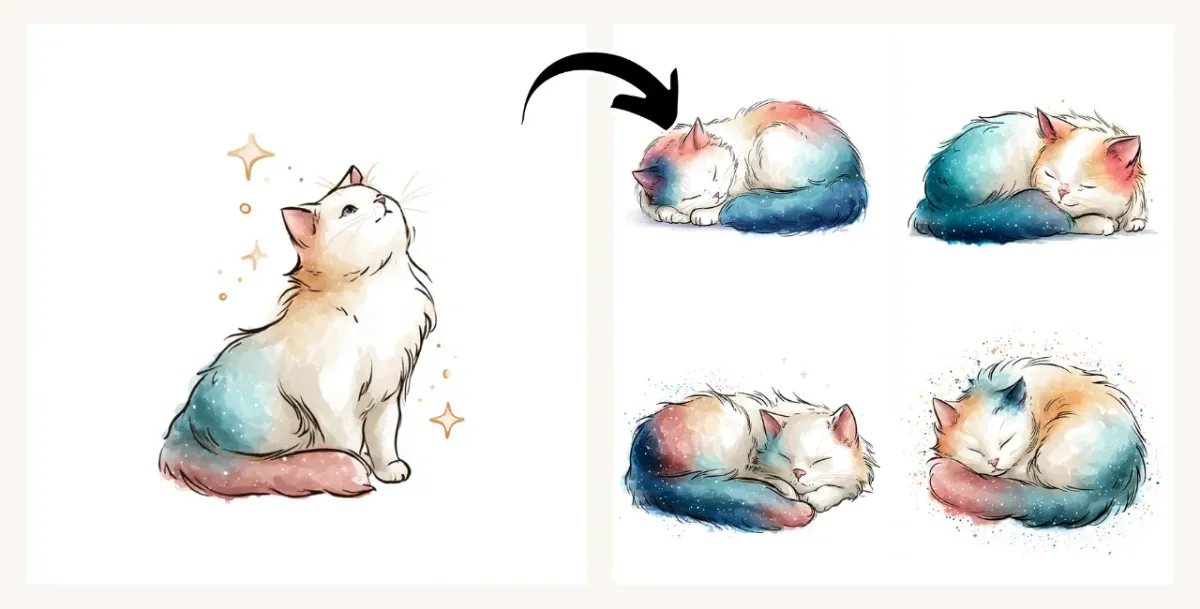
Prompt: A cute cat curled up and sleeping --v 7.0

Prompt: Photo of a teenage boy wearing headphones --v 7.0
You Can Add an Omni Reference to Your Prompt:
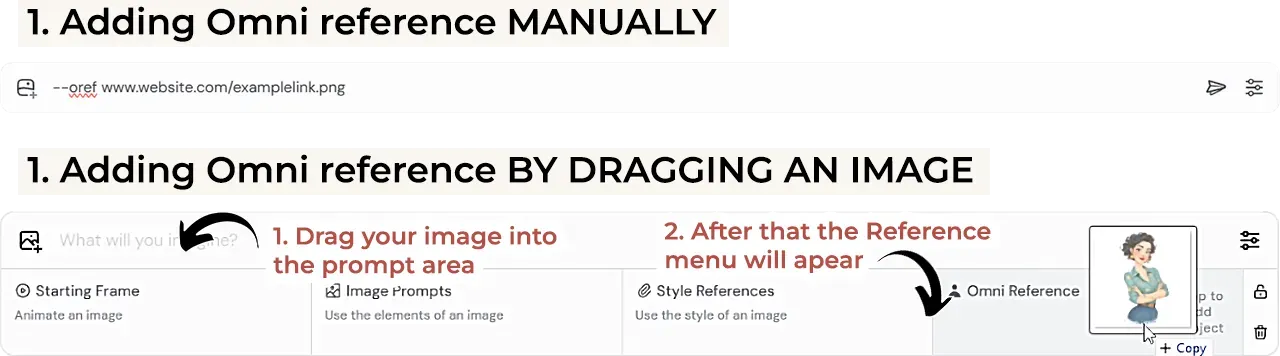
- Manually, by typing this parameter in the prompt field followed by a link to an image on the web (e.g.
--orefhttps://example.com/1_Leonardo_image.png). As soon as you insert the link, the omni parameter will disappear, and the image will be added to the Omni reference block under the prompt area. On Discord, you can use only the manual way. If your image is not online yet, drag it to your Midjourney Discord server and send it, then you can copy the image link. On Discord the--orefparameter data will not disappear. - By dragging an image from your local device, or your, or other people’s Midjourney creations. As soon as you drag the image to the prompt area, the Reference menu below it will appear, allowing you to put your image in the Omni block.
Adding Omni Reference
How to Use the Reference Menu:
- If you accidentally placed the image in the wrong block, just drag it to the correct one.
- You can delete the image using the trash bin icon on the right of the menu block, or the cross icon in the top right corner of the image.
- By default, the image will be used just once in your next prompt, but if you want to use it multiple times, click on the Lock icon on the right - this will attach the omni reference to all the following prompts until you unlock it.

Reference Menu

Only 1 Image Limitation
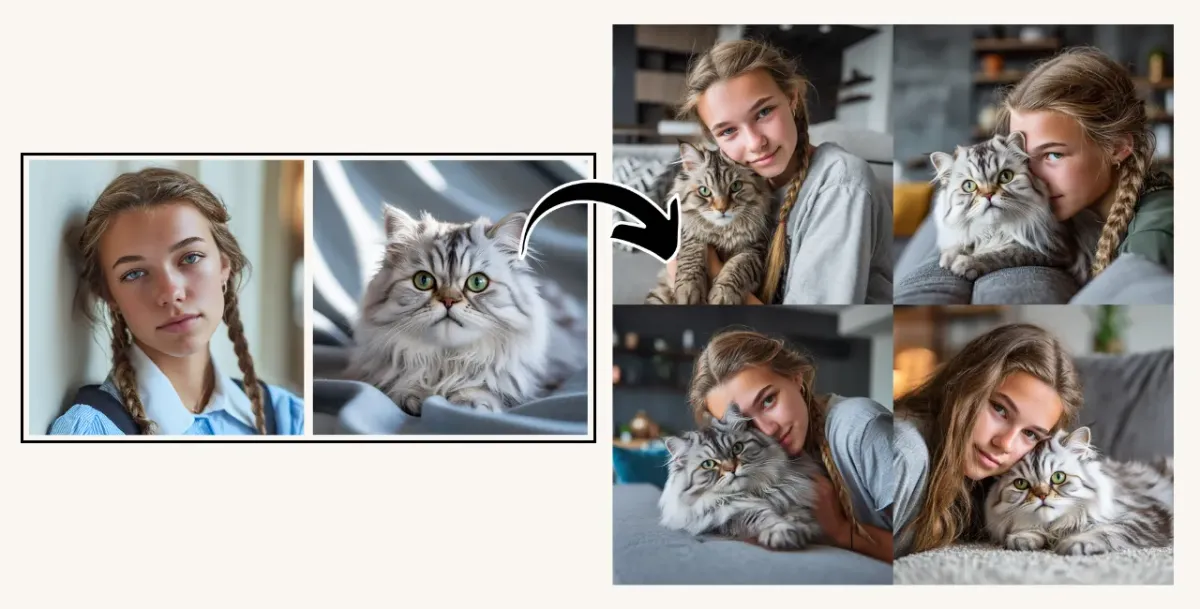
Omni reference allows using only one image, but you can make a collage of images as a single file if you want to provide a better character reference (with multiple images of your character in different poses or expressions), or if you want to combine objects (for example, the girl from one image wearing a dress from another).

Prompt: Photo of the girl hugging the cat sitting on the sofa in a modern living room --v 7.0
Omni Weight (--ow parameter)
Omni weight is the parameter responsible for the omni reference image’s influence on the outcome. It ranges from 0 to 1000, with the default value being 100. With the default value, the character in the new image will most likely have the same clothing, hair, and overall artistic style. With omni weight below 100, you can change various attributes, while the character itself will likely remain very similar. If you increase it above 100, the character will be even more fixed on similarity to the original, which is rarely useful.
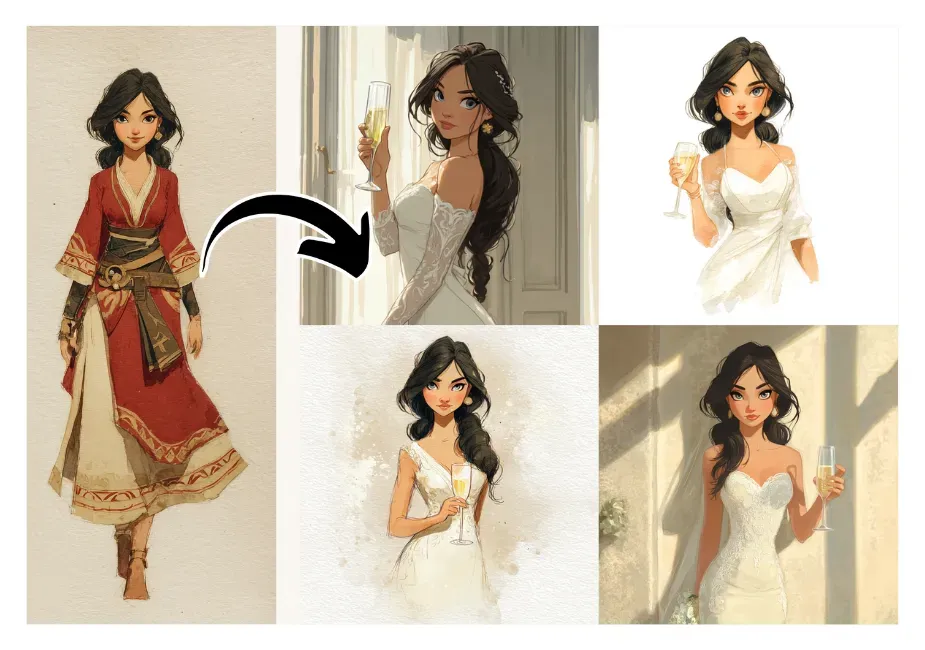
Prompt: a woman with grey eyes and long dark hair wearing is a white wedding gown and holding a champagne glass in her hand --ow 50 --v 7.0

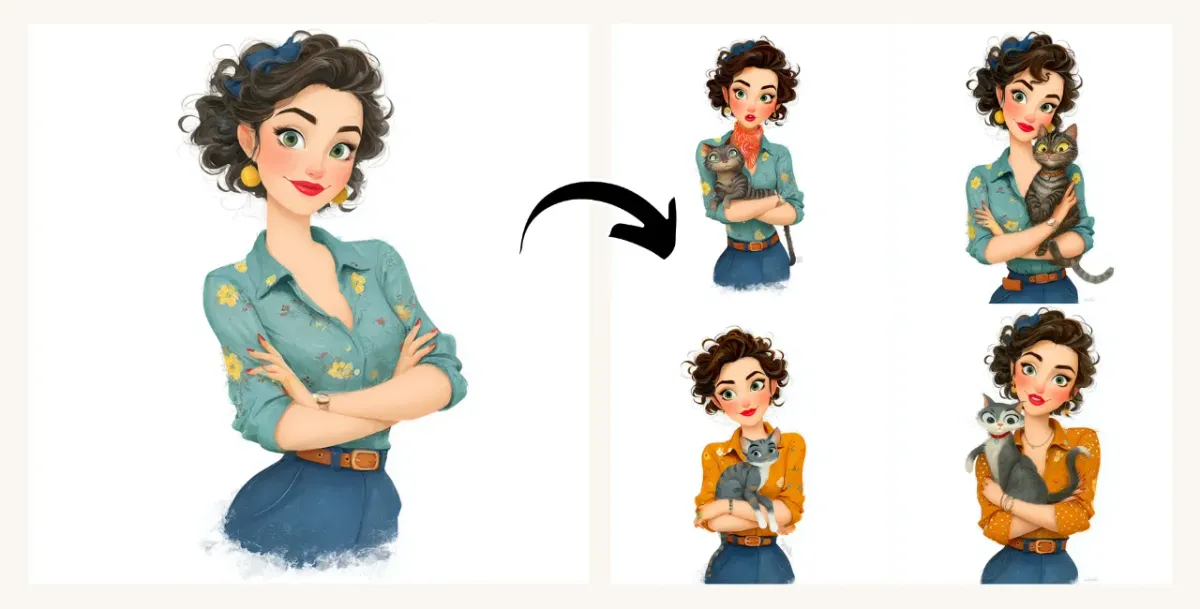
Prompt: a cute french girl with green eyes and curly short brown hair holding a cat --ow 500 --v 7.0

Another interesting use case for omni weight is changing the style of the image from photo to illustration and vice versa. Again, you can achieve this with lower values of omni weight. Here are some examples:

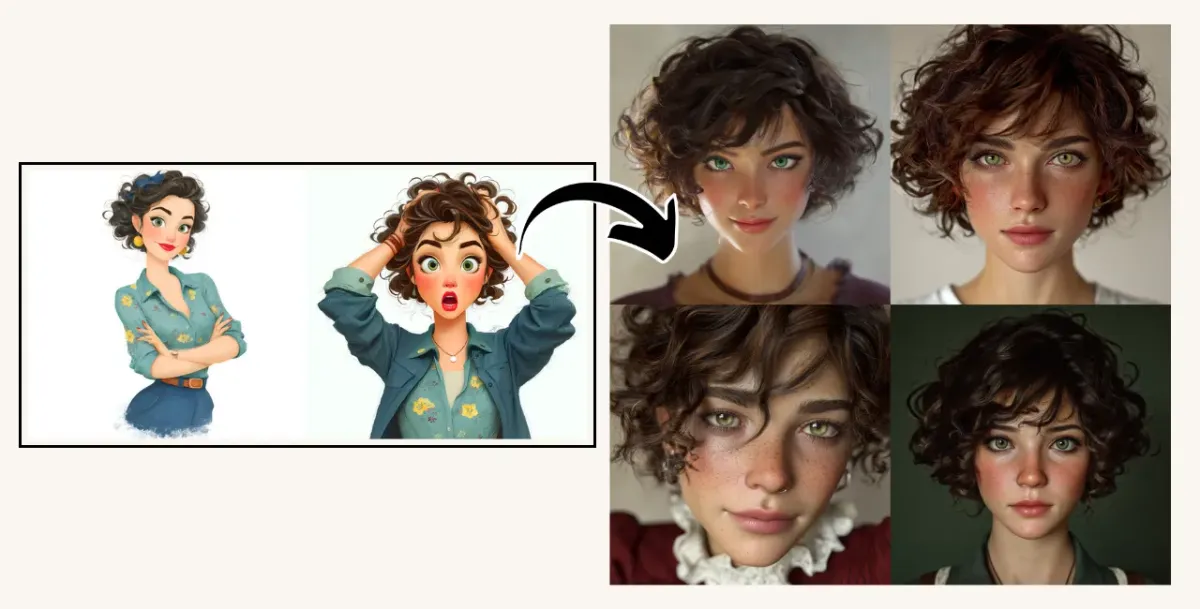
Prompt: photo of a green-eyes French girl with short brown curly hair, smiling photorealistic --ow 20 --v 7.0

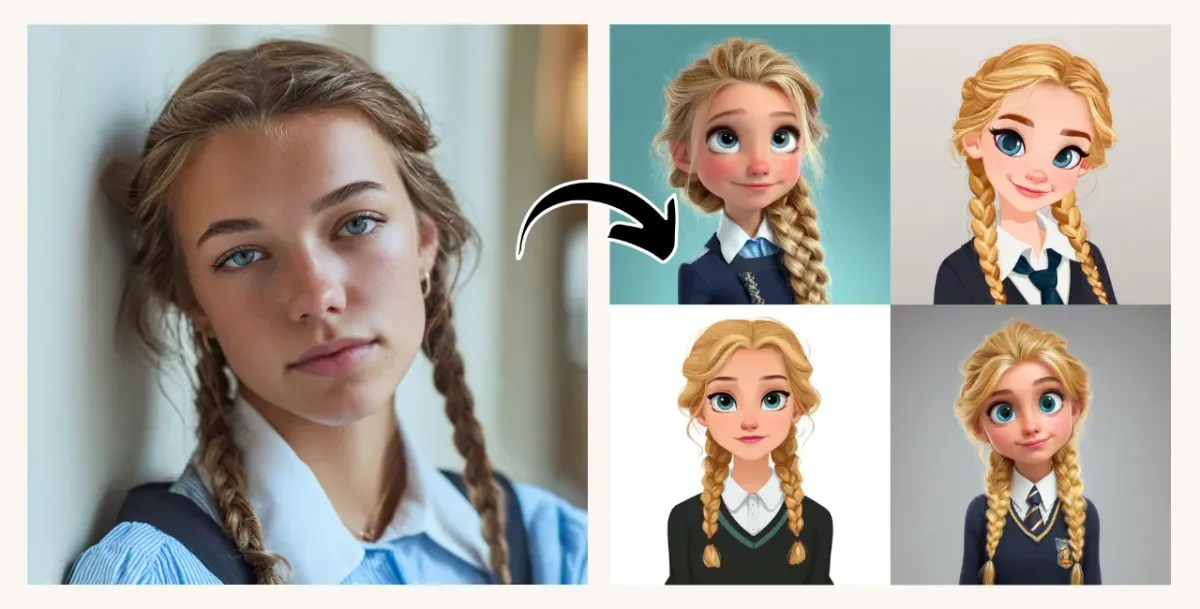
Prompt: Cute cartoon avatar in Disney style of a blond schoolgirl with braided hair. --ow 20 --v 7.0
Tip: Always provide detailed character descriptions to get better results.
And here’s what happens when we add a style reference image as well:
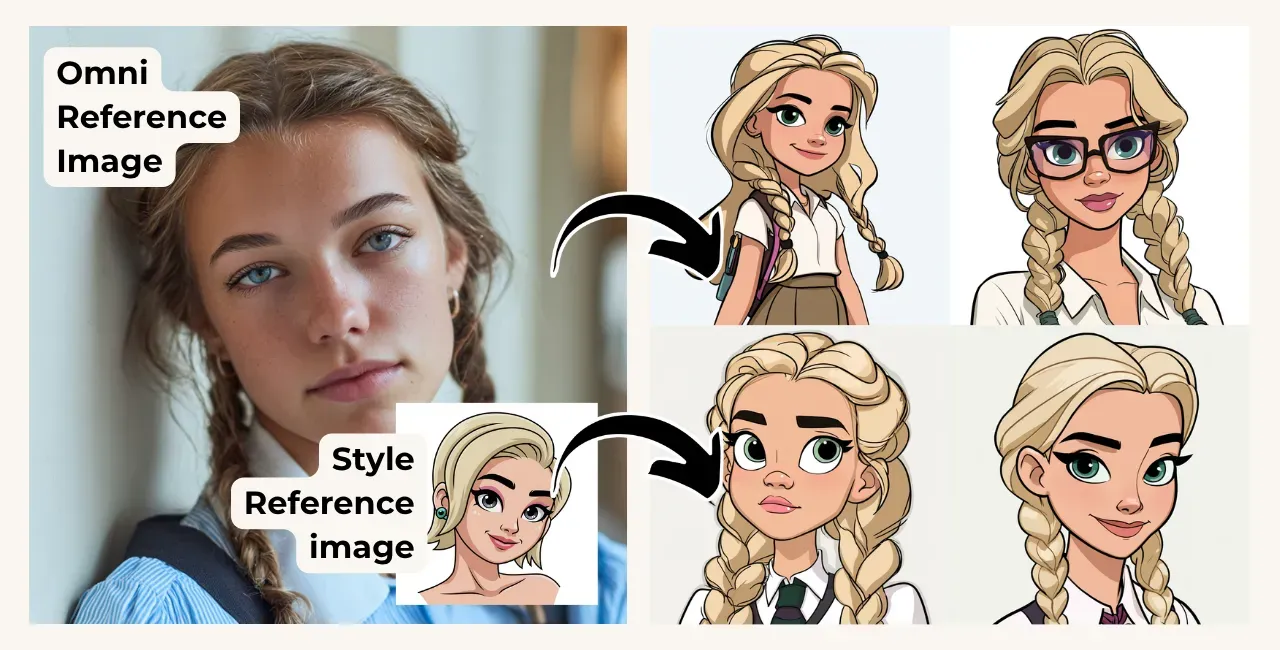
Prompt: Cute cartoon avatar in Disney style of a blond schoolgirl with braided hair. --ow 20 --v 7.0

Advanced Approach to Consistent Characters in Midjourney
This method involves the Midjourney Editor and will most likely be used by professional illustrators. The main goal is to have more control over the result while combining the best parts of several images to get exactly the face expression and pose you want.
To start, you’ll need two images of your character: a face view and a full body view. You can create them:
- together as a side-by-side view or a character sheet (it’s very easy with our Character 2.0 PRO Prompt Builder )
- separately, starting with your original reference and then generating the missing view from it.

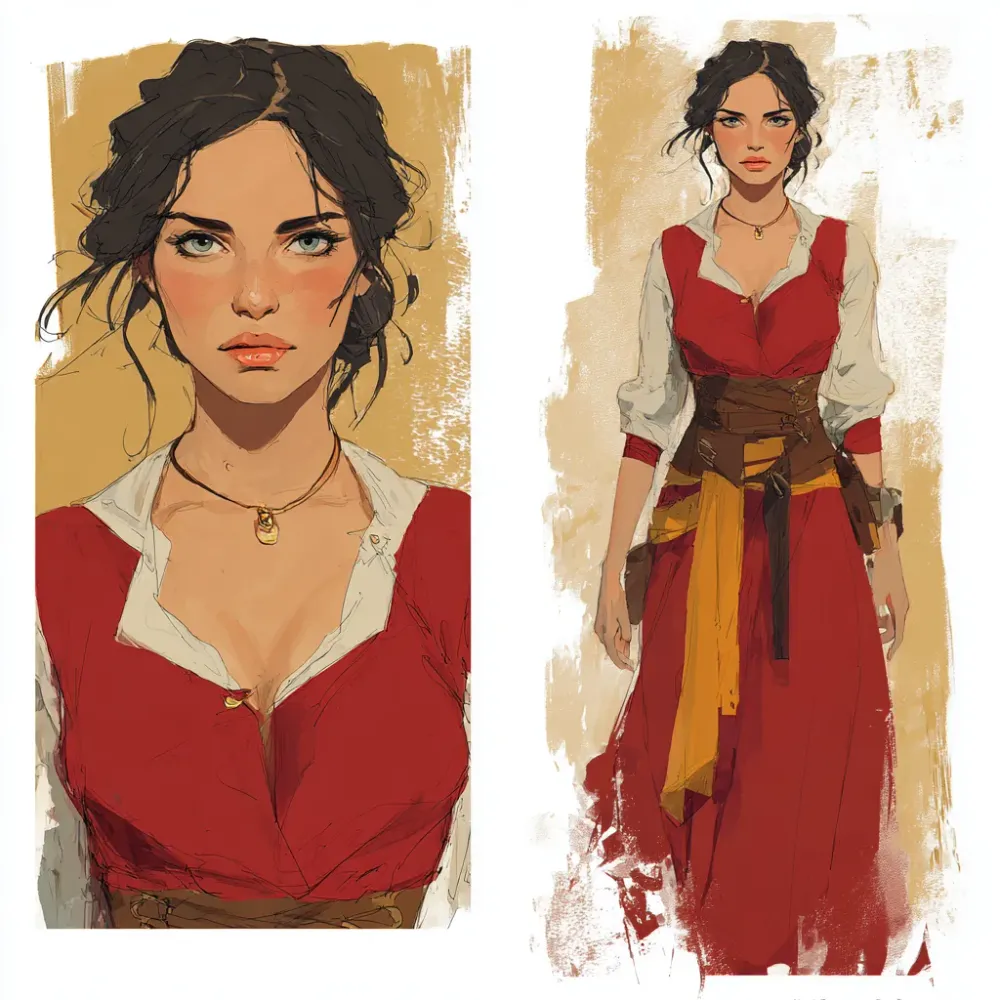
Prompt: Side by side character design concept: on the left front closeup face view, and on the right front full body view - featuring woman --v 7.0
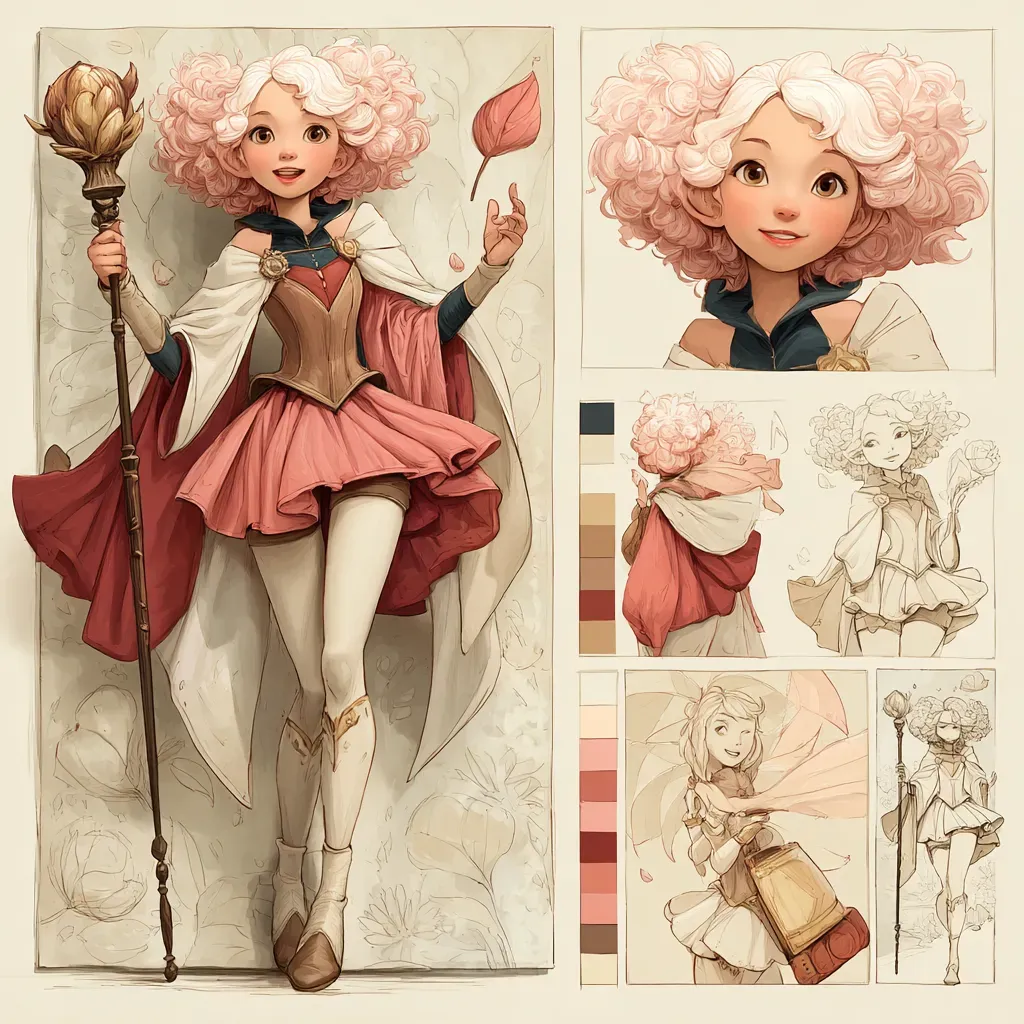
Prompt: Character design sheet featuring charming alien princess. Alien princess: holding magic staff. Colors: soft pink cherry red white blush beige --stylize 750 --v 7.0

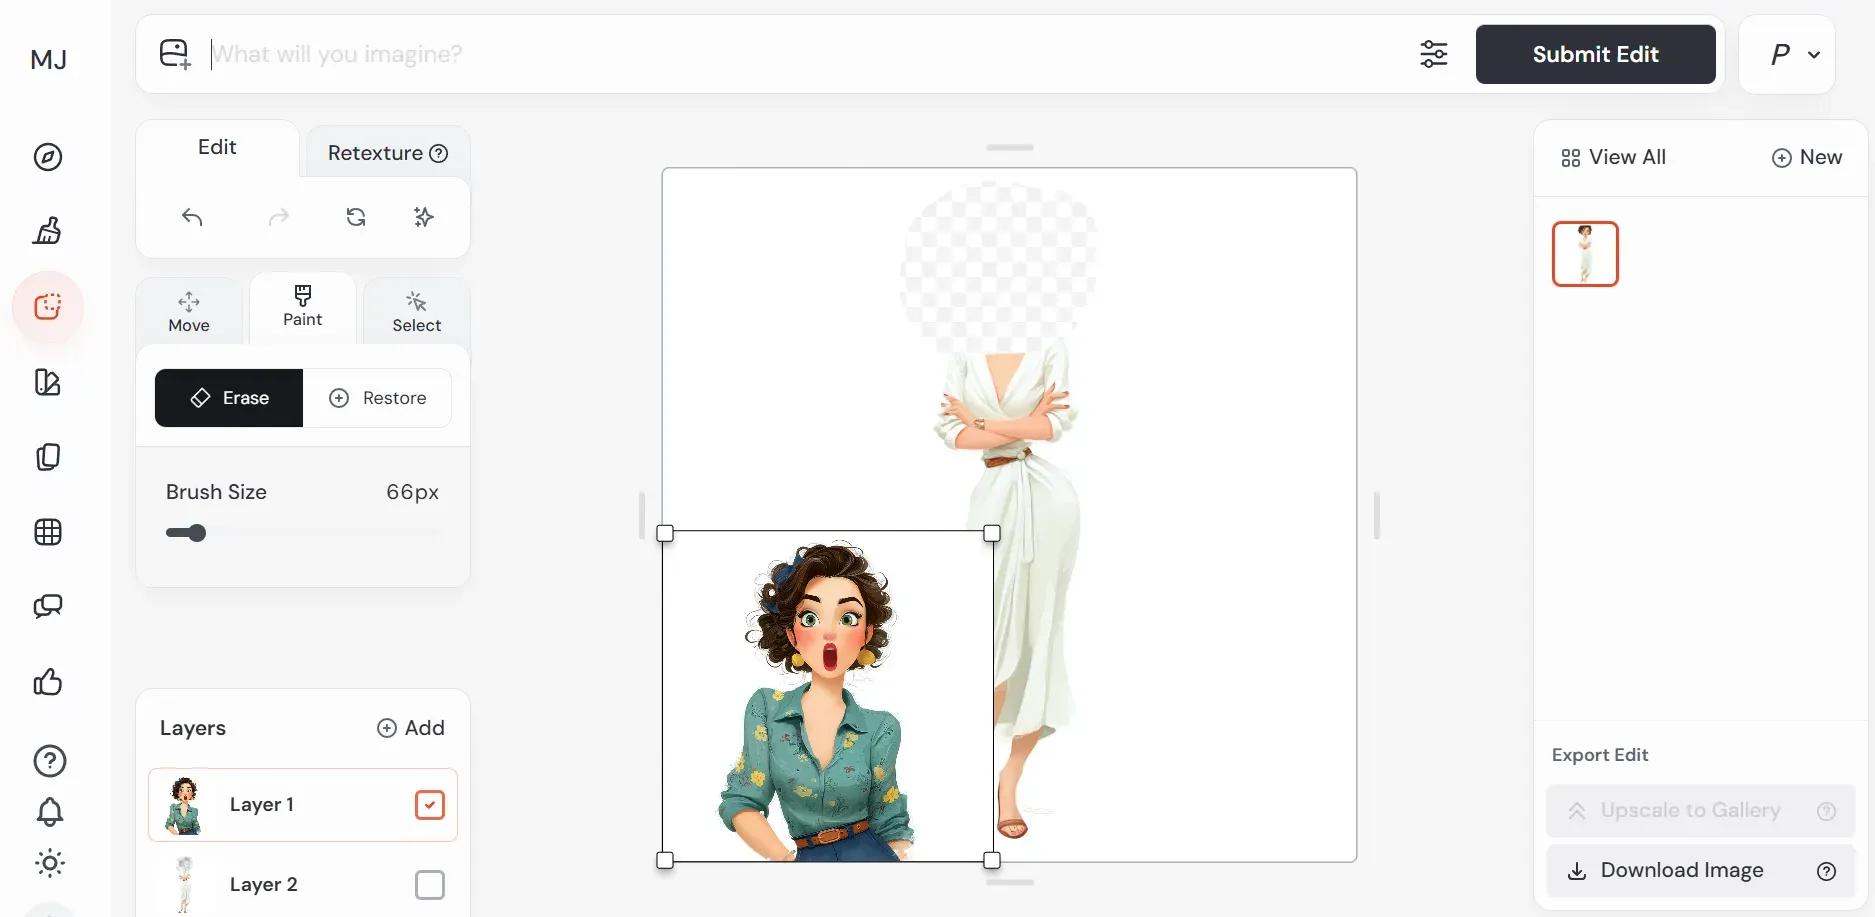
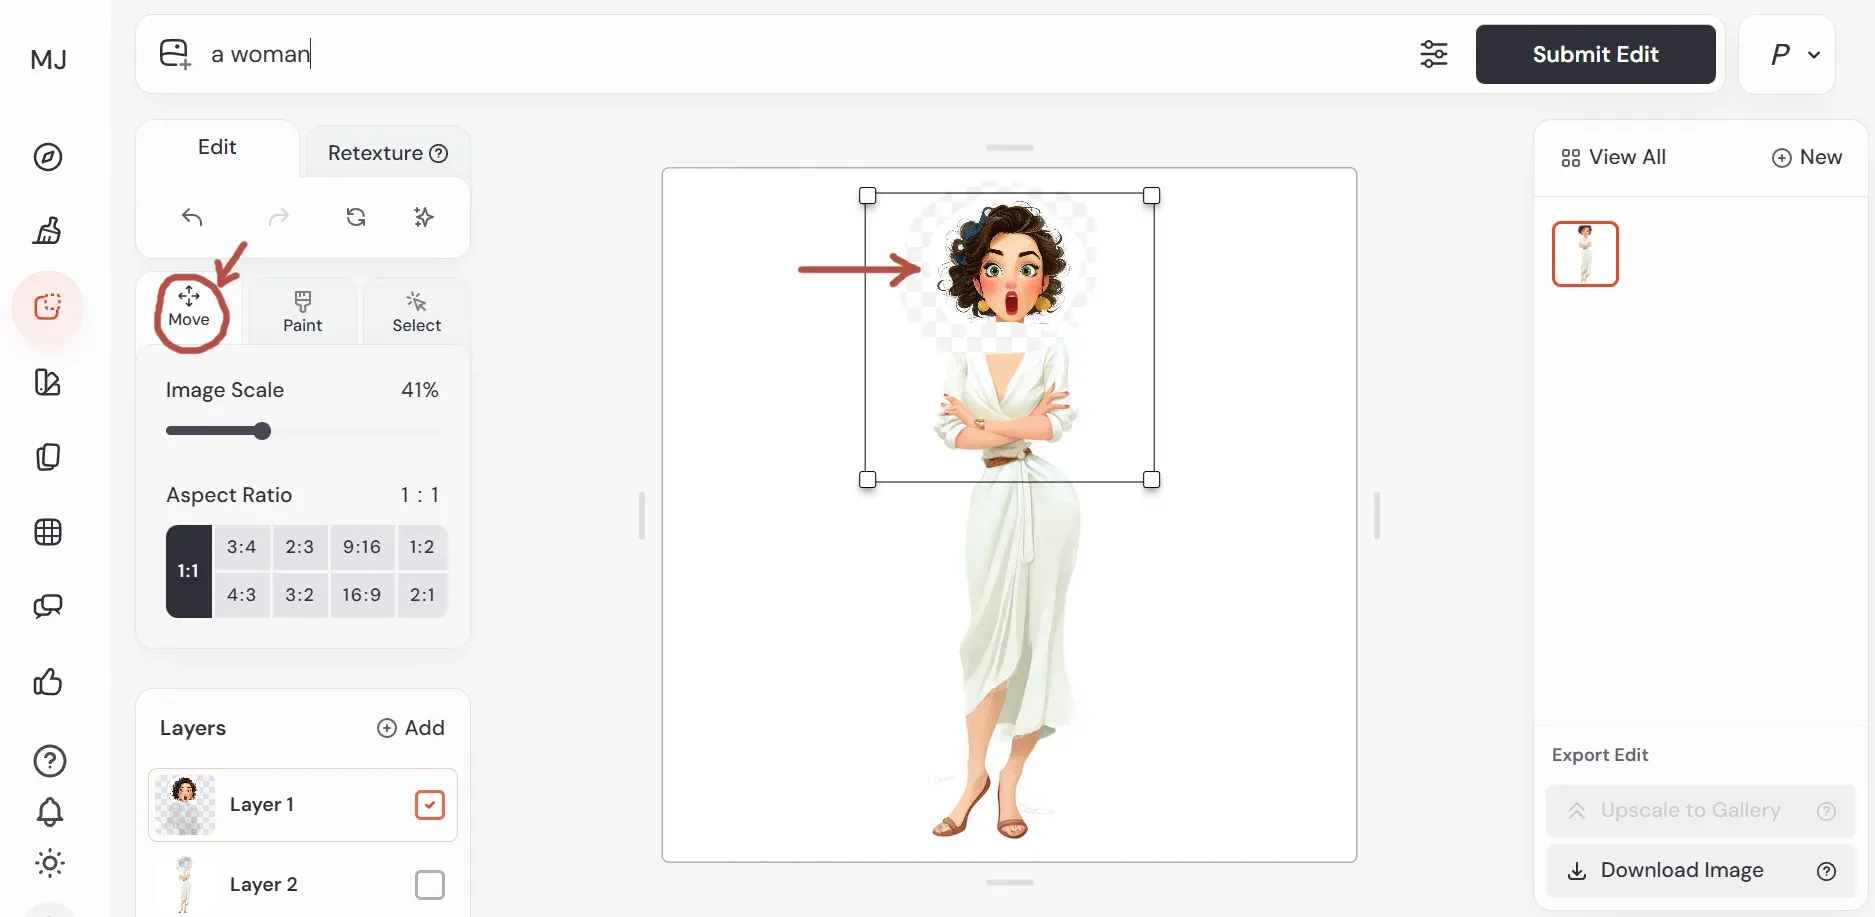
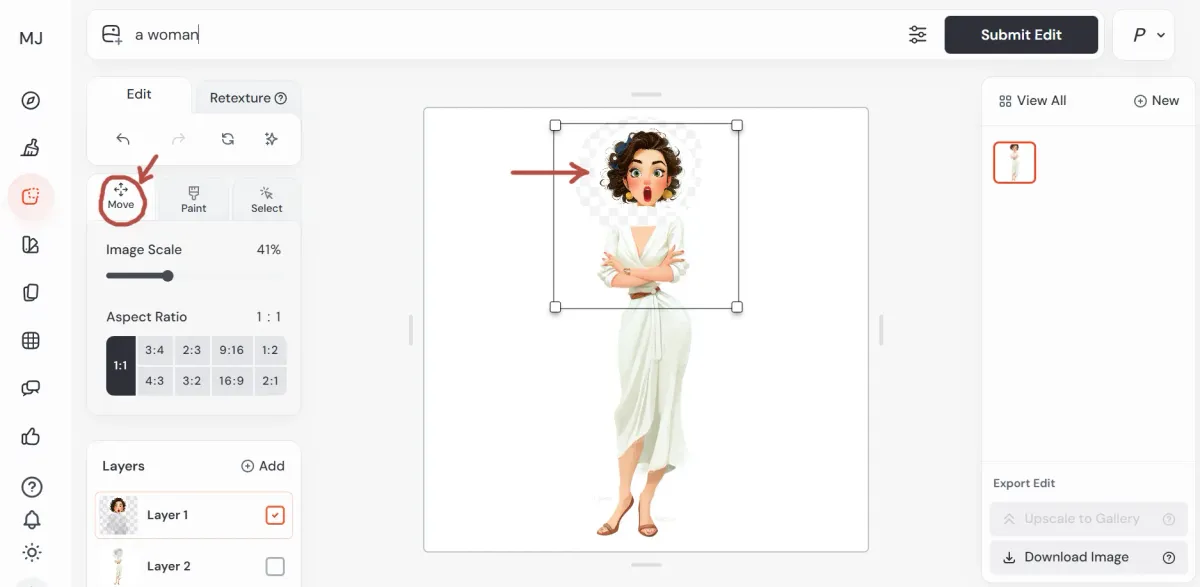
If you go with the first way, it’s time to go to the Midjourney Editor to separate the images. (You can also separate them in Photoshop, Photopea, etc.). Pick Edit on the left panel and drag your image into the center area. Then use one of the vertical lines on the sides to crop it - drag it inward until the undesired part is gone. Use a simple prompt such as “a woman” and click Submit Edit.
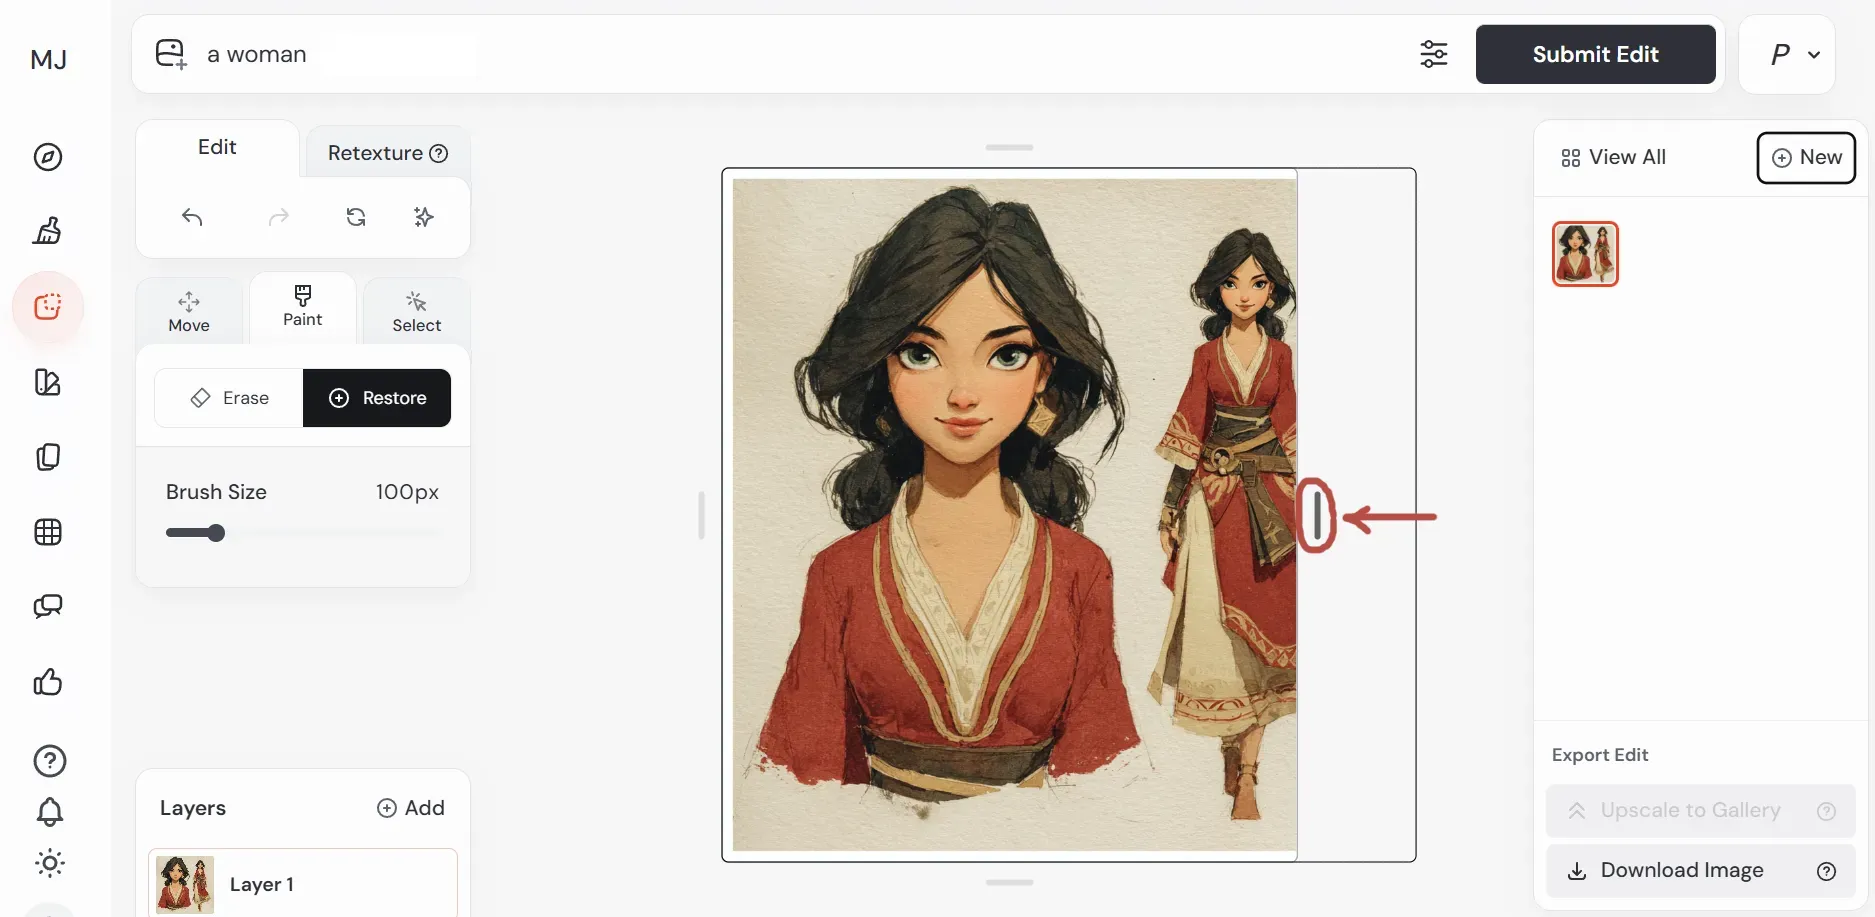
Cropping

If the cropping doesn’t remove everything needed, use the Eraser tool to clean undesired areas. Scroll the mouse wheel to adjust the eraser size. When ready, prompt and submit.
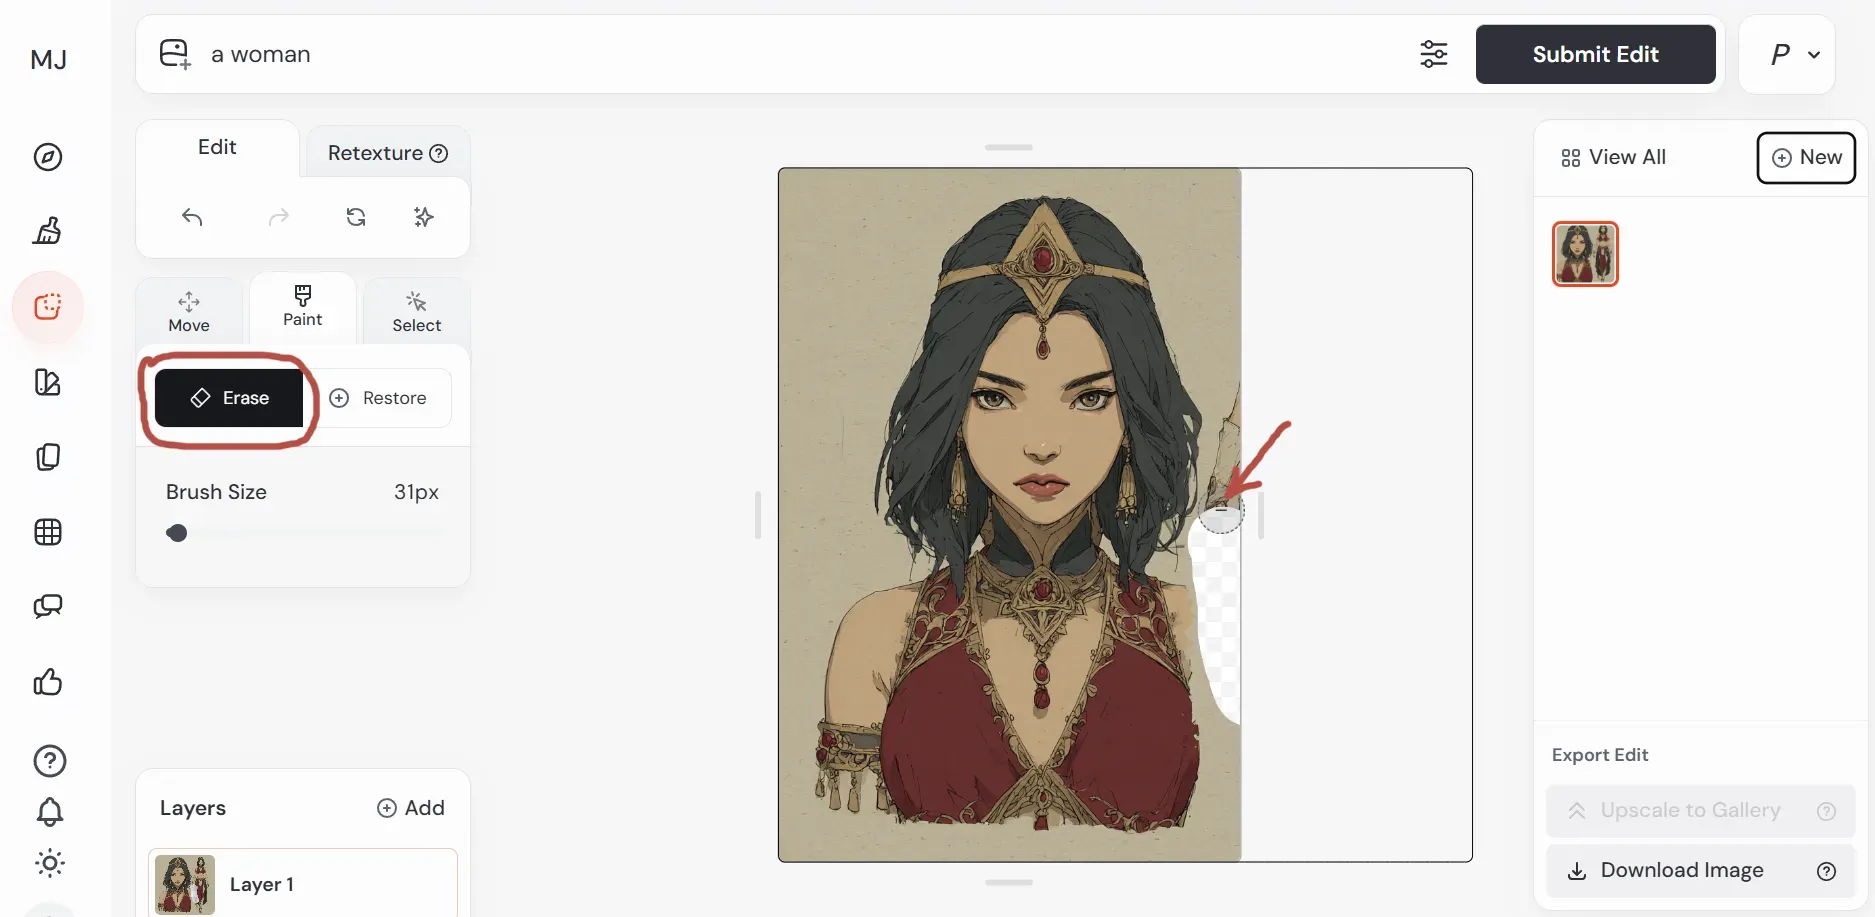
Eraser

After getting the image you like, click Upscale to Gallery (bottom-right corner). Then click New in the top-right corner and repeat the process for the second half of the image.
Tip: For the second way, start with the face view first - it provides a more detailed image of your character’s appearance. Then create a full body view. If you’re struggling with prompting, try these tricks:
- Add “front full body view”, “entire figure”, or “character in full” to your prompt.
- Use a vertical aspect ratio.
- Name footwear in the prompt text.
- Make sure the face description is not too long when prompting for the full body view.
We also have a short video on full body characters if you want to see examples.

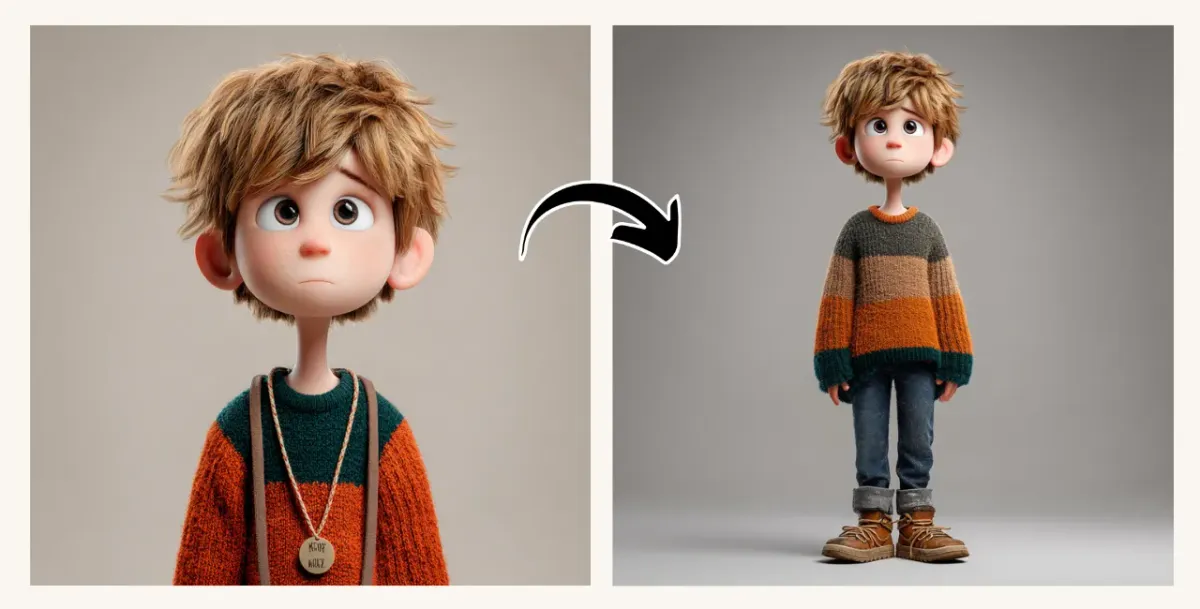
Prompt: A full body view 3D illustration of a short-haired cute boy wearing a sweater and jeans, standing, clean background --v 7.0
When you get your images, prompt for the pose you want using the full-body image as reference, and separately for the face expression you’d like using the face view as a reference.
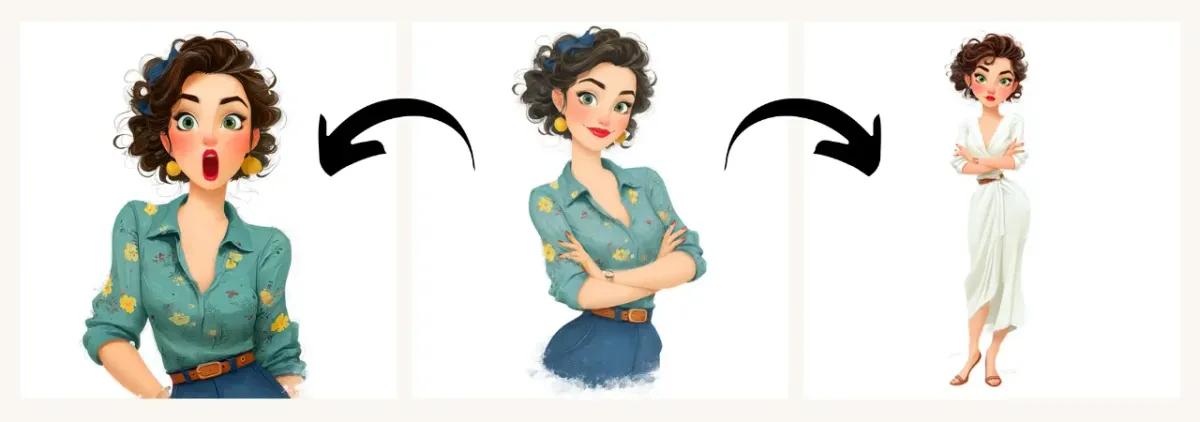
If you change clothing, accessories, or hairstyle, make sure to decrease the omni weight below 100. Here are the pose and face I’ve managed to get from the original omni reference:

Prompt for face: A young lady with green eyes and short curly brown hair, surprised emotion --v 7.0
Prompt for body: Young French girl with green eyes, brown short curly hair, wearing a white elegant gown, full body view --ow 50 --v 7.0
Now it’s time to combine them in the Editor. Click Edit on the left panel in Midjourney and drag your full-body image first. Use the Eraser to clean the face area, including some extra space around it. (In my case, I even erased part of the shoulders.)
Tip: The backgrounds of your images should match - ideally white.
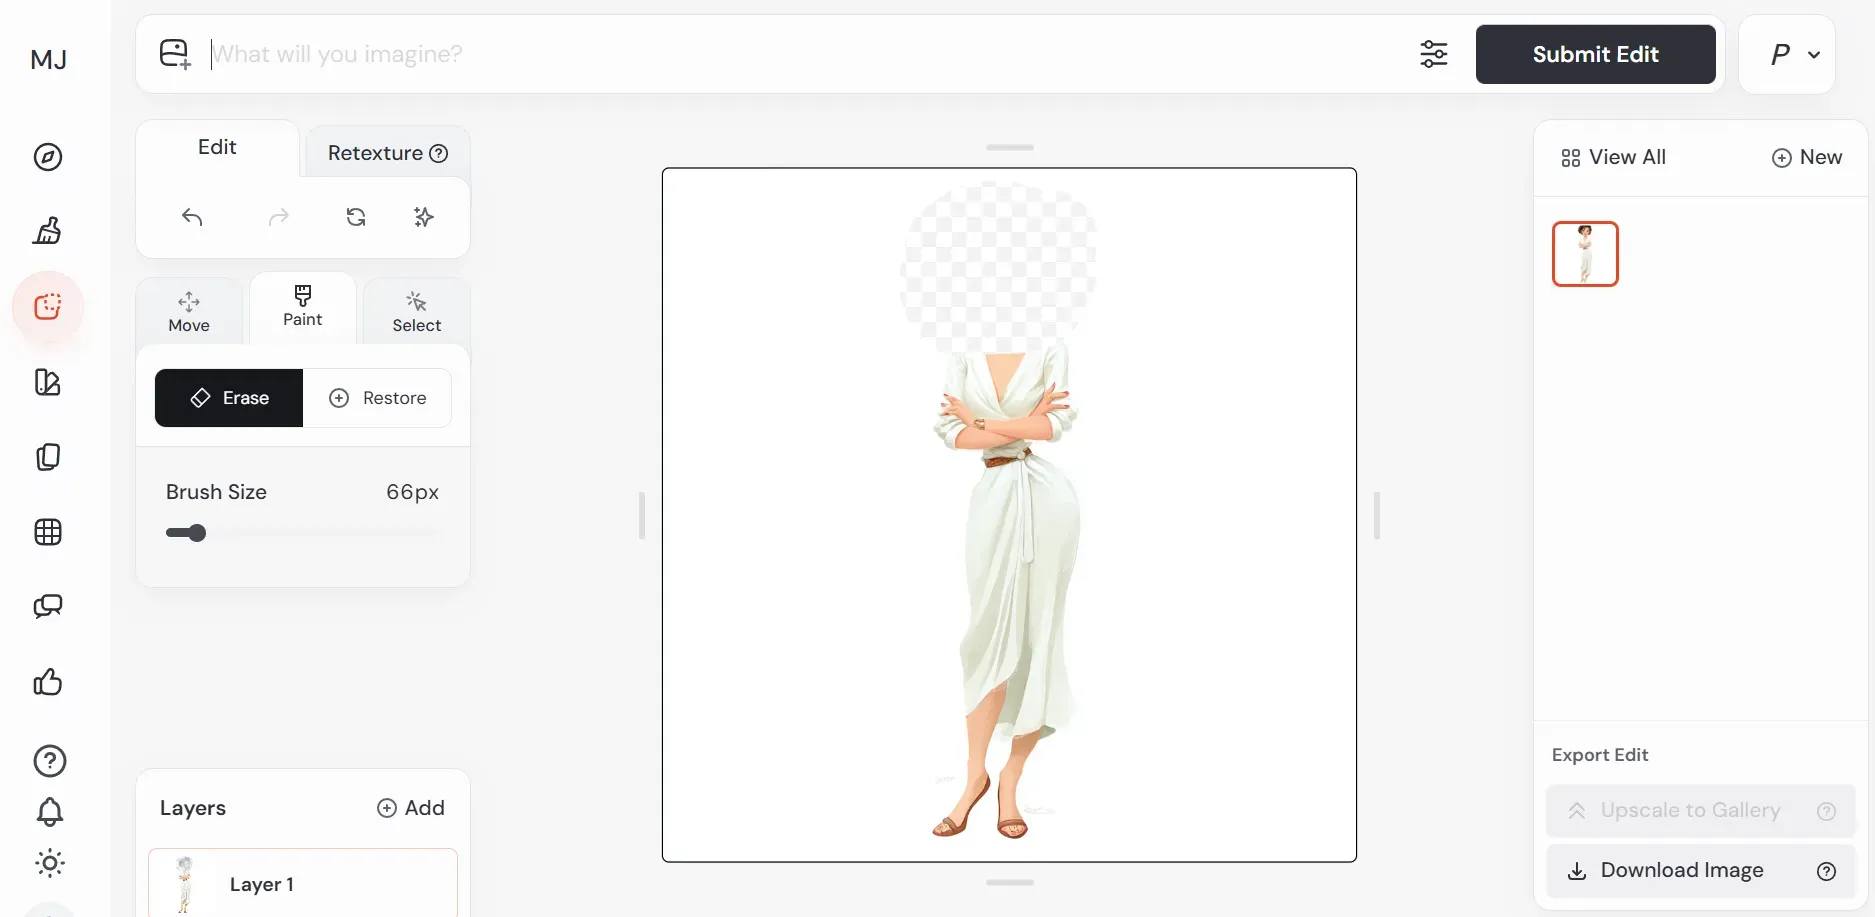
Eraser

Then drag the face image onto the canvas and reduce its size by dragging the corner inward - precise size doesn’t matter yet.
Inserting face layer

Now use the Eraser tool to roughly clean everything except the face. Keep the area around it relatively small. If the background of the face image differs from the full-body image, you can even remove the hair partly to ensure there’s no background left.

"Cleaning" face

Next, “attach” the face properly. Switch to Move mode and drag the face into place, adjusting its size. Make sure the background image (full-body layer) has enough transparent space around the face for the best fit. Once again, use a simple prompt and submit.
Combining images
You’ll get 4 variations. Pick one and upscale your best image to the gallery (bottom right corner).
Here’s the result I’ve achieved:

Final Result

Even More Advanced Approach
Midjourney recently introduced videos, and they’re quite impressive - see some examples in our video guide! You can use this video feature to animate your characters, making them show different emotions and poses. Then take screenshots from these videos and use them. This method requires upscaling and is more time-consuming, but for some projects, it’s worth the effort.
What Else You Should Know About Omni Reference
- Works only with Midjourney version 7 or later (not supported in older versions).
- Can be used with Moodboards, Style references (codes and images), and the Stylize parameter. If you don’t specify style references or use a text description of style in your prompt, Midjourney will likely inherit the style and color palette from the omni image.
- Omni Reference results are not compatible with inpainting, outpainting, vary region, pan, or zoom out. To edit, load them into the Editor and remove any
--orefor--owparameters. - Not compatible with Fast Mode, Draft Mode, Conversational Mode, or
--q 4. - Using Omni Reference costs 2x more GPU time than regular V7 images.
Ranking Midjourney’s Character Consistency
This is my personal opinion, not a rule. I’ll briefly explain each point:
- Character consistency for illustrations: ★★★★★
Excellent! It even recreates the image style without extra text. - Character consistency for AI photos: ★★★★☆
Solid results, though not as strong as illustrations. - Character consistency for real photos: ★★☆☆☆
Depends on luck and quality of the reference photo. Other tools (e.g. Google Nano Banana) perform better.
Tip: To improve results use a high-quality, well-lit photo with a clear face, no other people, and minimal background clutter. - Making photo images from cartoon illustrations: ★★★★☆
Impressive, though not perfect. - Making cartoon illustrations from photos: ★★★★★
Almost flawless, but highly prompt-dependent. You can also experiment with the Editor’s Retexture tool for more style options. - Tools for character consistency control: ★★★★★
With omni weight and the Midjourney Editor, you have a powerful toolkit for managing consistent characters.
Happy creating!