
Table of contents:
Whether you’re new to AI image generation or already creating regularly, this tool will solve your prompt writing issues once and for all. Everything you need is right here - just follow along.
Video version of this guide
This is your complete guide to the Prompt Builder - an AI-powered Google Sheets tool for creating optimized image prompts for any text-to-image AI generator. Use the built-in dropdowns to build your prompt step by step, add your own ideas in plain language, and let the AI refine everything into a structured, ready-to-use prompt - tailored specifically to the tool you work with. No prompt-writing experience needed.
Compatible with ChatGPT Image, Nano Banana (Gemini), Midjourney, Flux, Ideogram, Recraft, Lucid Origin and Realism (Leonardo AI), and Seedream.
In this guide we use the Junk Journal Builder as our example, but the workflow is the same across all our builders.
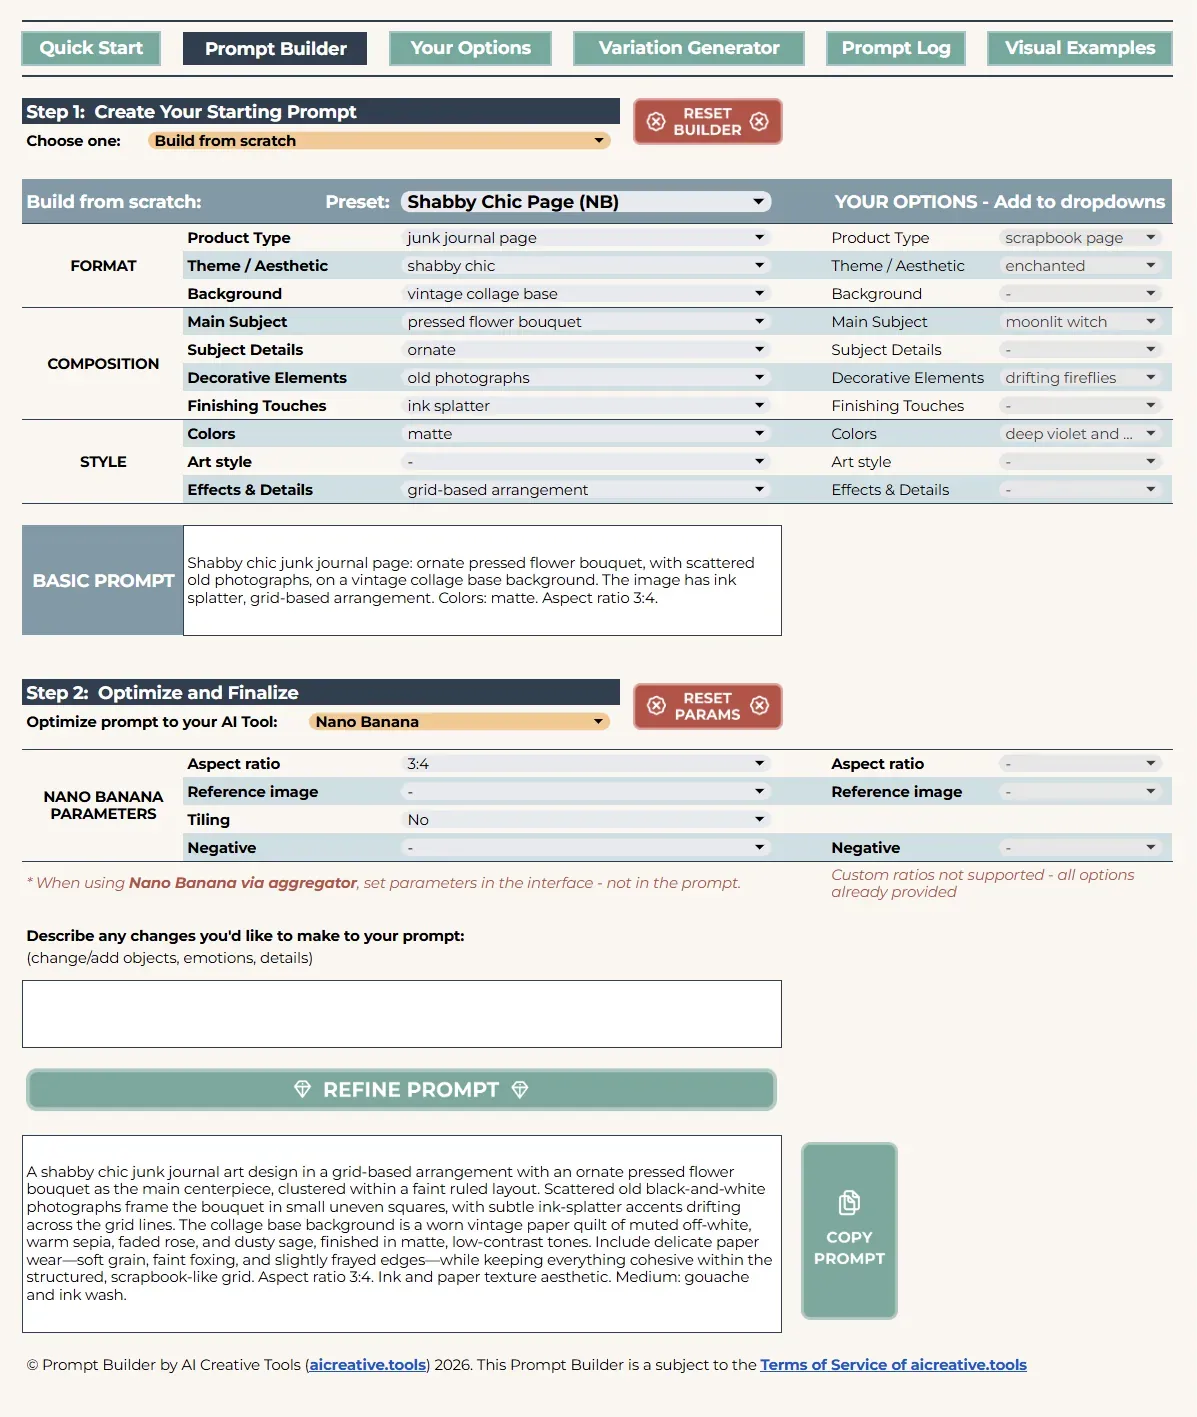
Prompt Builder Overview
Quick Start
Before you can use the Prompt Builder, there are two essential steps: making your own copy of the file and approving the script. Both take just a few minutes and only need to be done once.
Step 1. Make a copy
The file you received is the original shared file. To work with it, you need to make your own copy on your Google Drive - without this step, the dropdowns will not work.
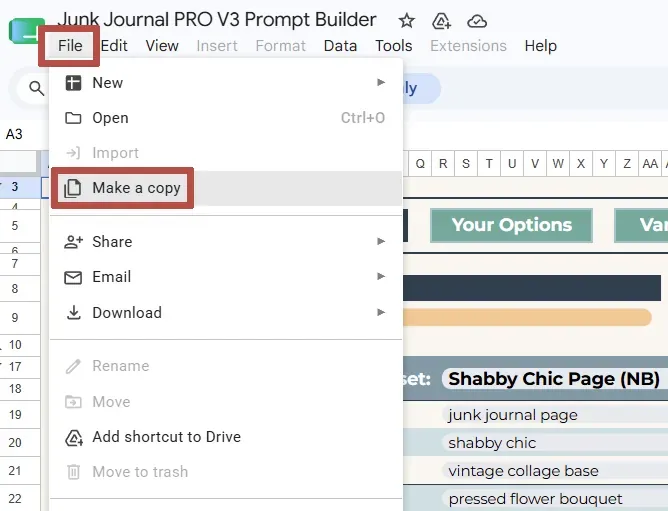
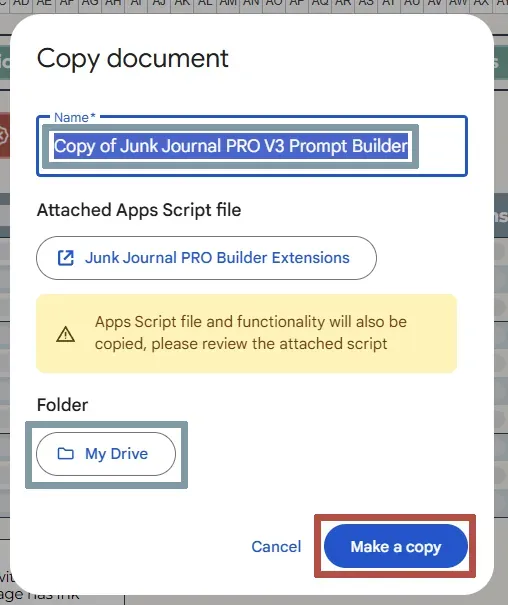
Go to File → Make a Copy. You can rename it and choose a folder, then click Make a Copy.
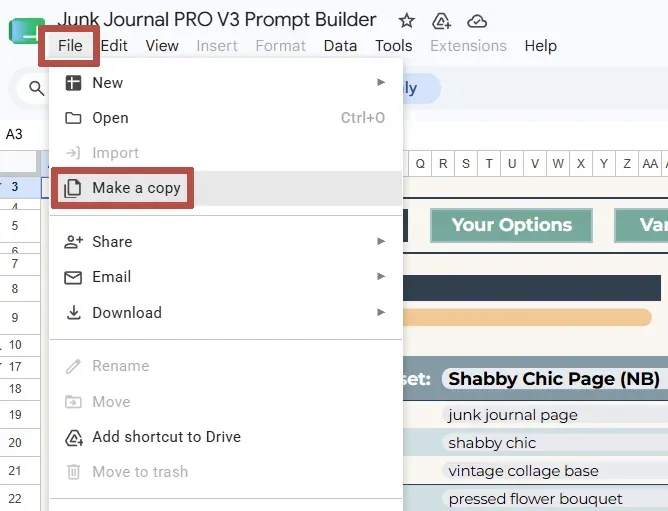
Go to: File → Make a Copy
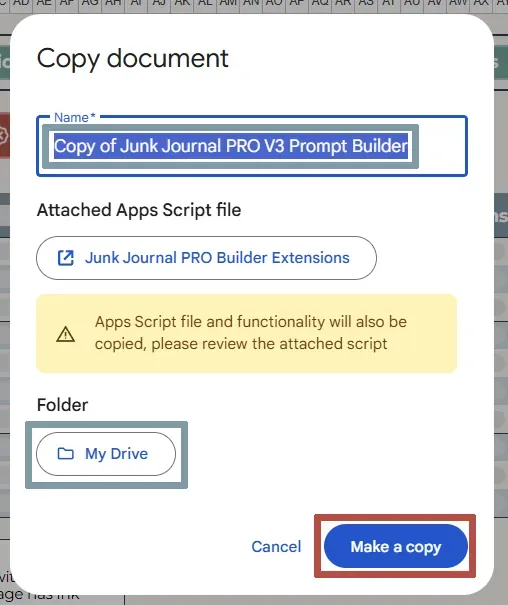
Optional: rename your copy and choose a folder on your G-Drive
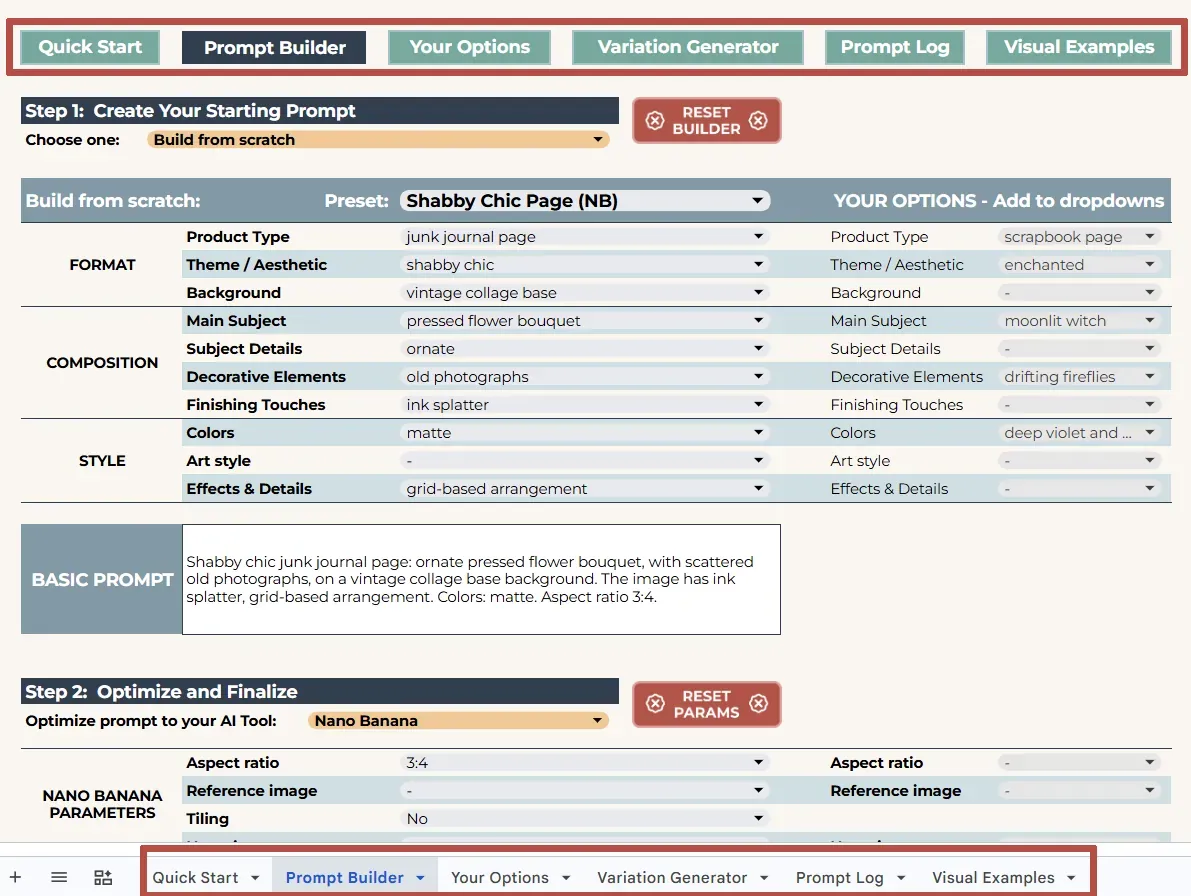
Your copy opens in a new tab. Take a moment to look at the tabs along the bottom - you’ll see Quick Start, Prompt Builder, Your Options, Variation Generator, Prompt Log, and Visual Examples. You can navigate between them using these tabs or the menu buttons at the top of each sheet. Each tab is a different part of the tool, and this guide covers all of them. Always work in your copy from now on - never in the original.
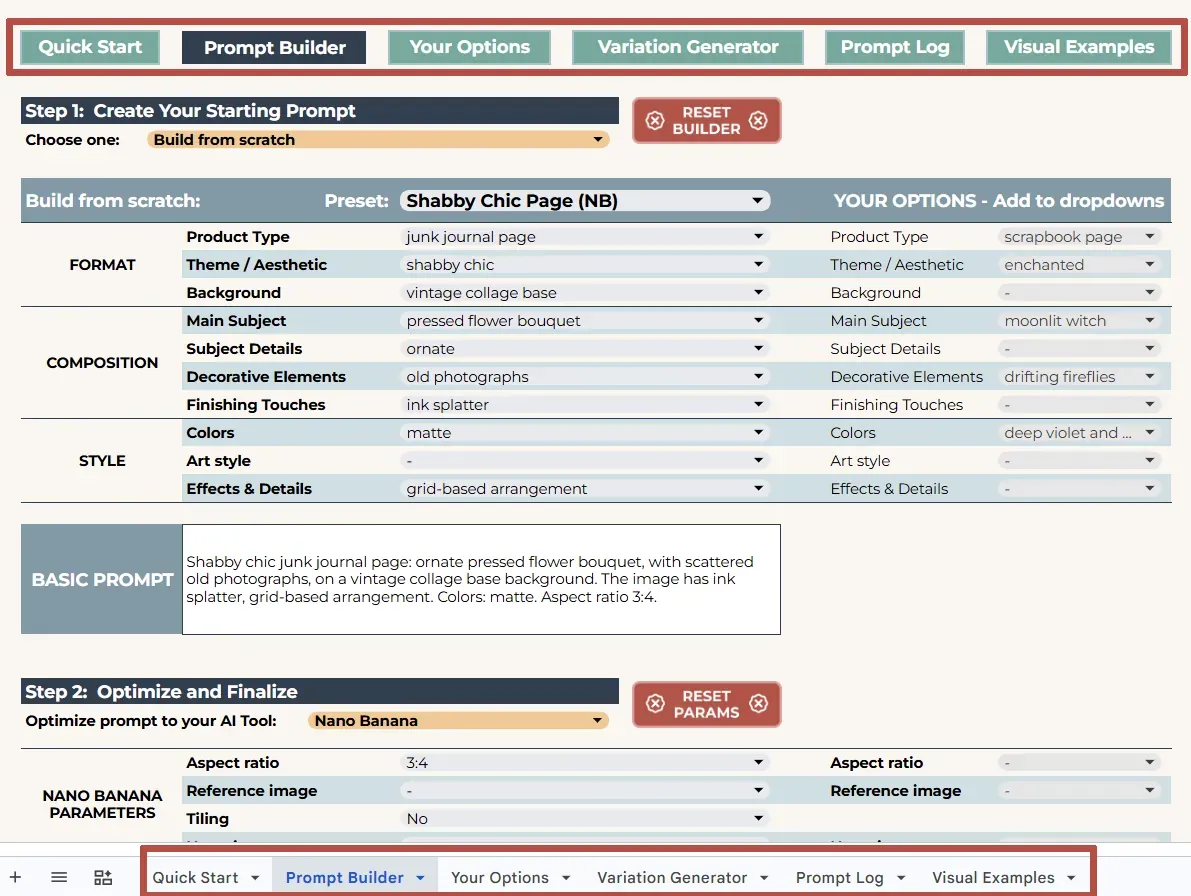
Prompt Builder navigation options
Step 2. Approve the script
The Prompt Builder is AI-powered, and all the interactive parts - Refine Prompt, Generate Variations, Reset functions - run on a script. This script needs your one-time approval before it can work in your copy.
Want to check the script yourself first? Go to Extensions menu → Apps Script to see the full code. Copy it, paste it into your AI of choice (e.g. ChatGPT, Claude, Gemini), and ask: “Does this script do anything harmful or access anything it shouldn’t?” We’re fully transparent about our work. Once you’re satisfied, proceed with the steps below.
1. Go to the Prompt Builder sheet and press any button - Reset Builder, Reset Parameters, or Refine Prompt.
2. A popup appears: “Authorization required.” Click OK.
3. A warning appears: “Google hasn’t verified this app.” This is Google’s standard label for any script that comes with a copied file - it doesn’t mean the script is dangerous. Click Advanced.
4. Click “Go to [Builder Name] Extensions (unsafe)” at the bottom of the window.
5. Scroll down and check all three checkboxes. These permissions affect only this Prompt Builder file - nothing else on your Google Drive or computer. Scroll down and click Continue.
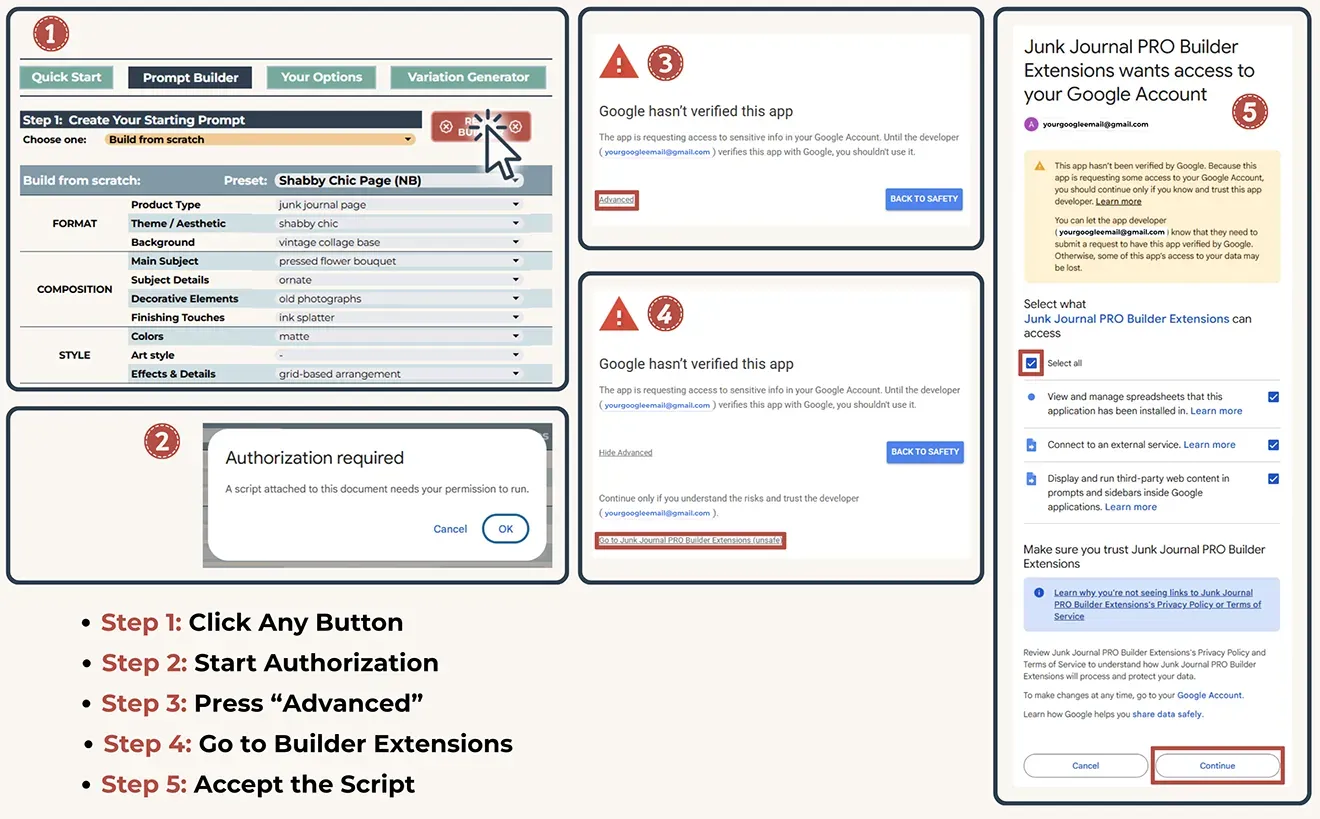
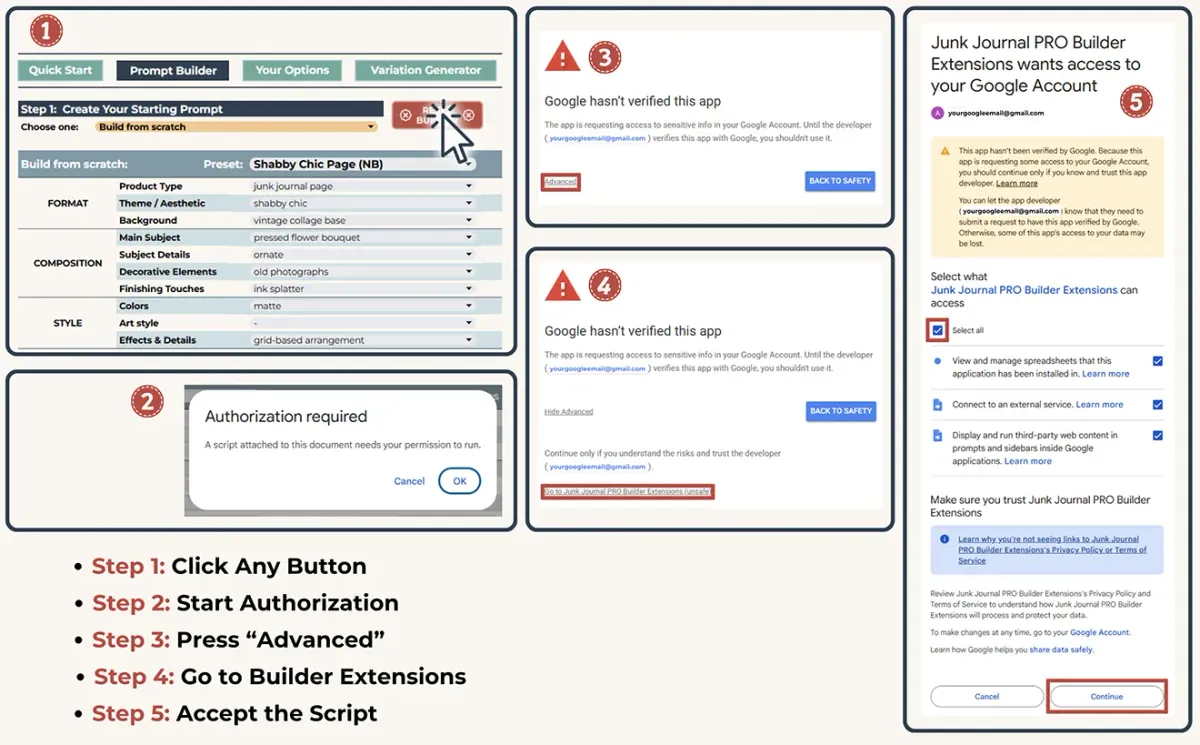
The five authorization steps
That’s it - the builder is fully active. You won’t need to repeat this for this copy, on any device, as long as you’re signed into the same Google account. If you ever make a new copy, these steps apply to that copy as well.
Prompt Builder
Basics
The Prompt Builder sheet is where everything happens. It’s organized into two steps.
- Step 1 - Create Your Starting Prompt is where you define what you want to create. You can build your prompt from scratch using the dropdown menus, or paste your own prompt and let the builder refine it. When you select one option, the other hides automatically.
- Step 2 - Optimize and Finalize is where you choose your AI tool and set its parameters. This is also where you can describe any changes you’d like to make in plain language before refining.
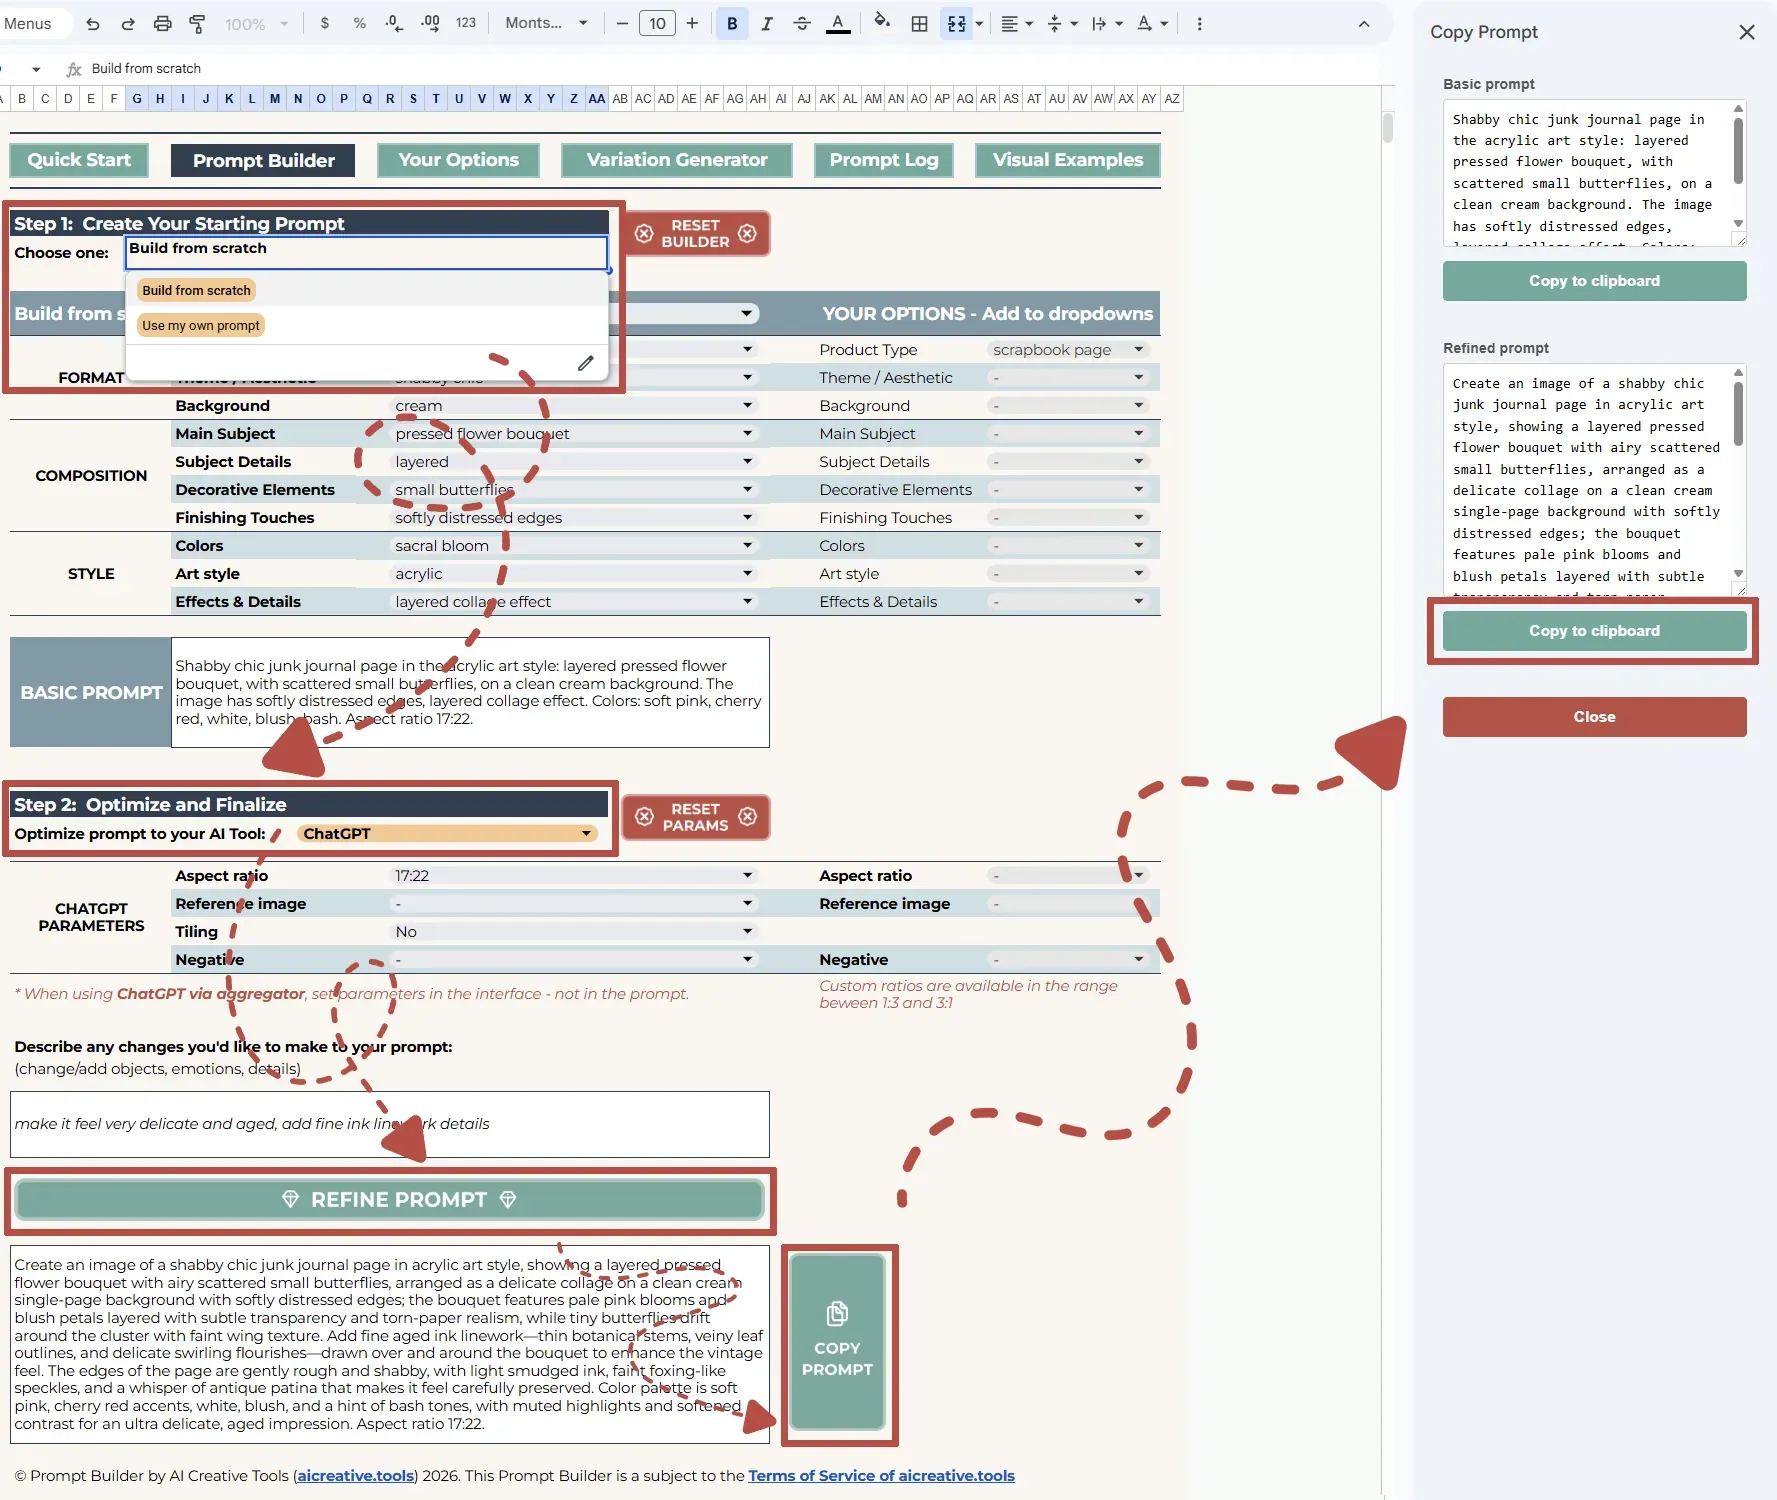
Prompt Builder steps
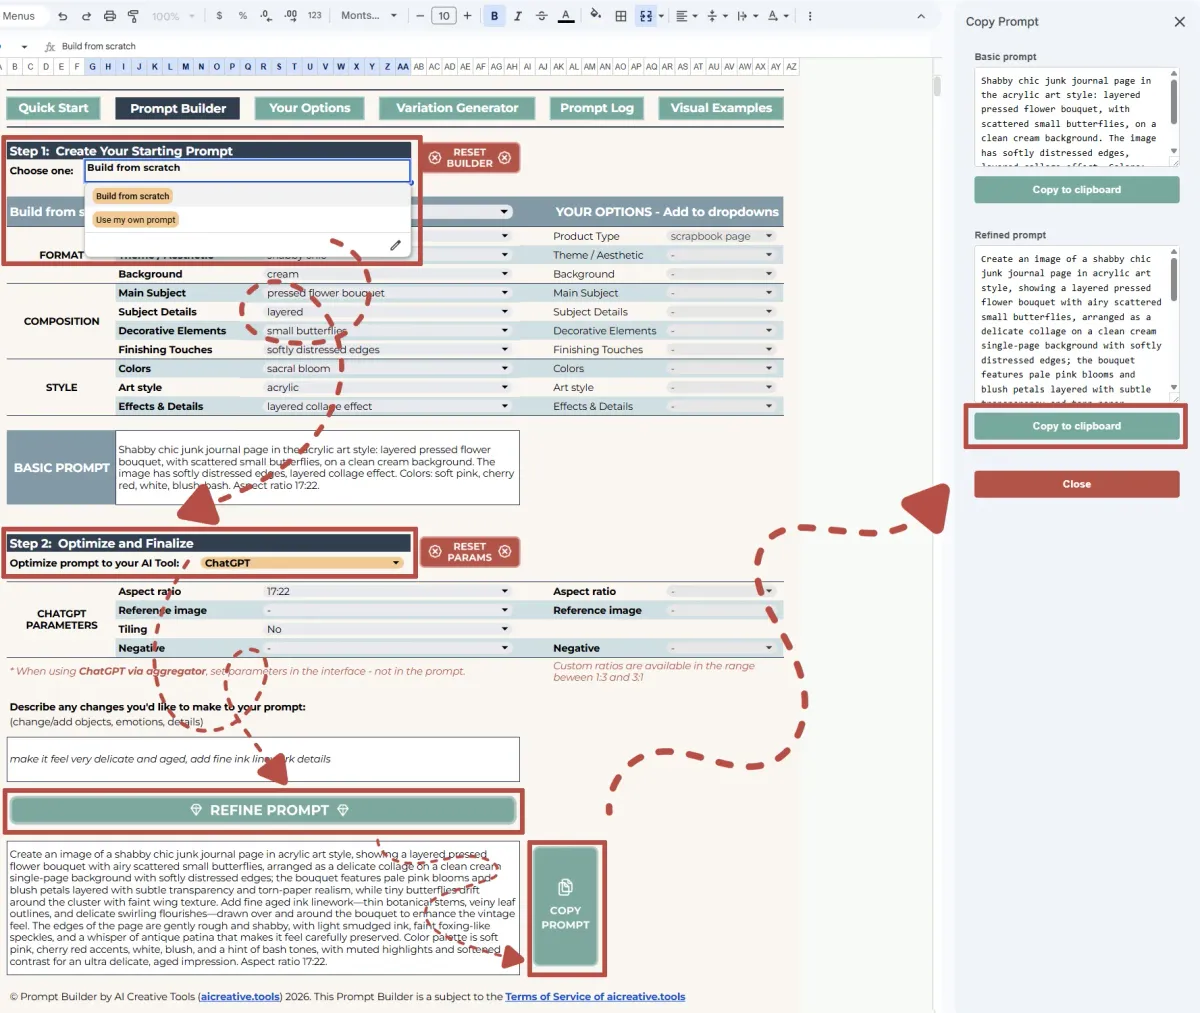
Once you’re ready, click Refine Prompt. The AI processes your selections and generates a fully structured, optimized prompt in the result field below. Click Copy Prompt to copy it to your clipboard and paste it straight into your AI tool.
Two more buttons worth knowing from the start:
- Reset Builder - clears all dropdown selections and the refined prompt. Your custom options and the “Describe any changes” field stay untouched.
- Reset Params - clears only the parameters for the currently selected AI tool.
Workflow 1 - Pick from Dropdowns
This is the most common workflow and the best starting point if you’re new to the builder - following it will introduce you to all the key functions of the Prompt Builder. Select “Build from scratch” in Step 1.
The dropdowns are usually organized in several groups, in our example: Format, Composition, and Style. Each covers a specific aspect of your prompt, and every option has been manually picked and tested.
A few things to know:
- Some dropdowns group options by category - for example, Full Canvas and Isolated Elements in Product Type. The category labels are visual separators only and don’t affect your prompt.
- Most dropdowns include a Random option, which picks a random term for you.
- As you make selections, the Basic Prompt box updates automatically - this is the raw skeleton of your prompt taking shape in real time.
On the right side of the builder you’ll also notice a Your Options column - this is where you can add your own custom terms to any dropdown. We’ll cover this in the Customize the Dropdowns section.
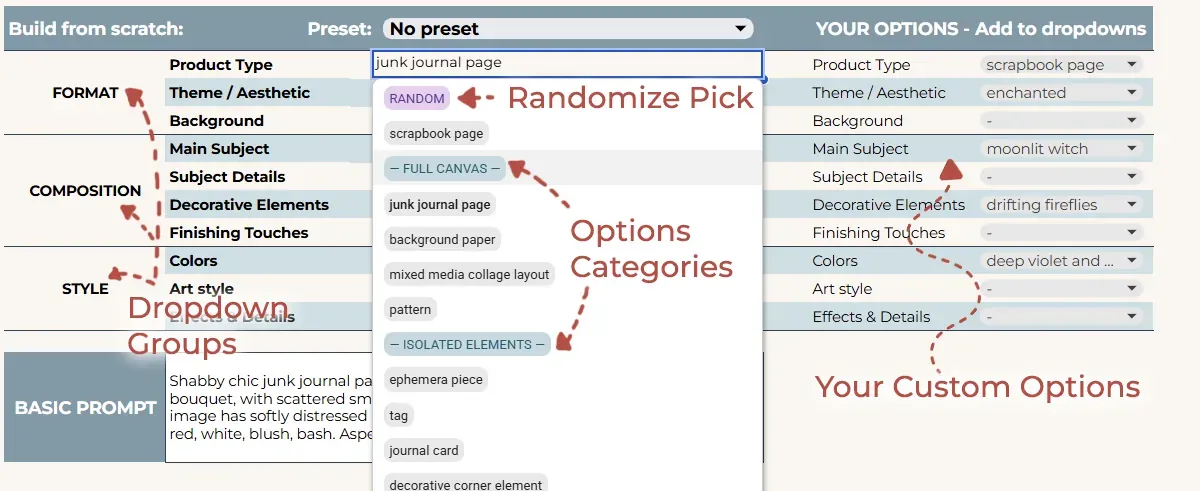
Prompt Builder dropdowns
Moving on to step 2 - your AI tool, parameters and additional instructions.
Picking your AI tool is not optional - if you skip it and click Refine Prompt, the builder will remind you. The tool you select determines the prompt structure, language, and optimal length of your refined prompt. The order of AI tools in the list reflects our personal preference for this particular builder - the first tool is the one we consider best suited for the task, in our example - Junk Journal images.
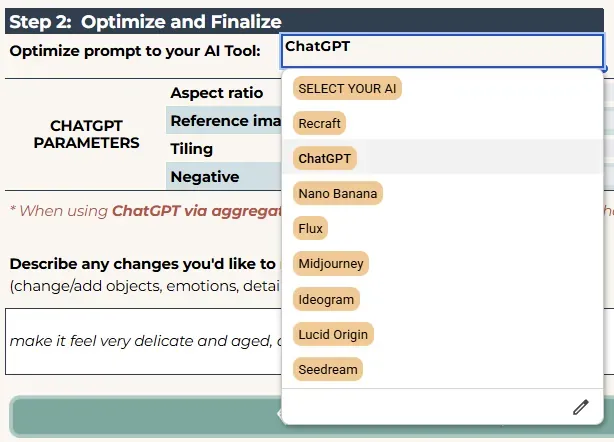
AI tool dropdown open
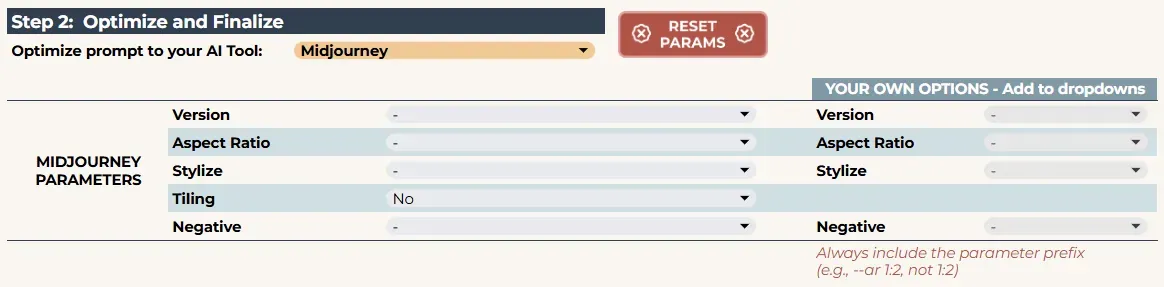
Parameters section: Midjourney example
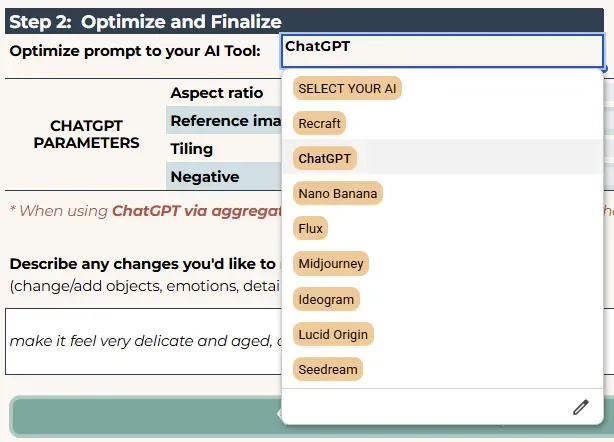
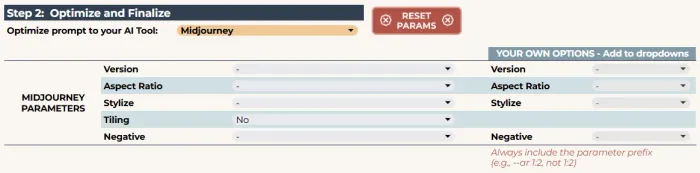
Once you pick a tool, its parameters appear below. Not all tools support parameters inside the prompt - some require you to set them directly in the tool’s own interface. Use Reset Params to clear the parameters for the currently selected tool without affecting anything else.
The “Describe any changes” field is for your additional instructions, it accepts plain language - no prompt writing skills needed. Use it to add details, change elements, or adjust the mood of your prompt. For example: “make the colors warmer”, “add a small bird on the flowers”, “make it feel more aged and worn.” The AI will understand and apply your instructions when refining the prompt.

“Describe any changes” field

Click Refine Prompt and the AI takes over. It takes a few seconds. The result appears below - fully structured and optimized for your chosen tool.
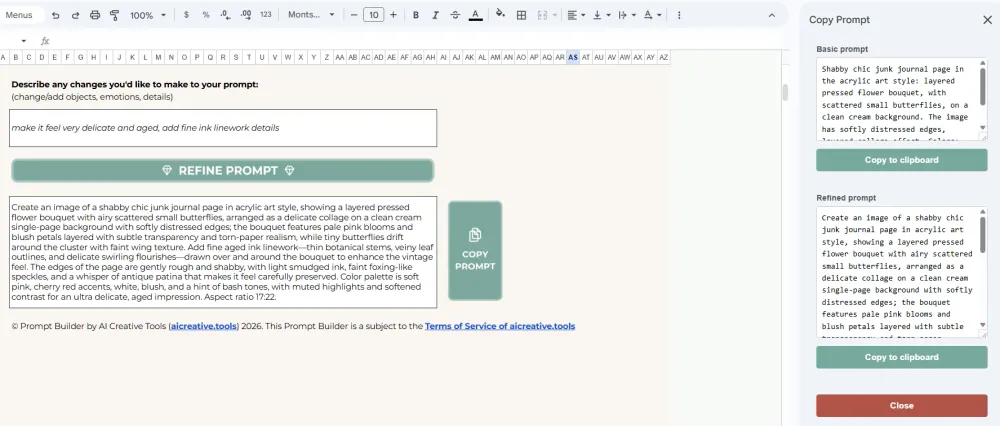
Click Copy Prompt to open a sidebar showing your Basic Prompt and Refined Prompt. Click Copy to clipboard and paste it straight into your AI tool.
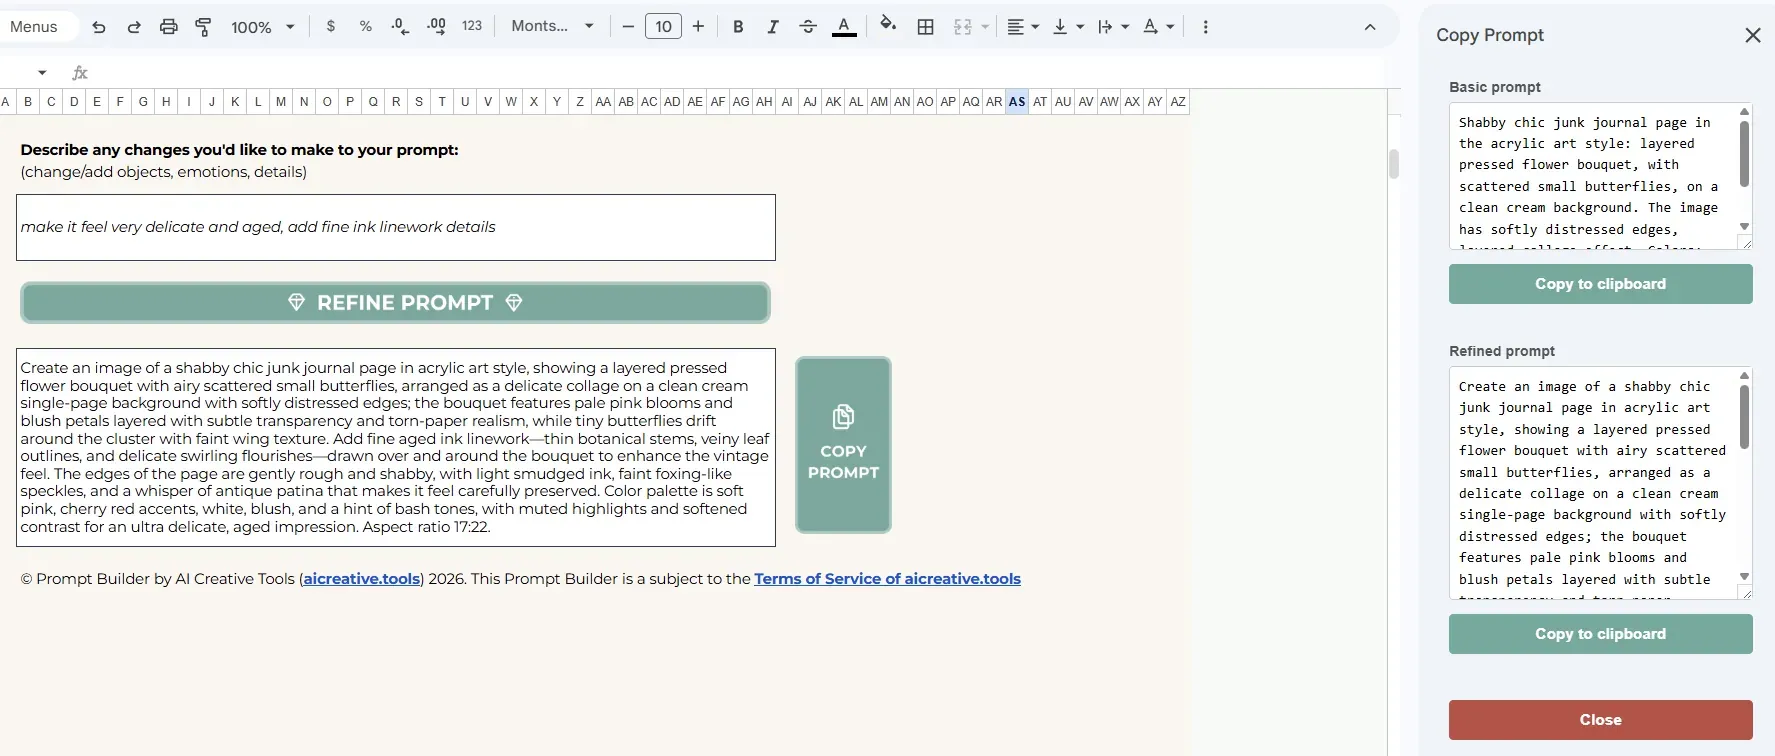
Refine and Copy your prompt
And here’s our outcome image from ChatGPT:
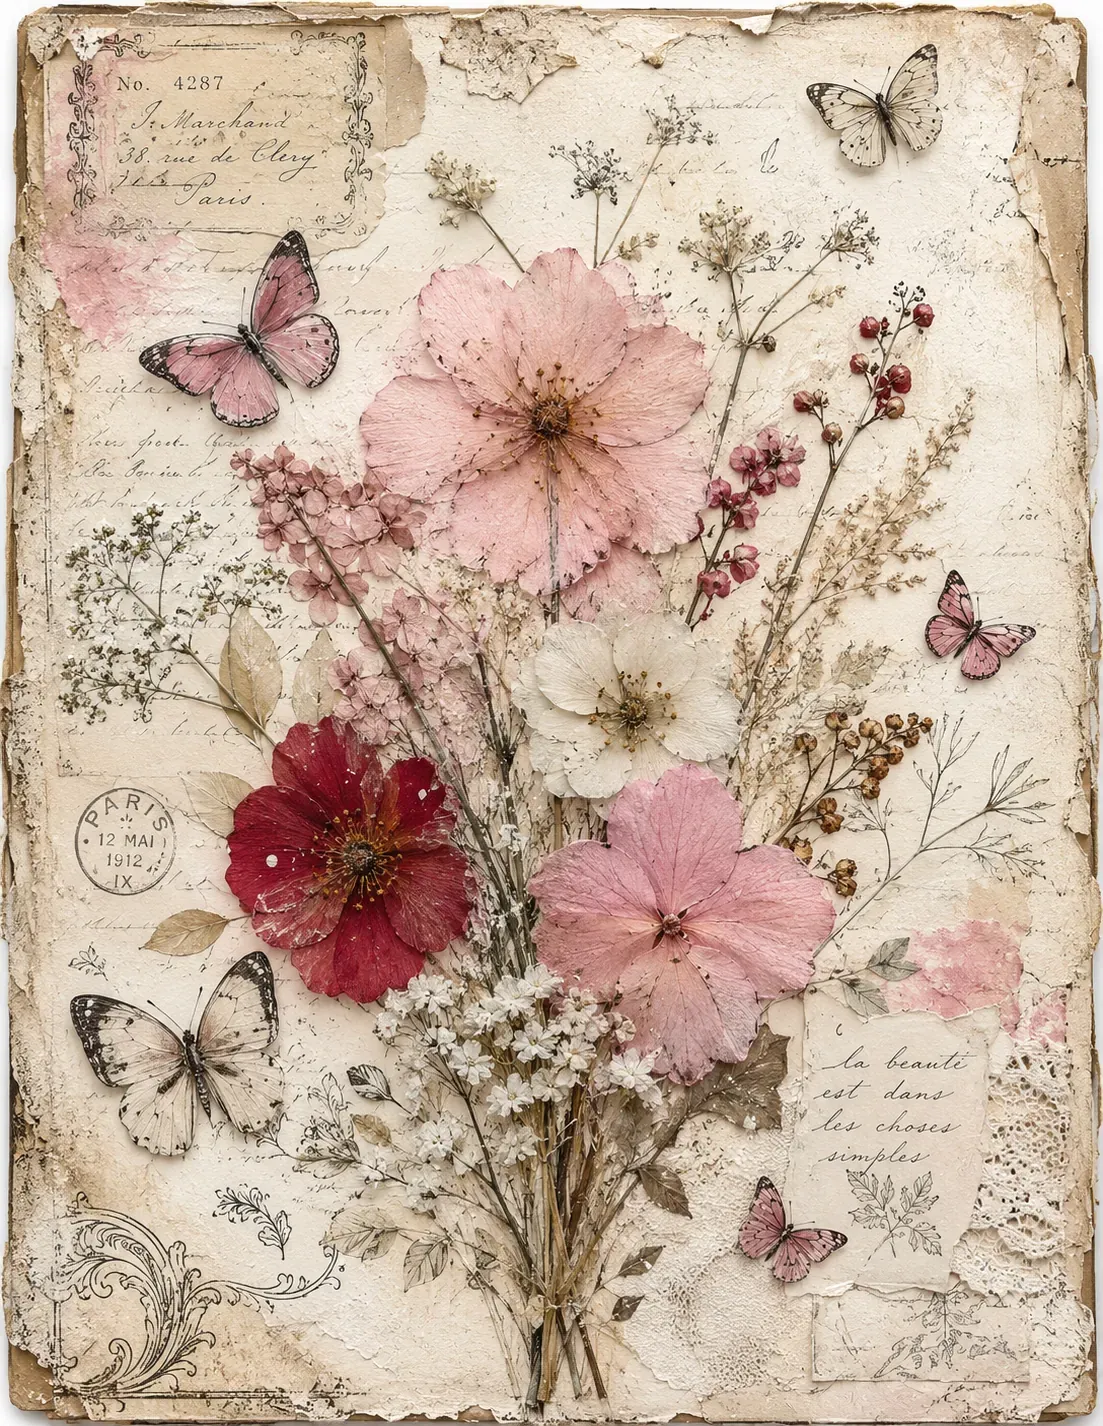
Outcome image for picking from dropdowns
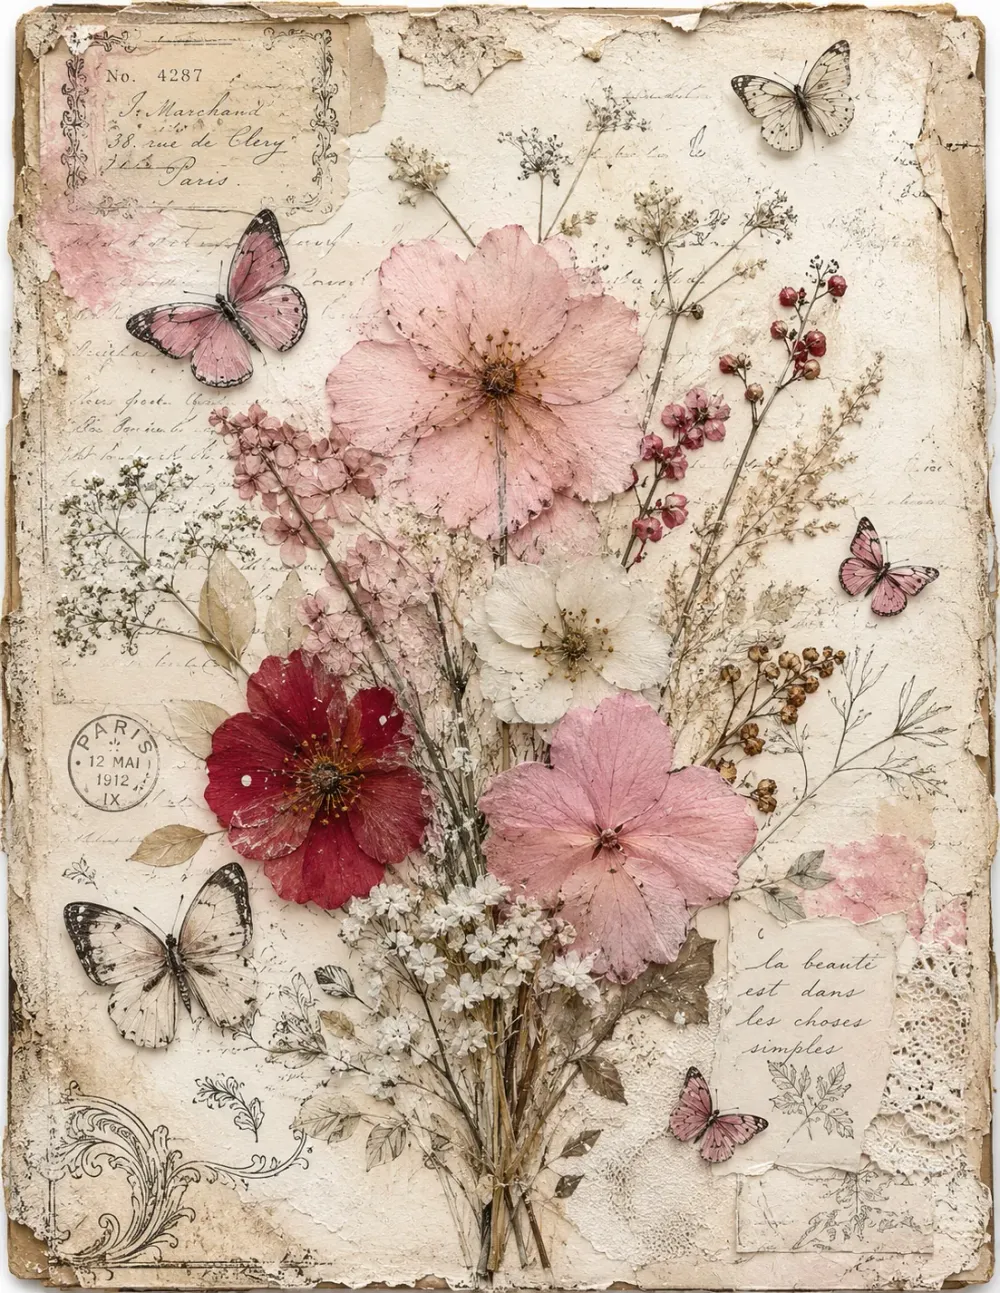
Workflow 2 - The Preset Start
Presets are ready-made dropdown configurations - a complete set of picks already chosen for you. There are 15 available, each built around a specific theme or style. Select one from the Preset dropdown within “Build from scratch” and the builder fills in automatically.
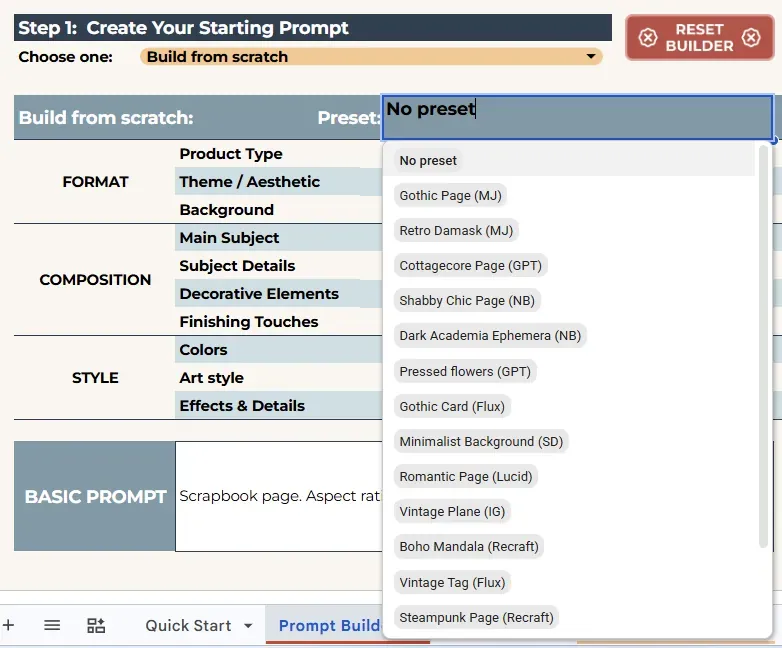
Preset dropdown open
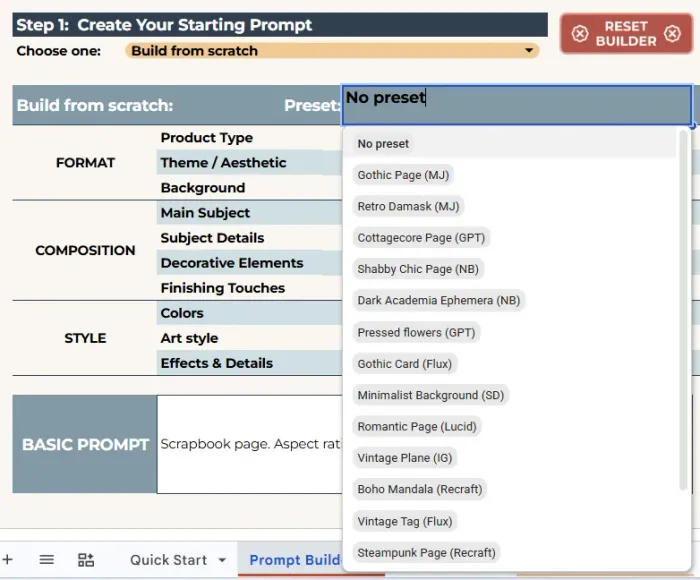
You can use the preset as is or adjust any dropdown you like. To go back to an empty builder, select No Preset or click Reset Builder.
Presets are designed to work well without the Describe any changes field - they’re already optimized as they are. You can still use it if you want to add something specific.
Preview preset outcomes in the Visual Examples sheet before committing - a quick way to find the right starting point for your project.
From here, pick your AI tool. For results closest to what you’ve seen in Visual Examples, use the recommended AI tool shown in brackets after the preset name - for example, (NB) stands for Nano Banana. Set parameters if needed, and click Refine Prompt.
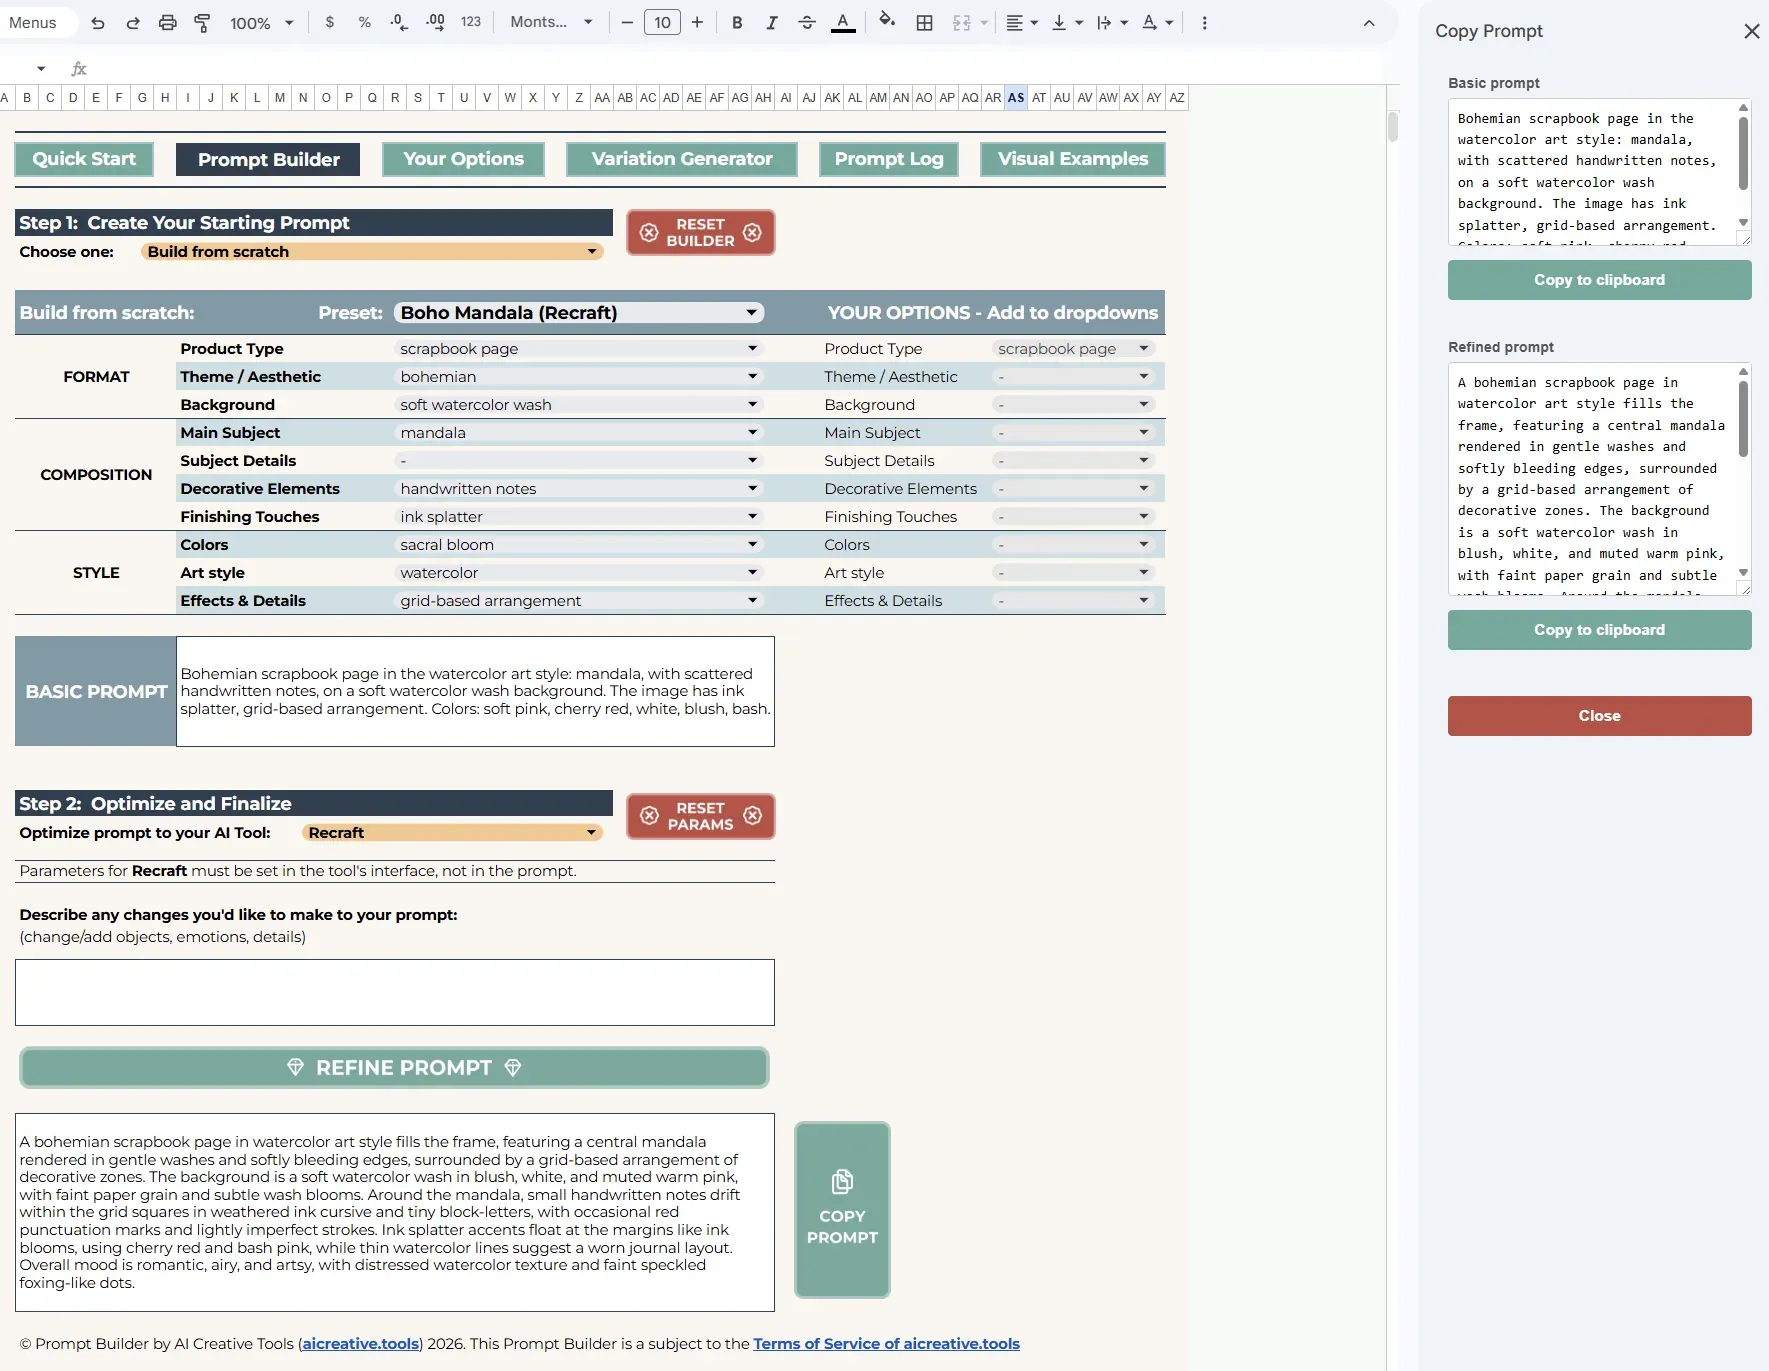
Builder filled with a preset
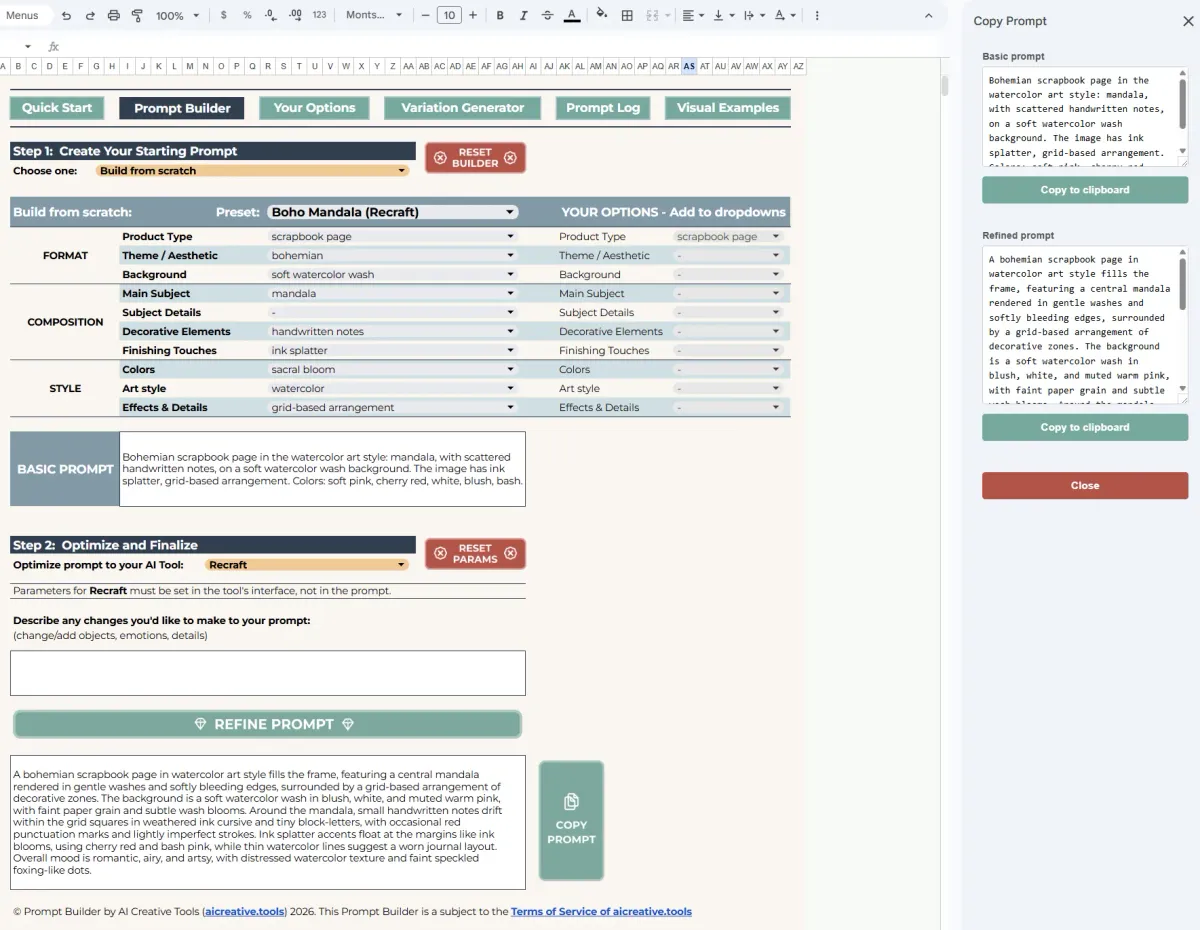
And here are the preset results:
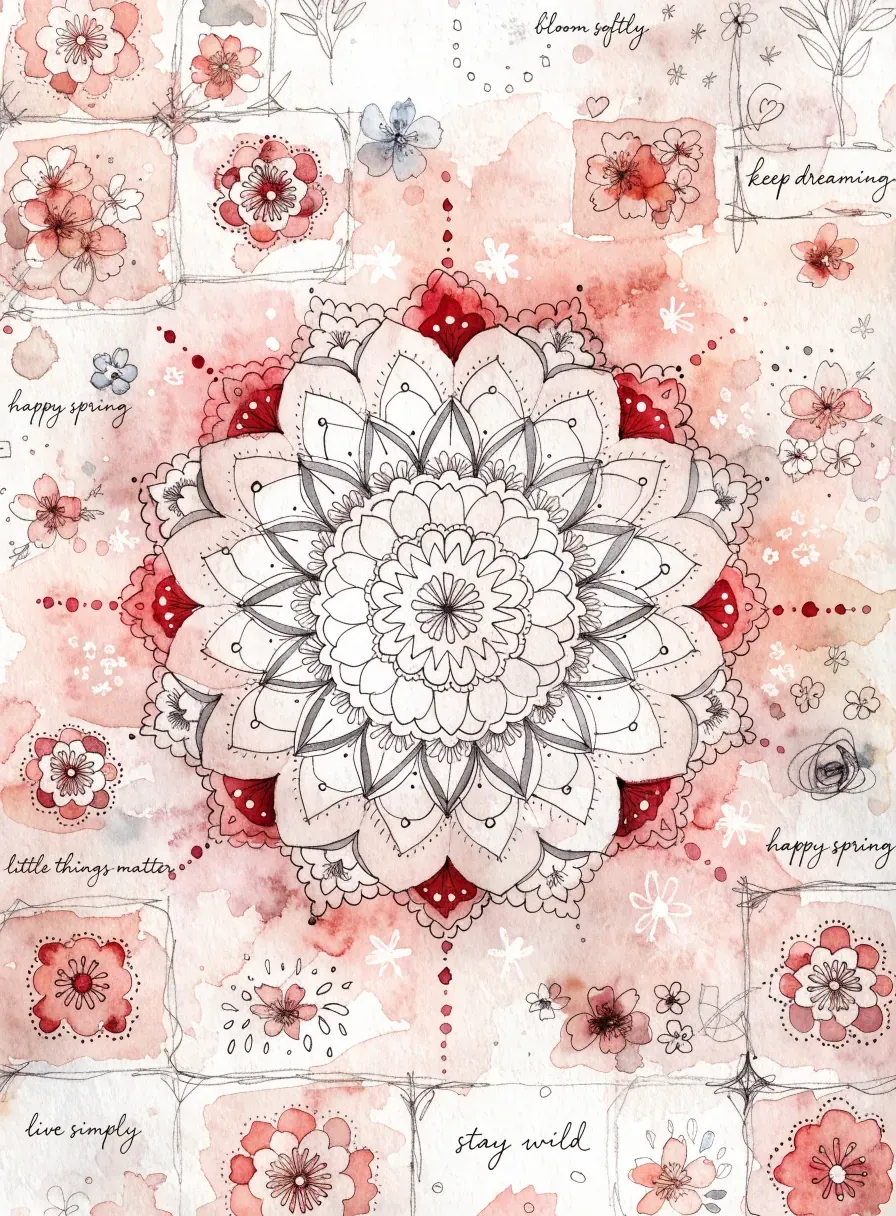
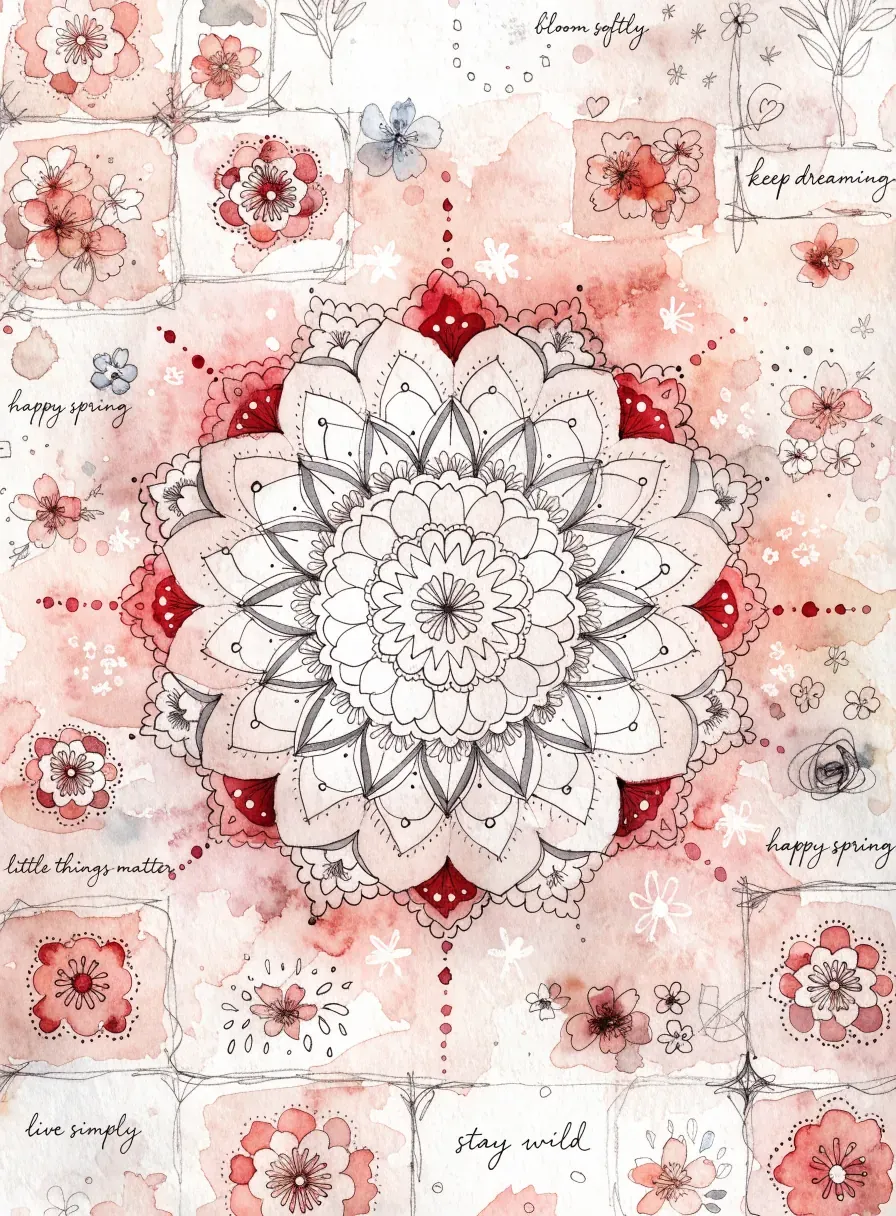
Outcome image for the Boho Mandala Preset
Workflow 3 - The Brain Dump
Sometimes you have a clear picture in your head and don’t want to browse through every dropdown to find the right options. In that case - pick the minimum and write everything else in plain language.
Our recommended minimum for Junk Journal is Product Type and Theme / Aesthetic. Everything else goes straight into the Describe any changes field - just write your ideas as they come, without worrying about prompt structure or terminology.
For example: a gothic scrapbook page with a lady’s silhouette in the center, a gothic castle in the background, crows and bats all around, purple and grayscale colors, watercolor and ink lines art style.
Pick your AI tool, set parameters if needed, and click Refine Prompt. The builder will turn your brain dump into a structured, optimized prompt.
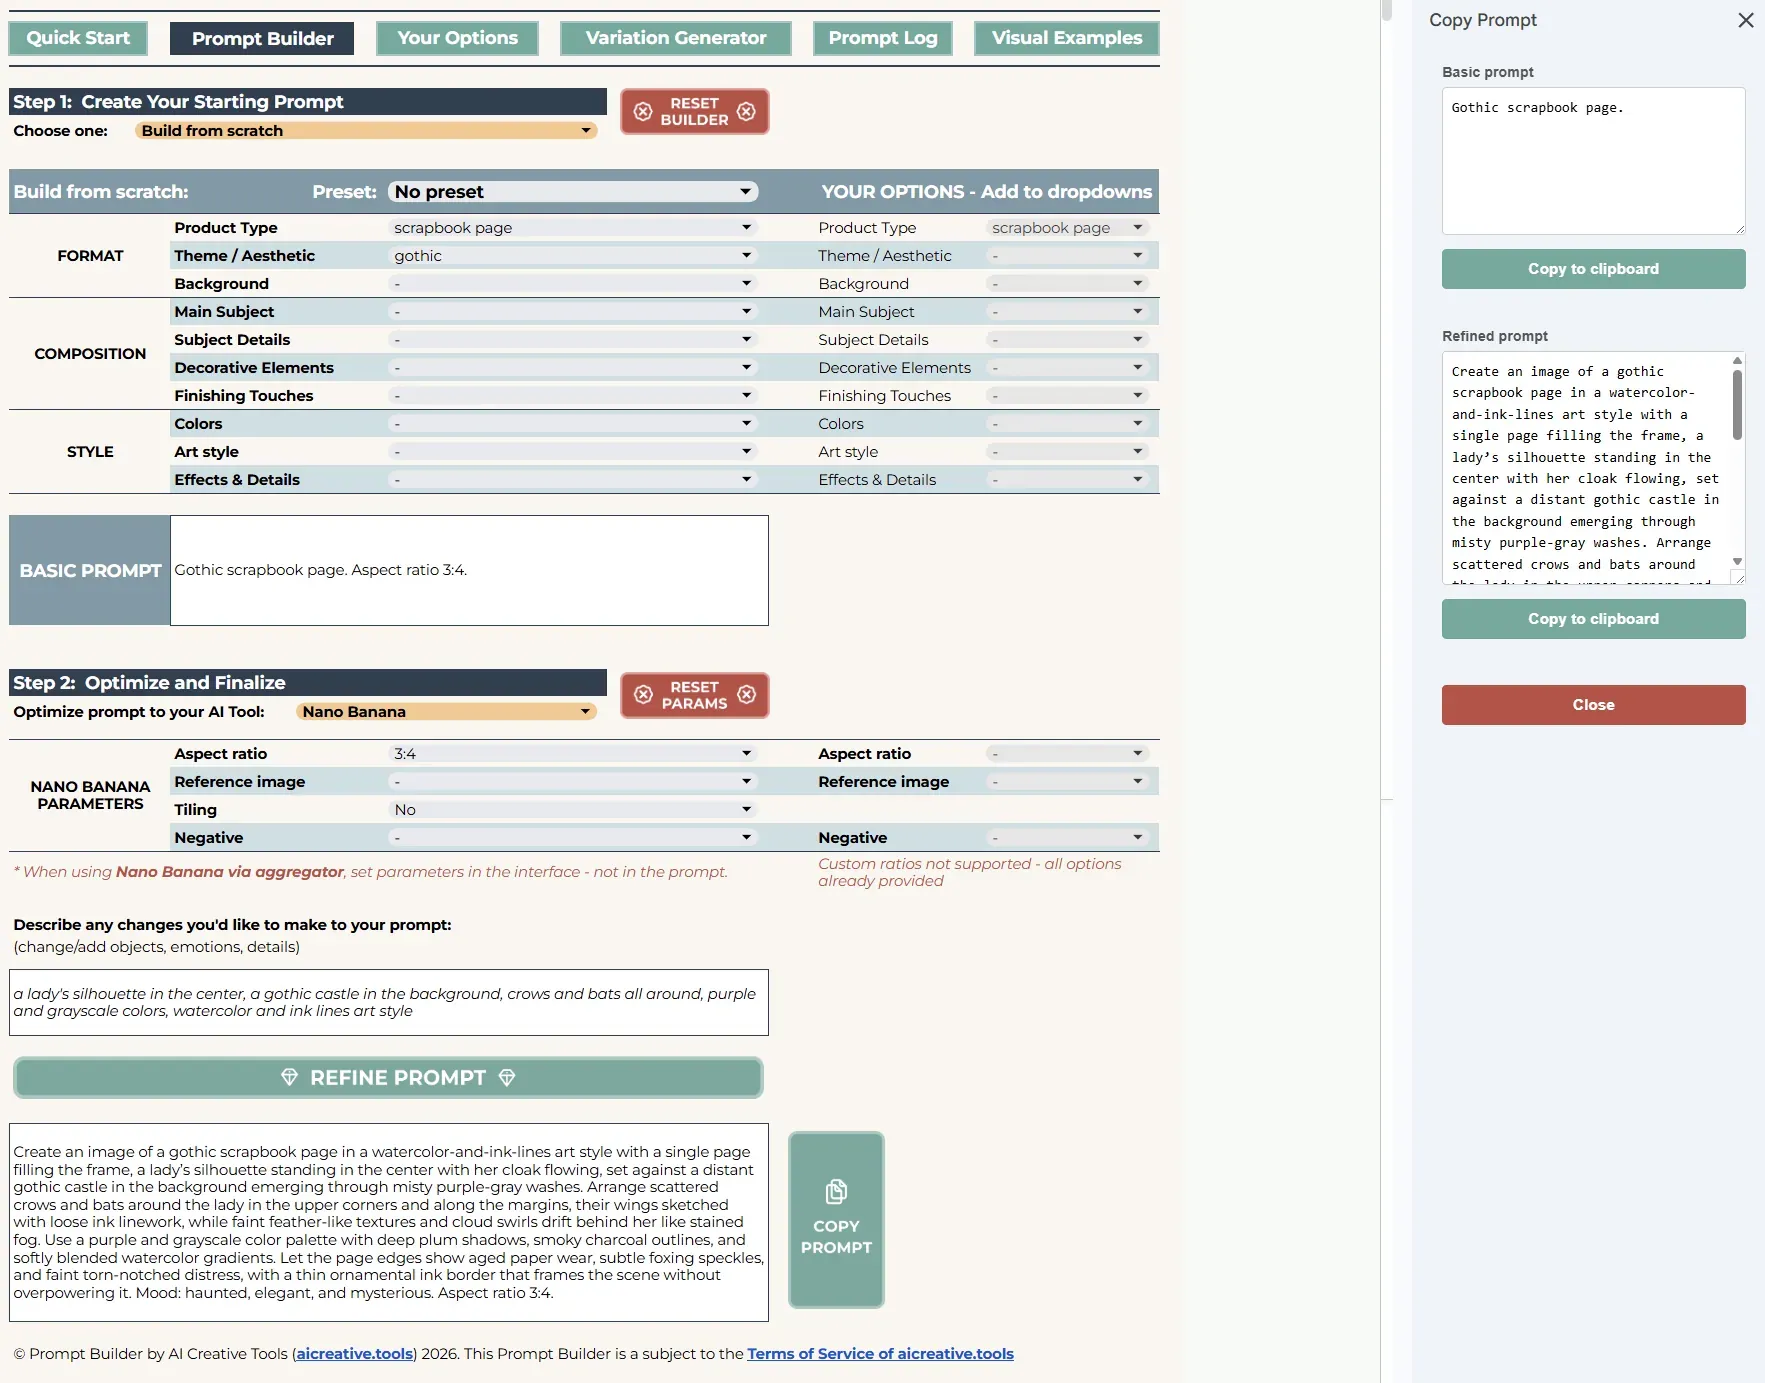
Builder filled for Brain Dump
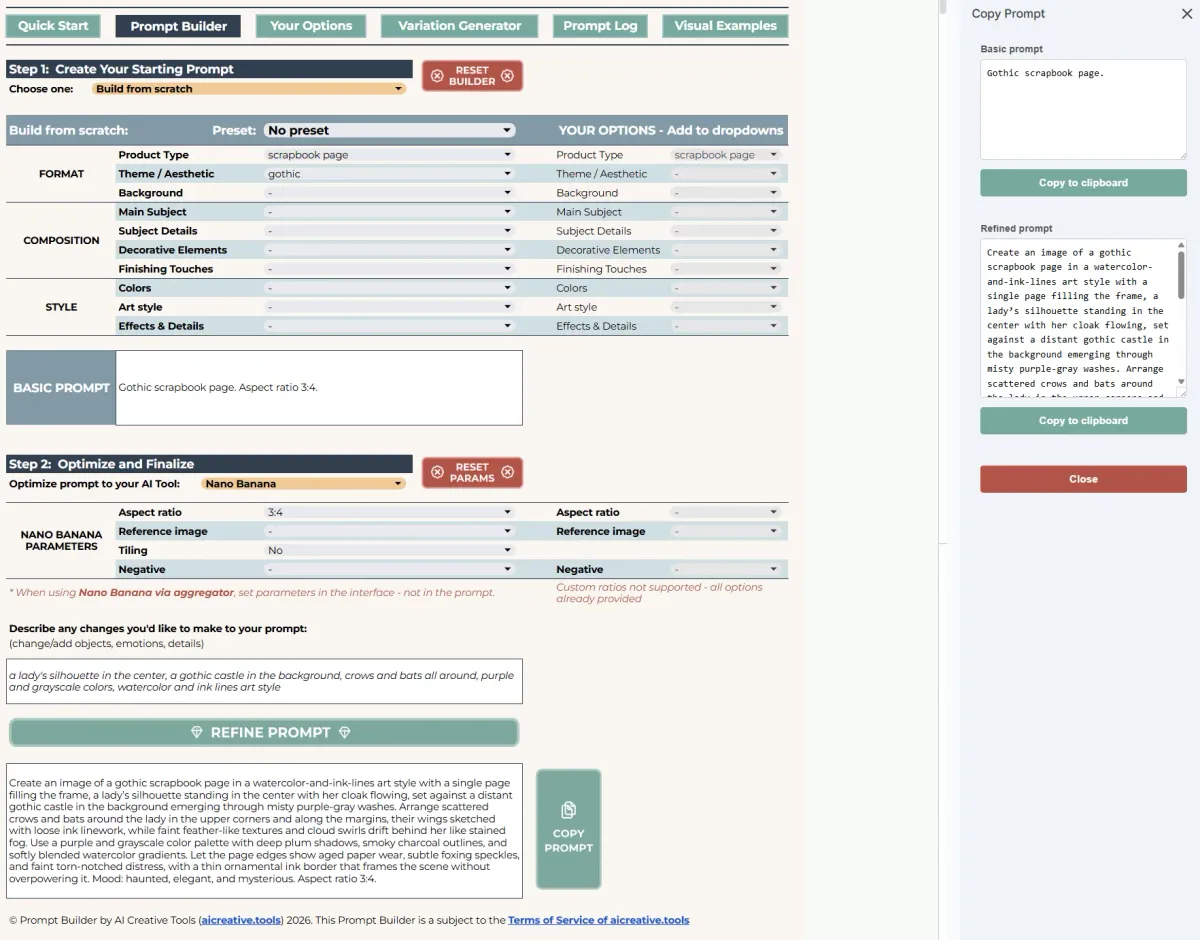
Here’s what this workflow produced:
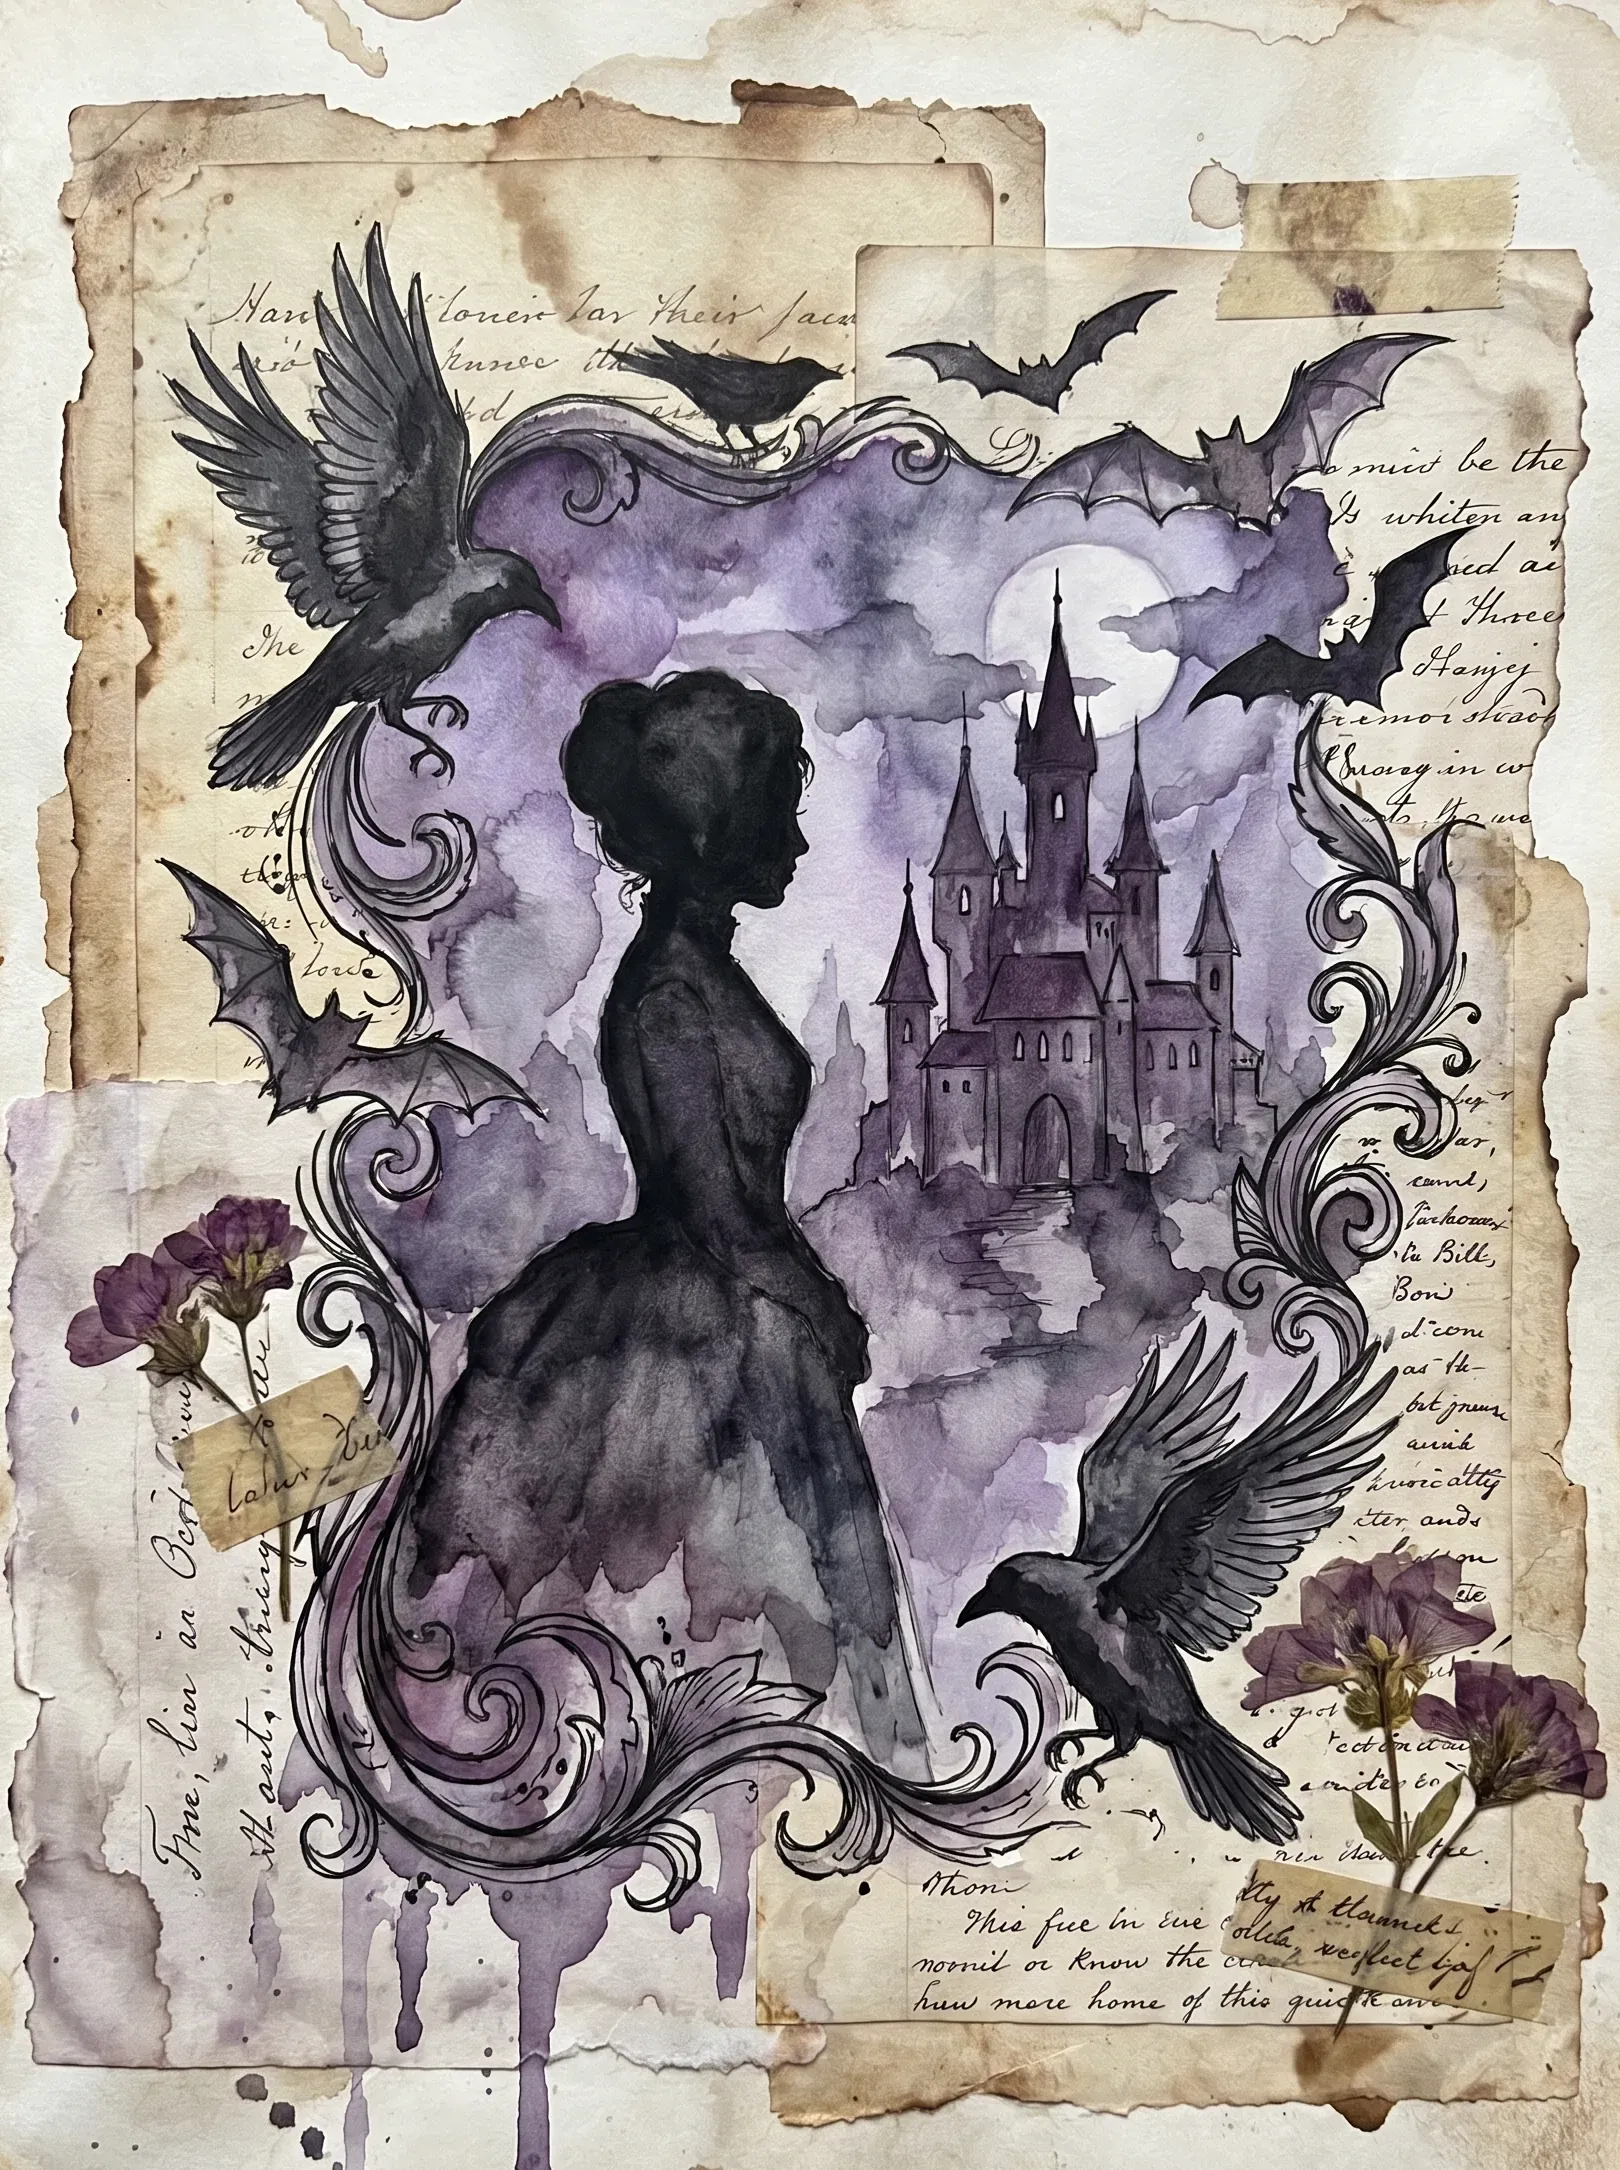
Outcome image for the gothic Brain Dump example
Workflow 4 - Customize the Dropdowns
The builder is fully customizable - you can populate any dropdown with your own terms. There are two ways to do this depending on how much you want to customize.
Your Options column (right side of the Prompt Builder sheet) is the quick option. Click on the dropdown, then on the pen icon, then type your term and select it from this dropdown. Now you are able to select it from the main corresponding dropdown - it appears instantly at the top. Perfect for individual tweaks and testing new ideas.
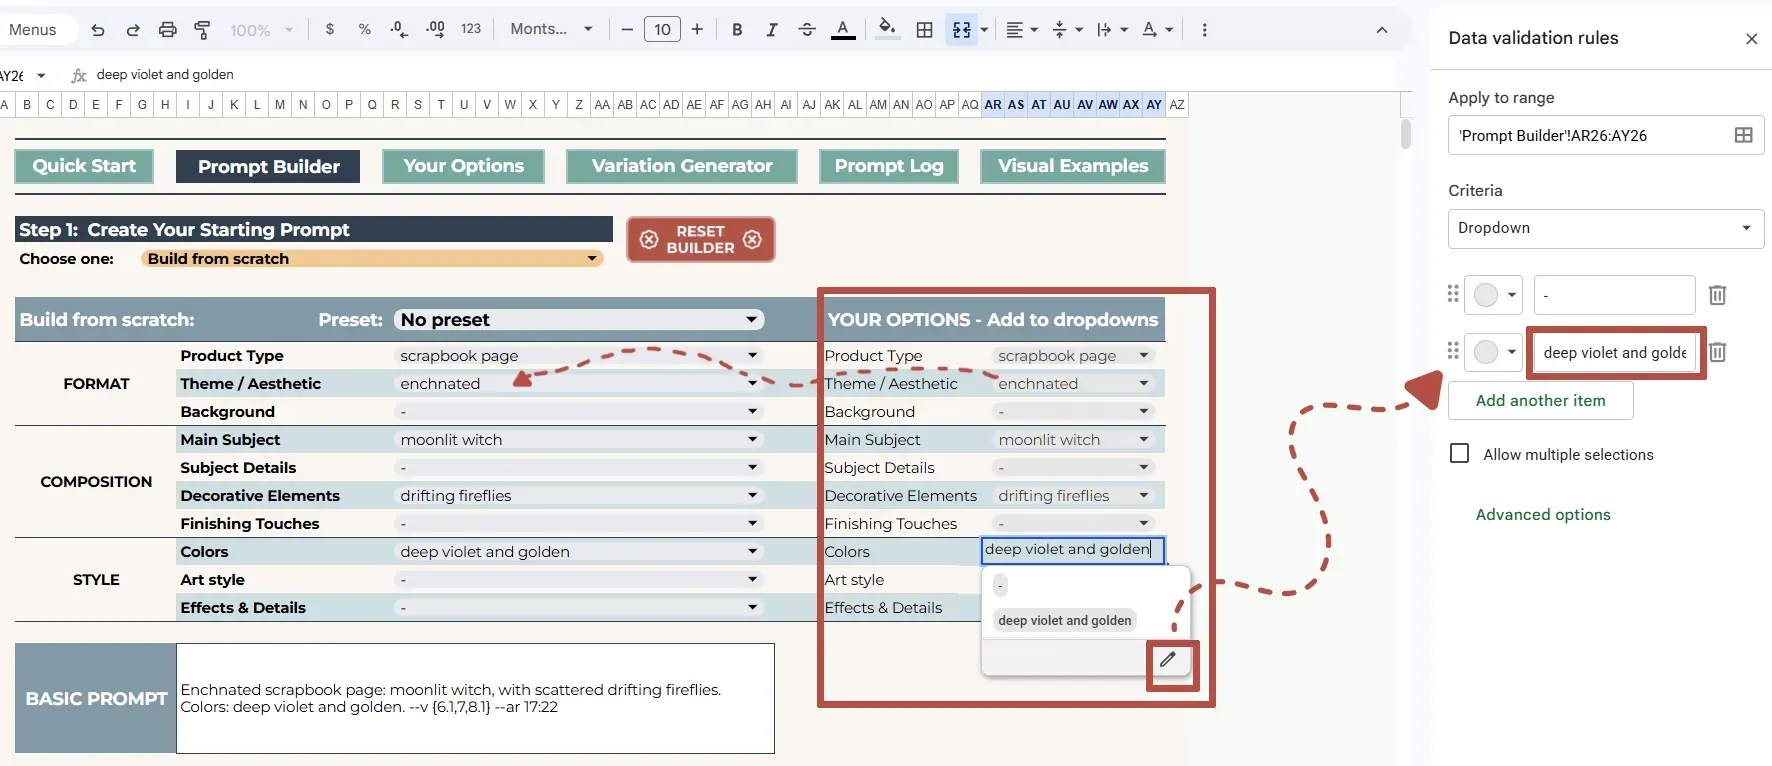
Your Options column
Your Options sheet is for more serious customization - adding many terms at once, keeping everything organized, and having a backup ready when you need to make a new copy. It supports up to 100 options per dropdown.
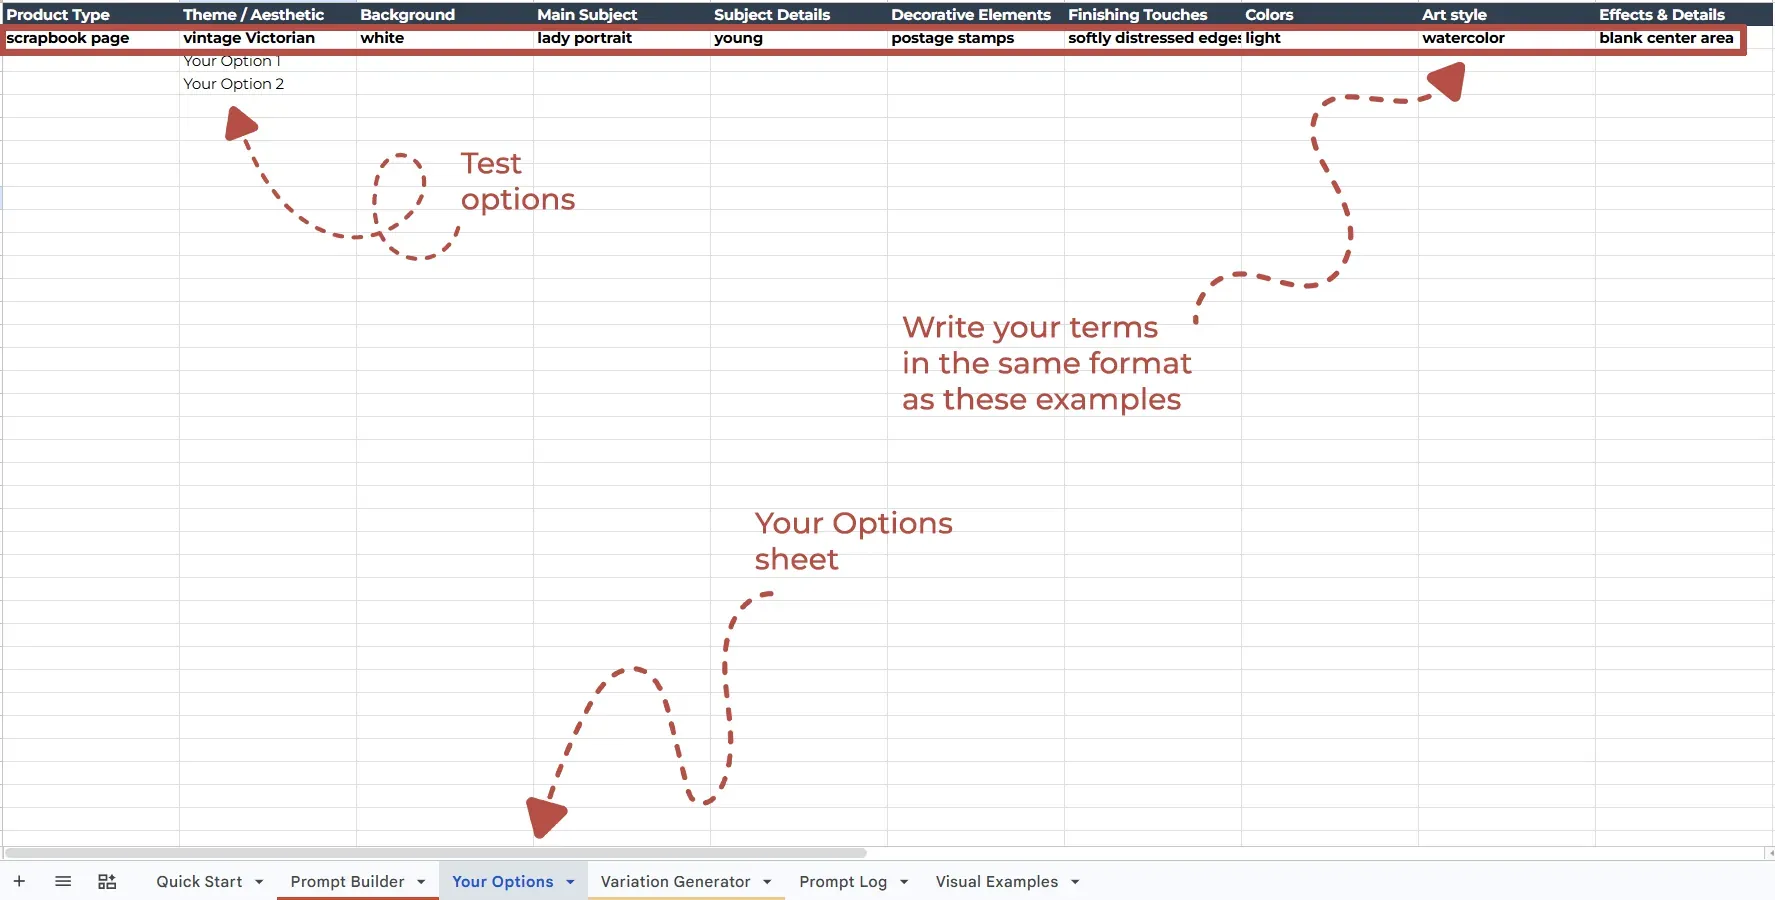
Your Options sheet
The sheet shows the same dropdowns as the builder, presented as columns. The bold row at the top of each column shows formatting examples - use these as a reference when adding your own terms. The formatting rule is simple: write just the term itself, nothing extra: “watercolor” - not “in watercolor style”, “deep violet and golden” - not “colors of deep violet and golden”. The builder knows where each term belongs. This applies to the Your Options column on the Prompt Builder sheet as well.
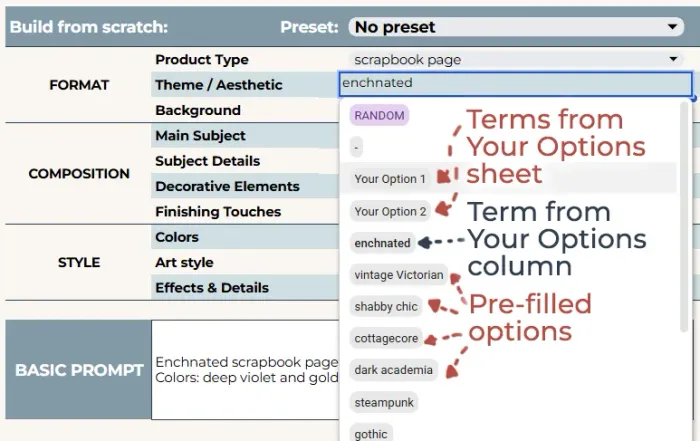
In the dropdowns on the Prompt Builder sheet, your terms always appear first - Your Options sheet terms come before Your Options column terms, which come before the pre-filled options.
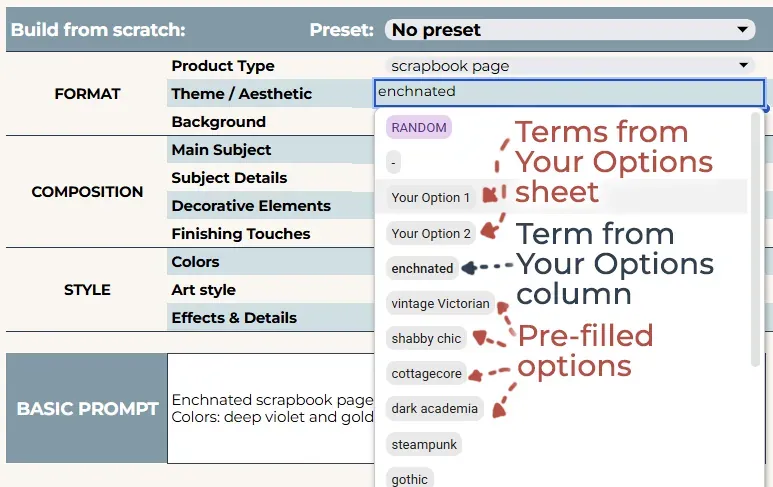
Dropdown populated with your options
Your Options work for parameters too - add your frequently used parameter values the same way.
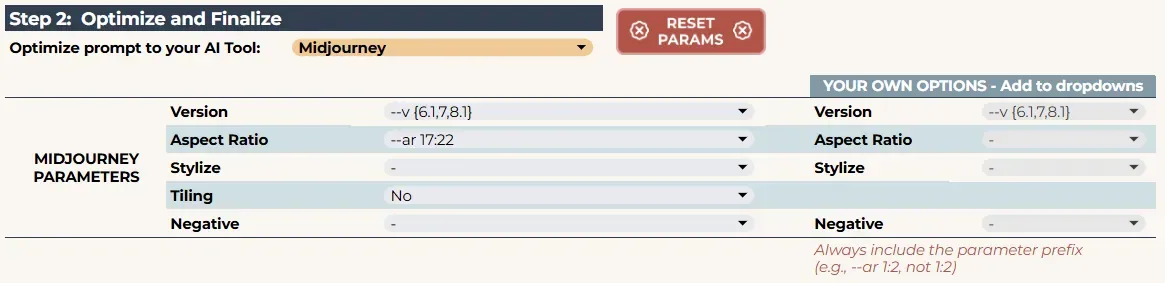
Parameters with your options
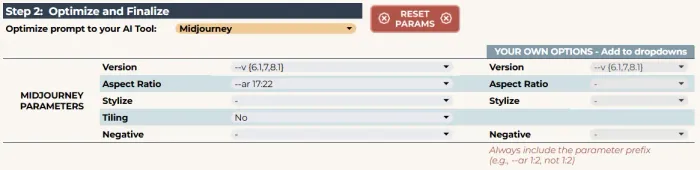
Your Options always stay untouched when you use Reset Builder or Reset Params - they can only be removed manually.
Pick your AI tool, set parameters, and click Refine Prompt as usual.
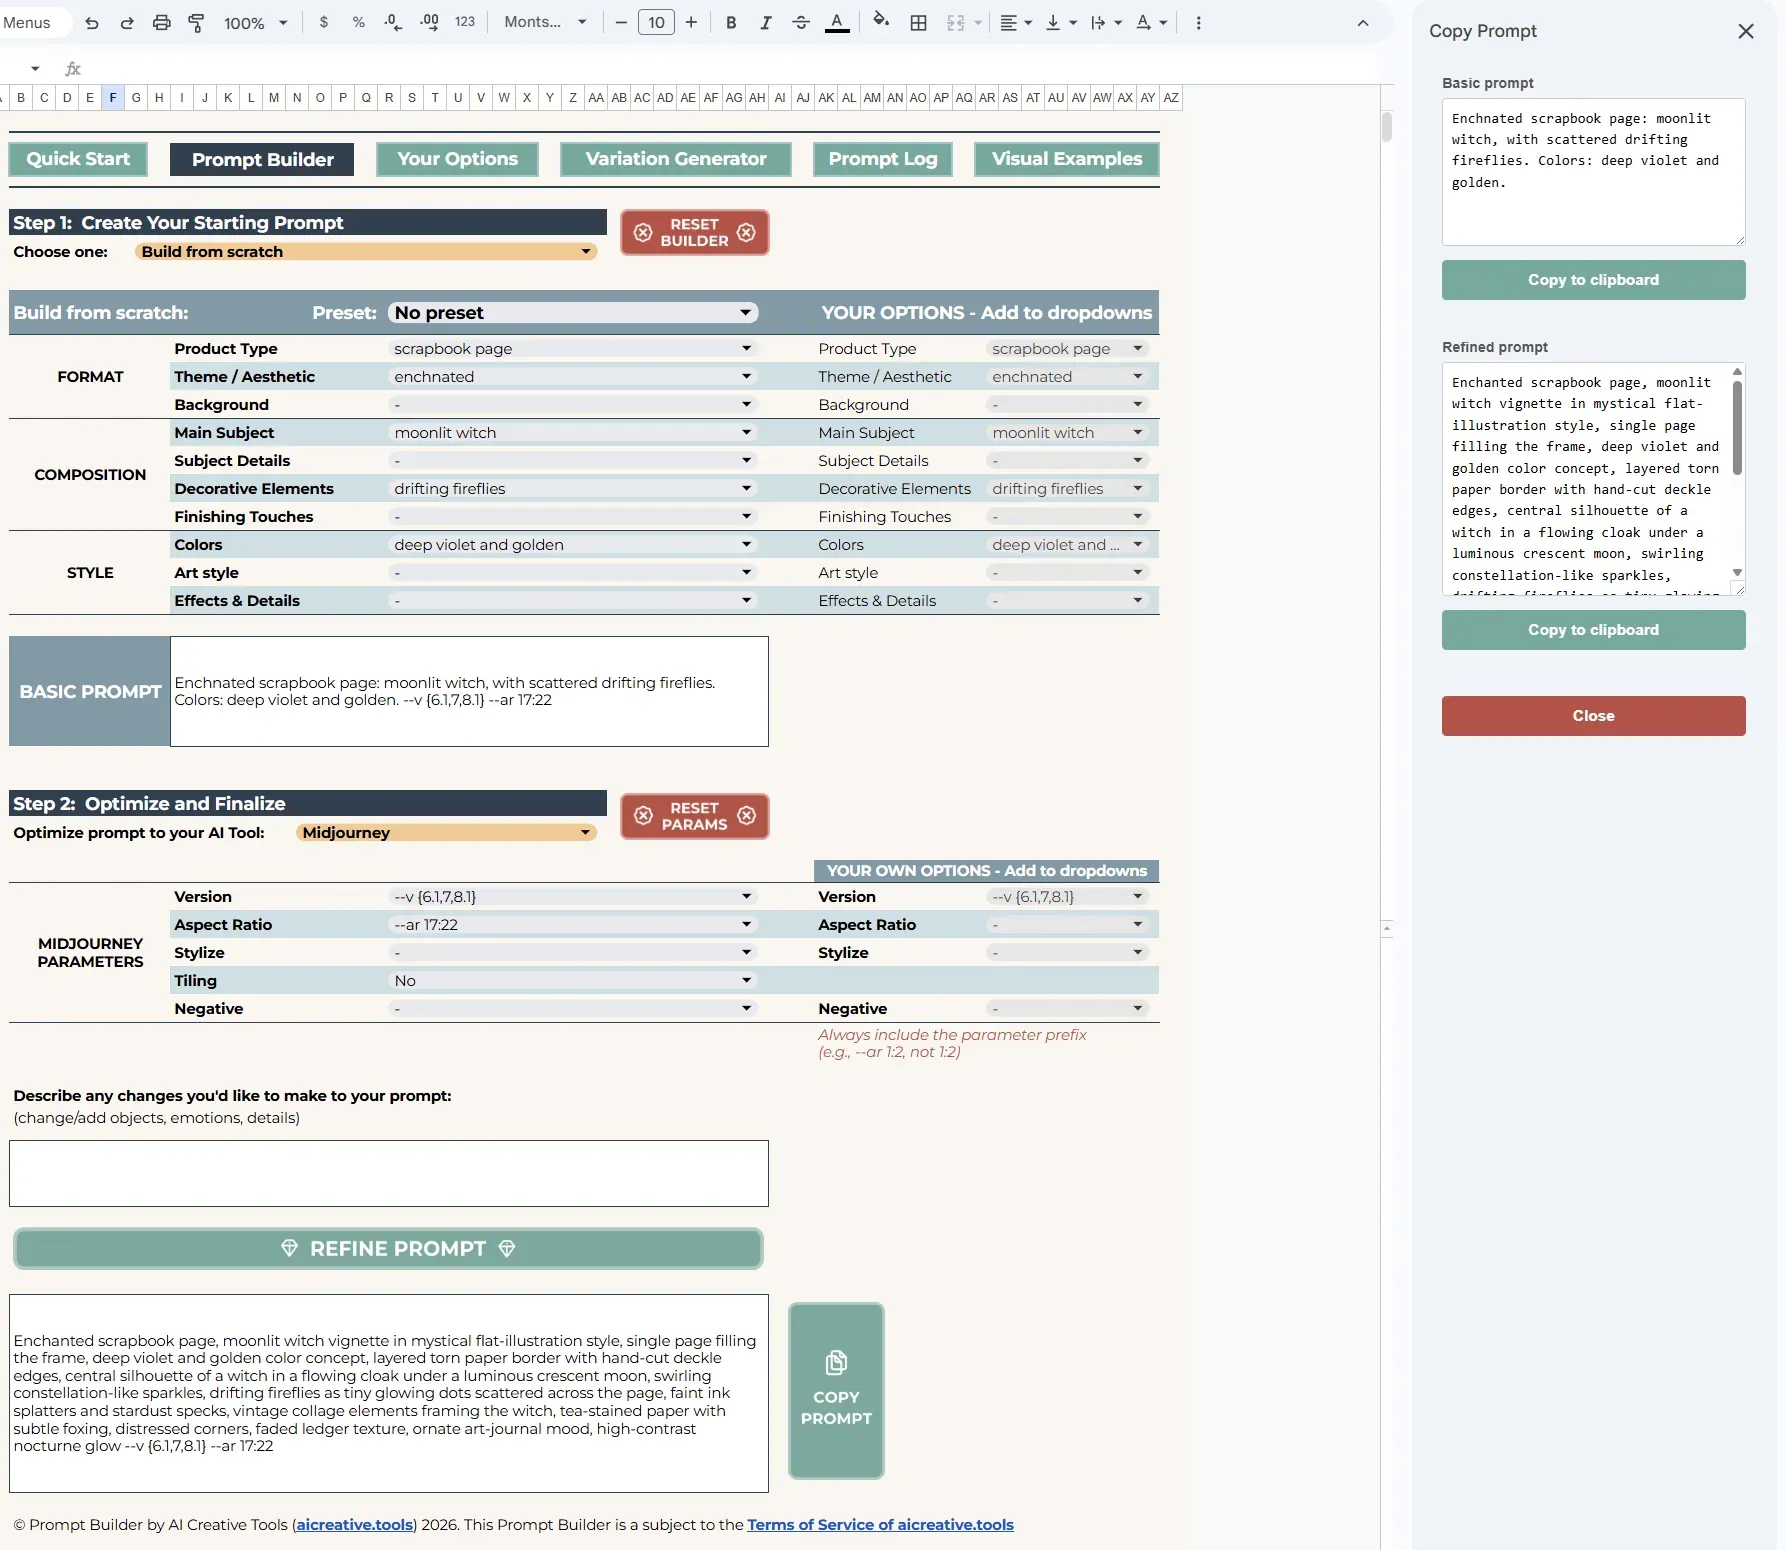
Builder filled with your options
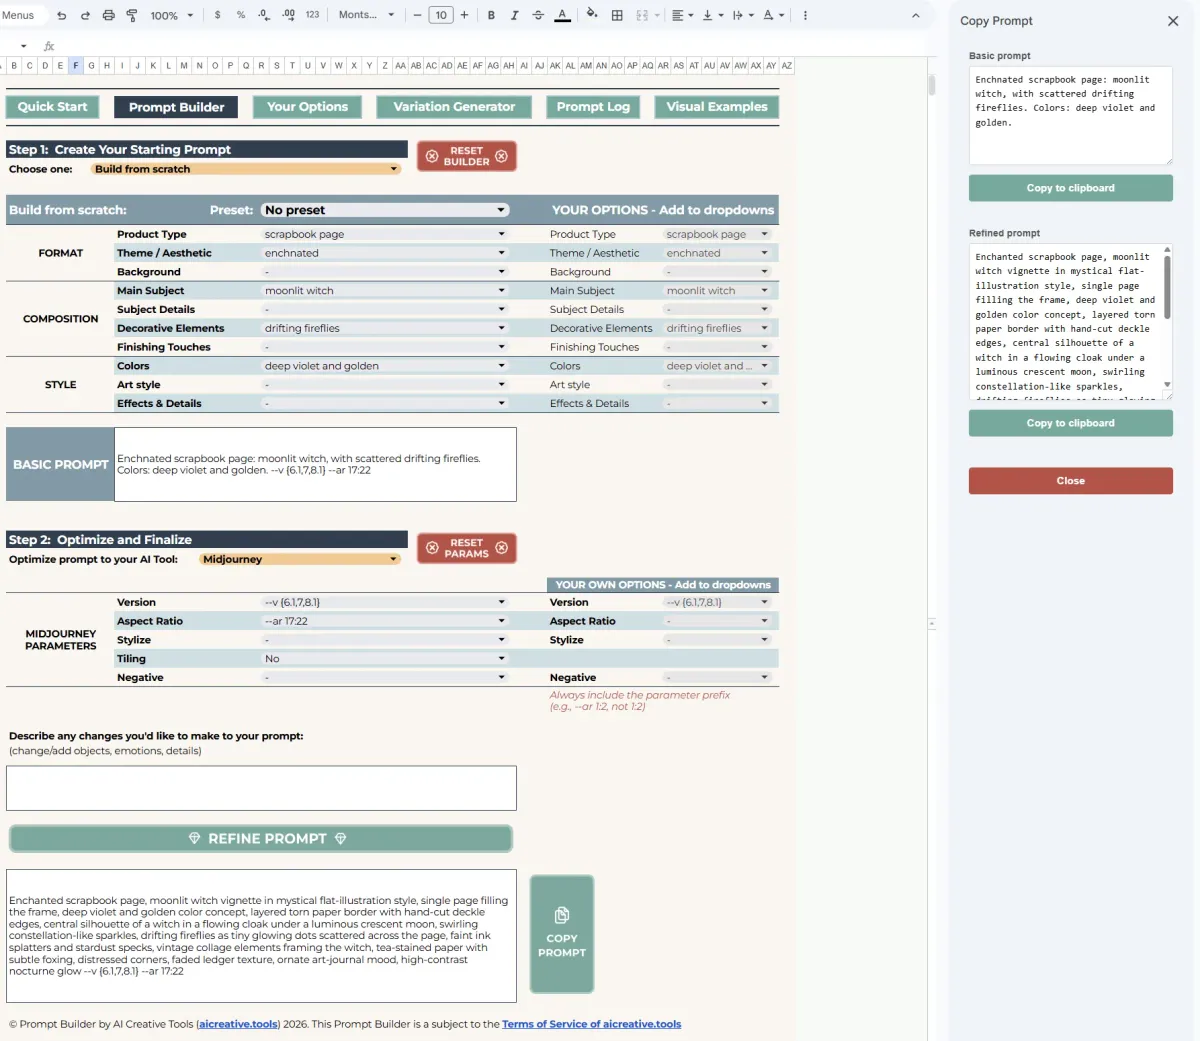
Here’s what this workflow produced:

Outcome image for Your Options example

Workflow 5 - Starting with Your Own Prompt
Select “Use my own prompt” in Step 1 and a text field appears where you can paste any existing prompt. There are a few situations where this workflow comes in handy.
1) Recreating an image you like
Drop the image into any text AI - ChatGPT, Gemini, or Claude - and ask it to describe the image as a prompt. Paste the result into the Your Prompt field.
At this point the prompt exists but isn’t optimized for any specific AI tool. Your text AI will do its best, but it doesn’t know the optimal structure, terminology, or length for each tool - that’s what our Refine Prompt is built for. Pick your AI tool, adjust parameters if needed and click Refine Prompt.
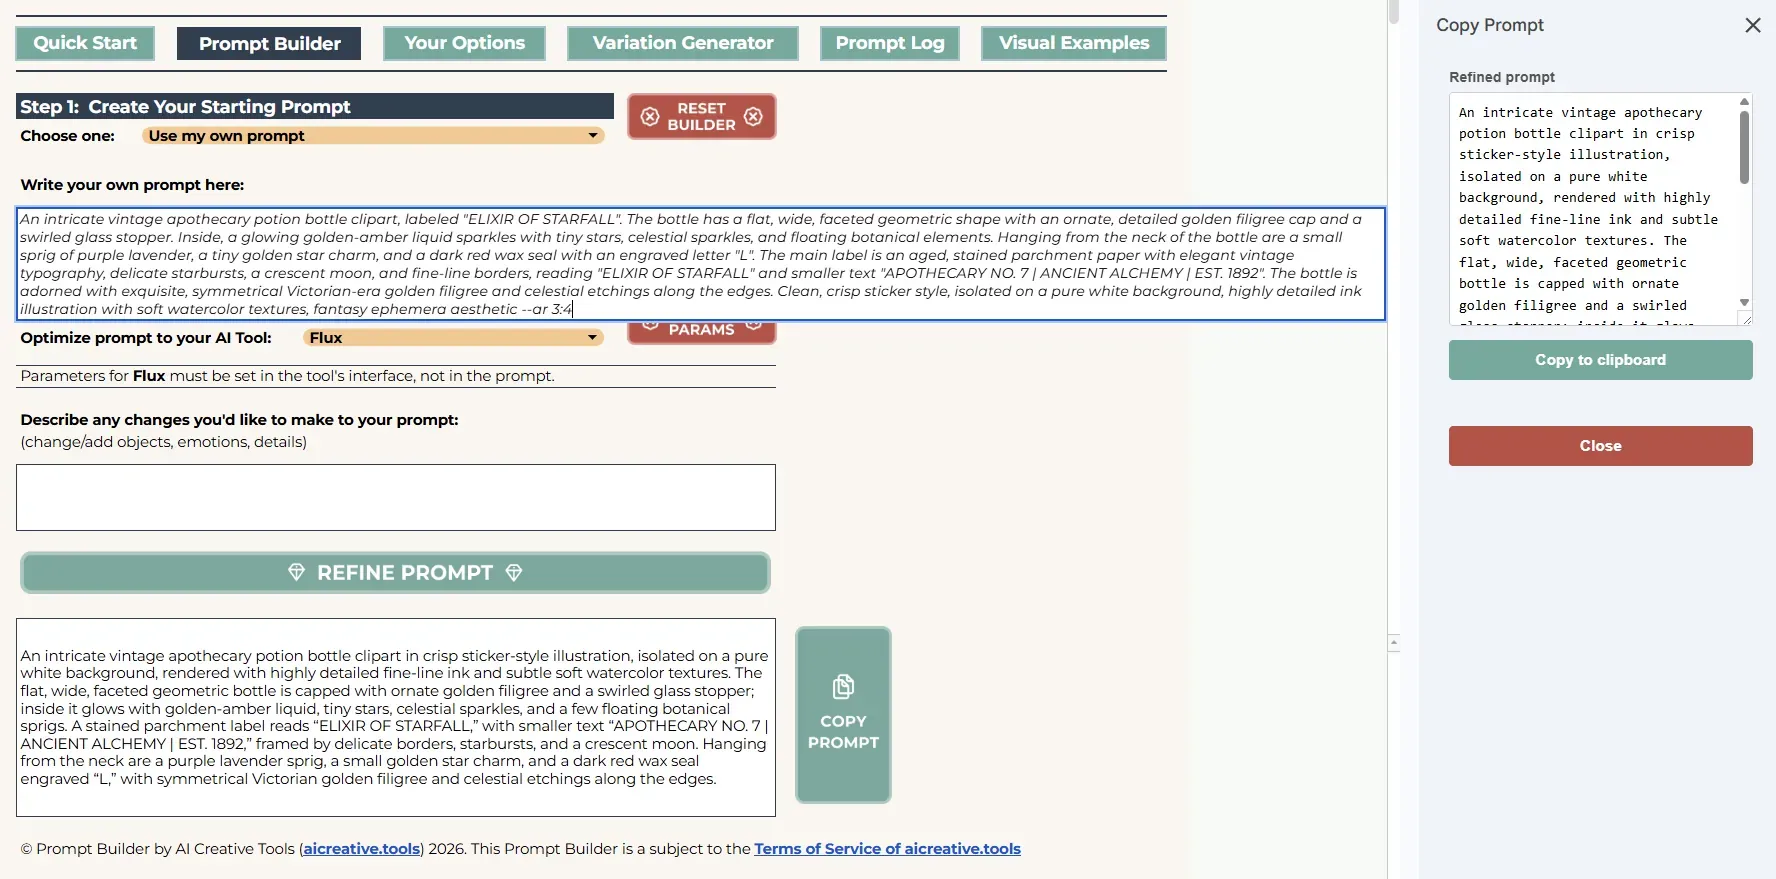
Typical Recreate workflow
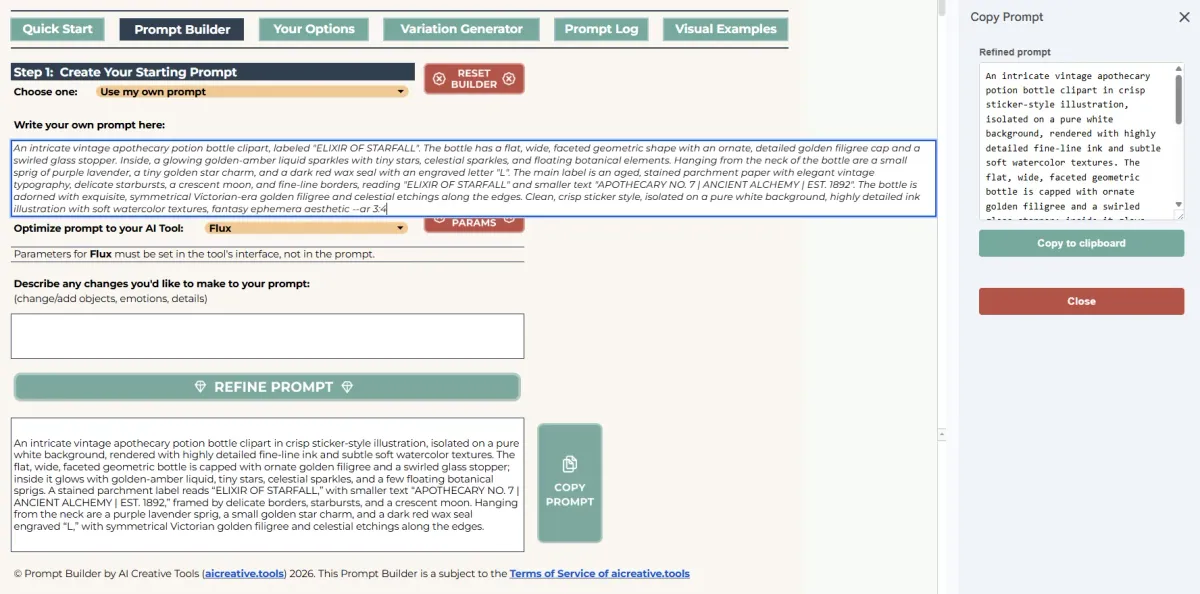
If the result alone doesn’t get you close enough to the original, attach the original image as a reference in your AI tool - most tools support this and it can make a significant difference.

Original image

Outcome (no reference image)

Outcome (using reference image)



2) Modifying as you go
Once you have your first result, you can keep iterating. Use the Describe any changes field to transform the prompt - change the subject, shift the colors, modify the composition - and refine again. Using your previous generated image as a reference helps keep the style consistent across variations.
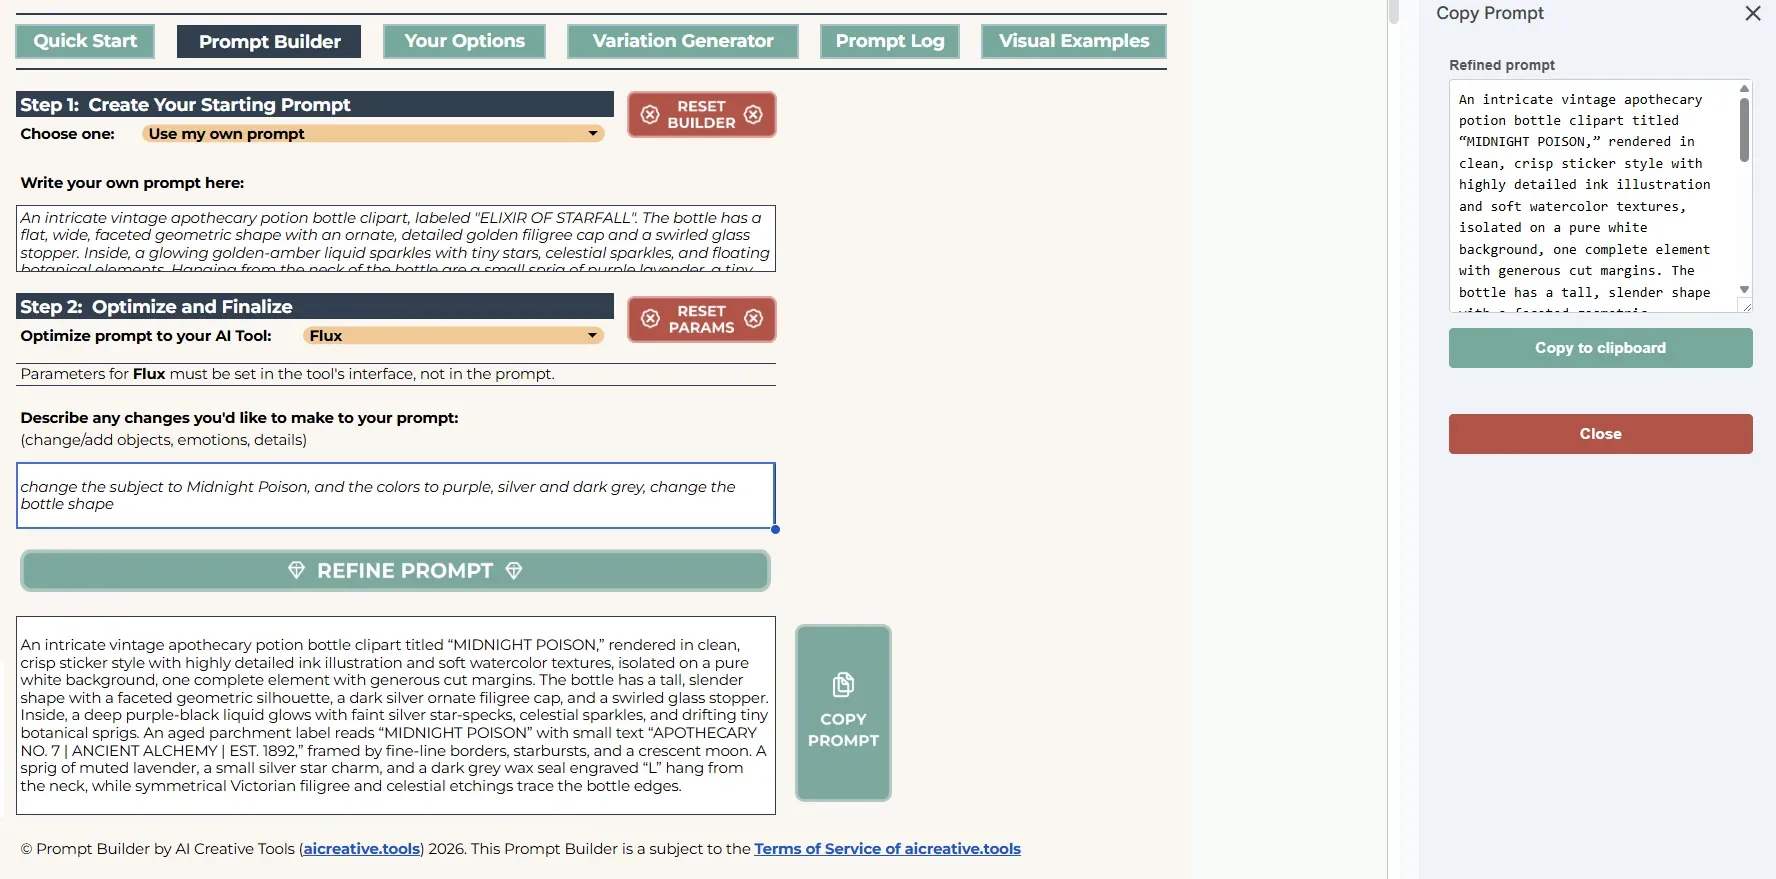
Recreate with modifications workflow
Continuing from the Prompt Log
Any prompt saved in your Prompt Log can be pasted here to continue working with it - refining it further or taking it straight to the Variation Generator to build a collection.
Here’s what this workflow produced:

Original image

Outcome (no reference image)

Outcome (using reference image)



Variation Generator
Once you have a prompt you like, the Variation Generator lets you multiply it into a collection - or explore completely different directions from the same starting point.
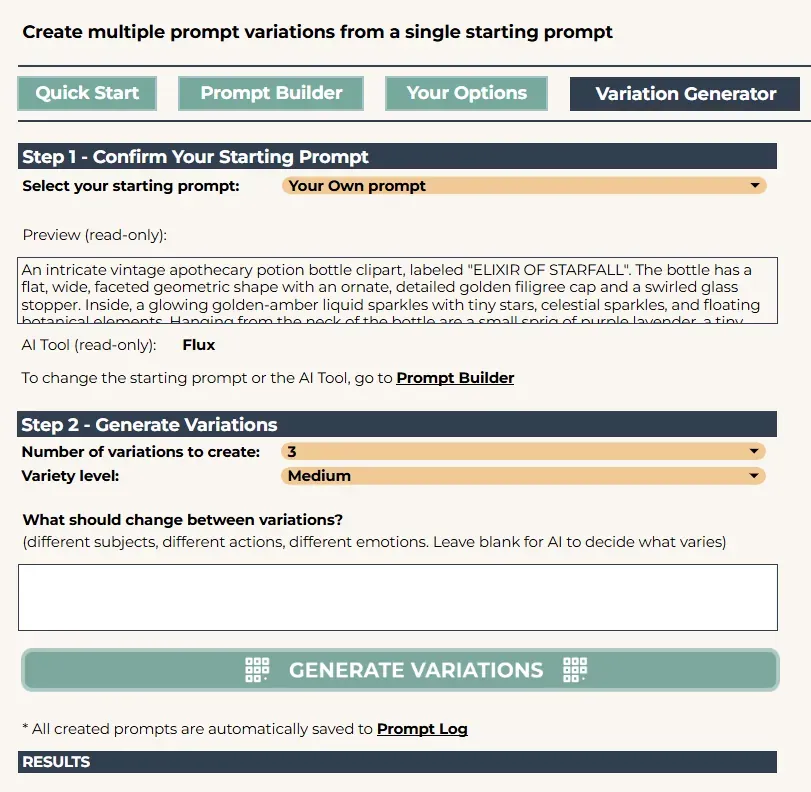
Variation Generator overview
Step 1 - Confirm Your Starting Prompt
Select which prompt you want to work with: Refined Prompt, Basic Prompt, or Own Prompt. The selected prompt and AI tool appear below as a read-only preview.
If you want to switch to a different prompt or change the AI tool, go back to the Prompt Builder sheet and make your changes there.
Step 2 - Set Up Your Variations
First, choose how many variations you want - up to 20 at a time. Then pick your Variety Level. This controls how much changes between variations:
- Light - only subjects change. Everything else stays consistent. Perfect for cohesive collections where all images feel like they belong together.
- Medium - main subject, secondary subjects, and color palette all change. A sweet spot for bigger collections or when you want to explore different directions without going too wild.
- High - main subject, secondary subjects, color palette, art style, and theme all change. Only the product type stays the same. This one is for real experiments - results can get very diverse.
What should change between variations
This field works just like the Describe any changes field in the Prompt Builder - plain language, your own words. It overrides the variety level defaults and lets you get very specific. For example:
- “change the subjects but keep everything in a Christmas theme”
- “change subjects to cute ballerina, funky skateboarder, mischievous fashionista”
- “don’t change the subject - only change the background and surrounding elements”
Leave it empty and the variety level handles everything automatically.
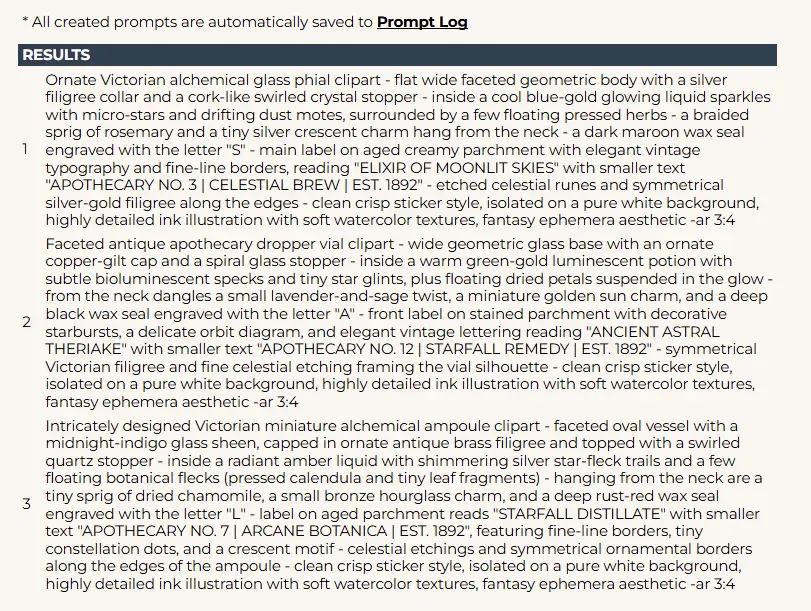
Click Generate Variations. Results appear below the button and are automatically saved to your Prompt Log.
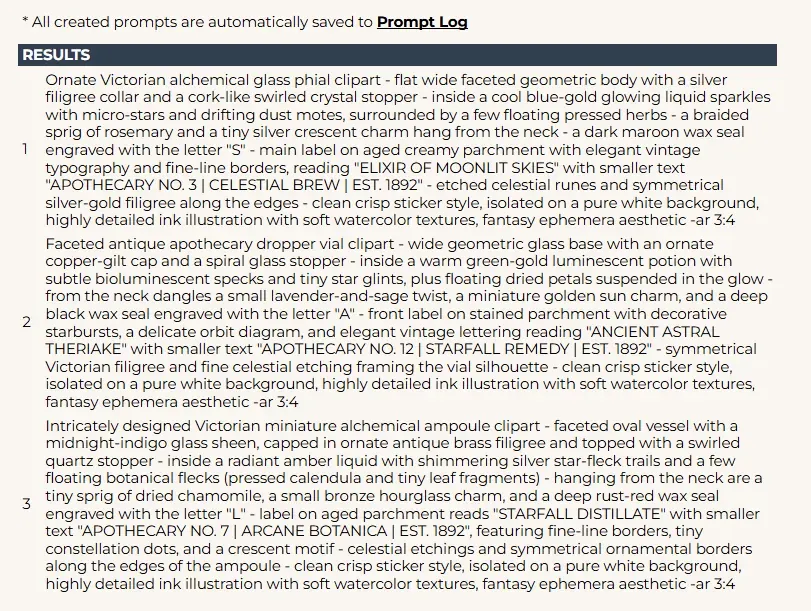
Variation Generator results
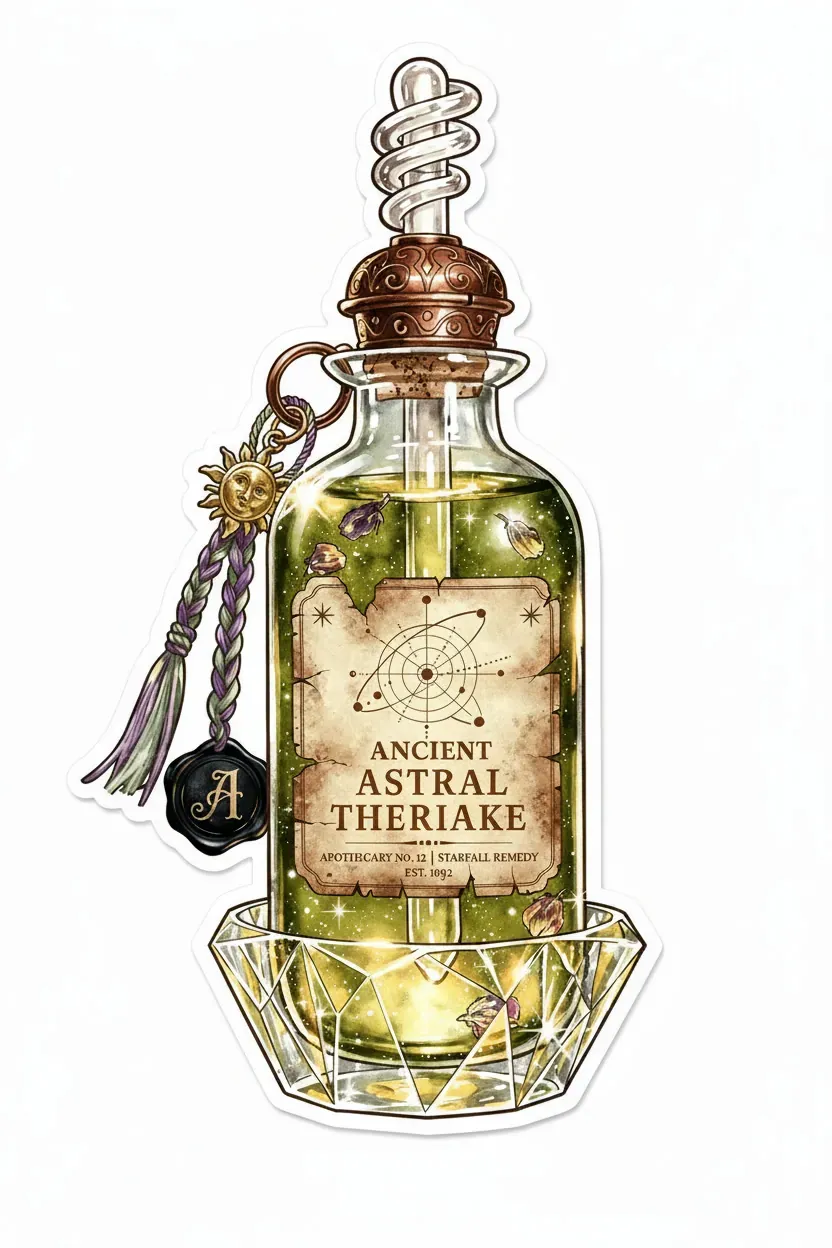
Here’s what these settings produced (with High variety and no instructions):

Original

Variation 1
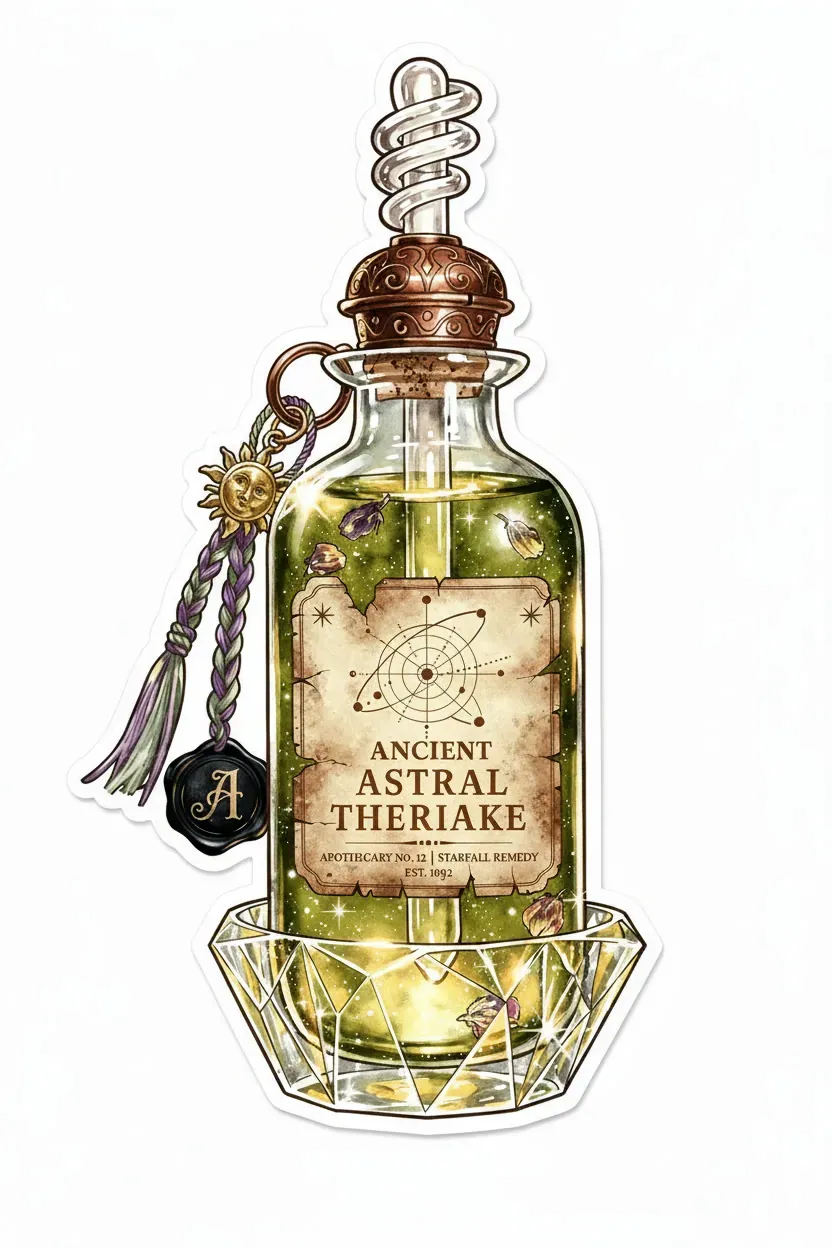
Variation 2

Variation 3



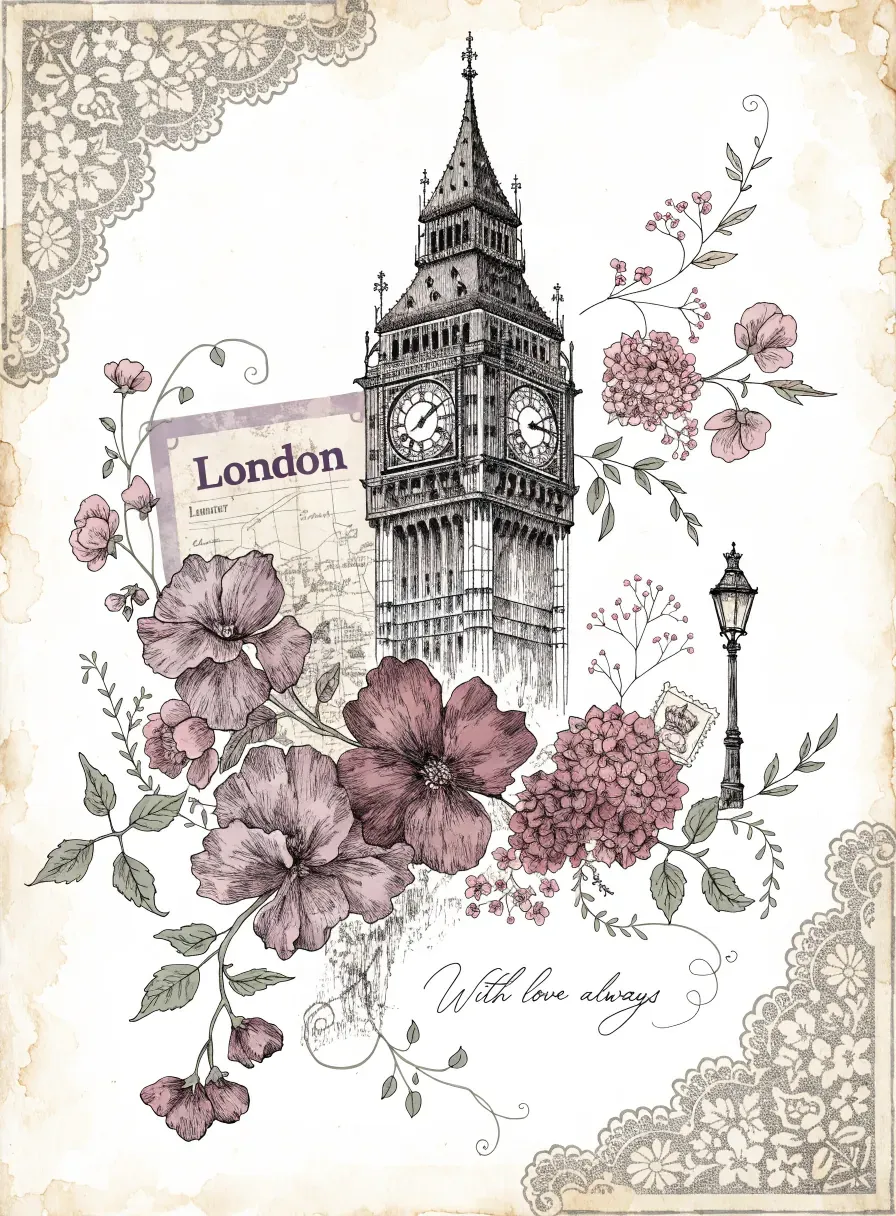
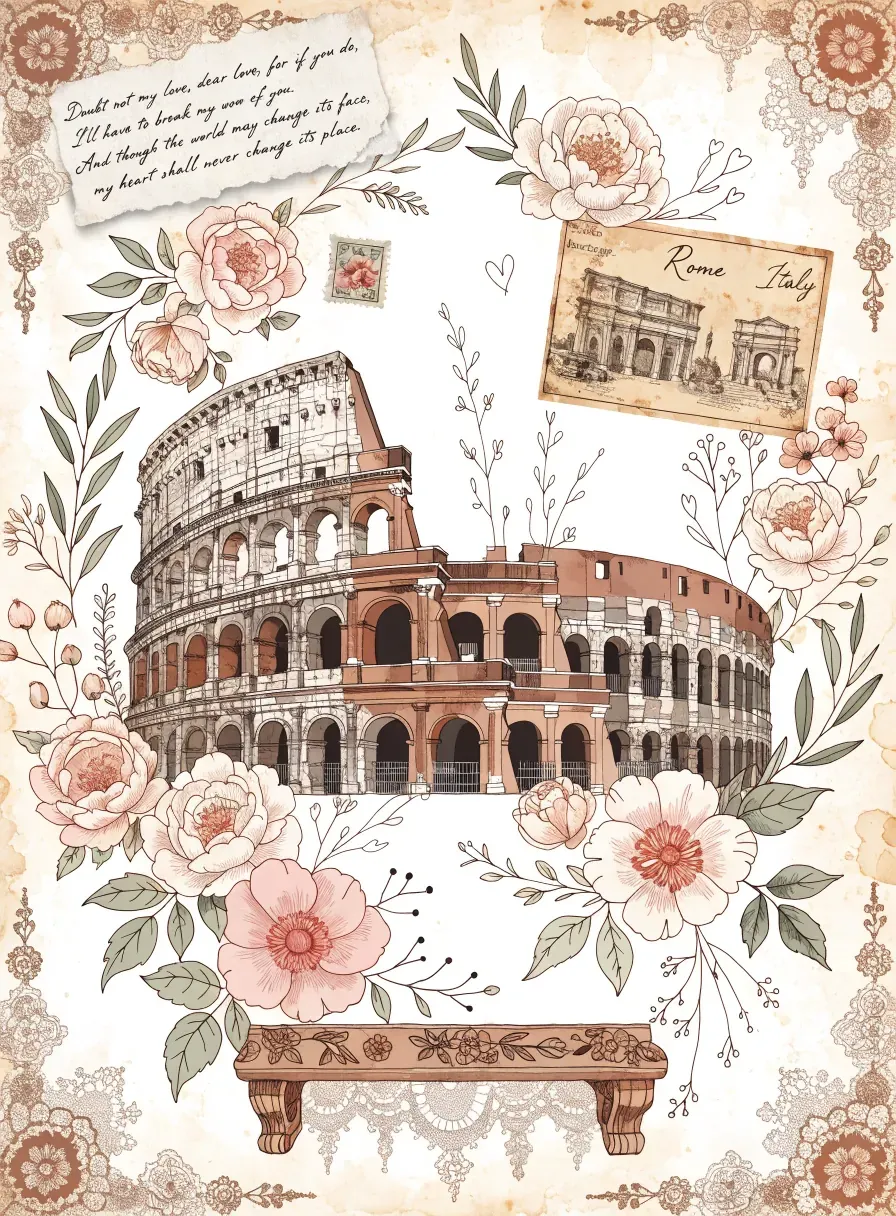
For one more example - this time using another prompt and the instruction: “Change famous capital cities of the world and their symbols as the main subject of the image”, 3 variations, High variety level:
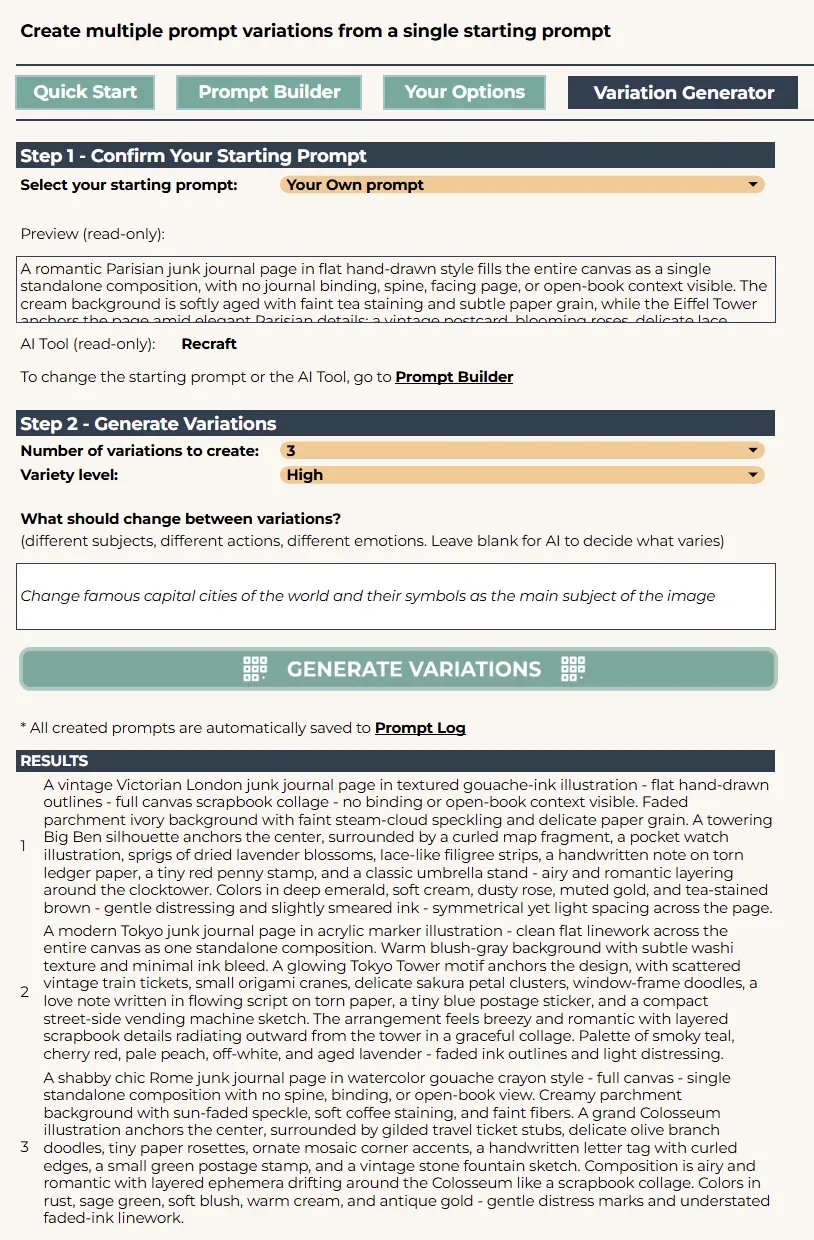
Variation Generator (setup with instruction)
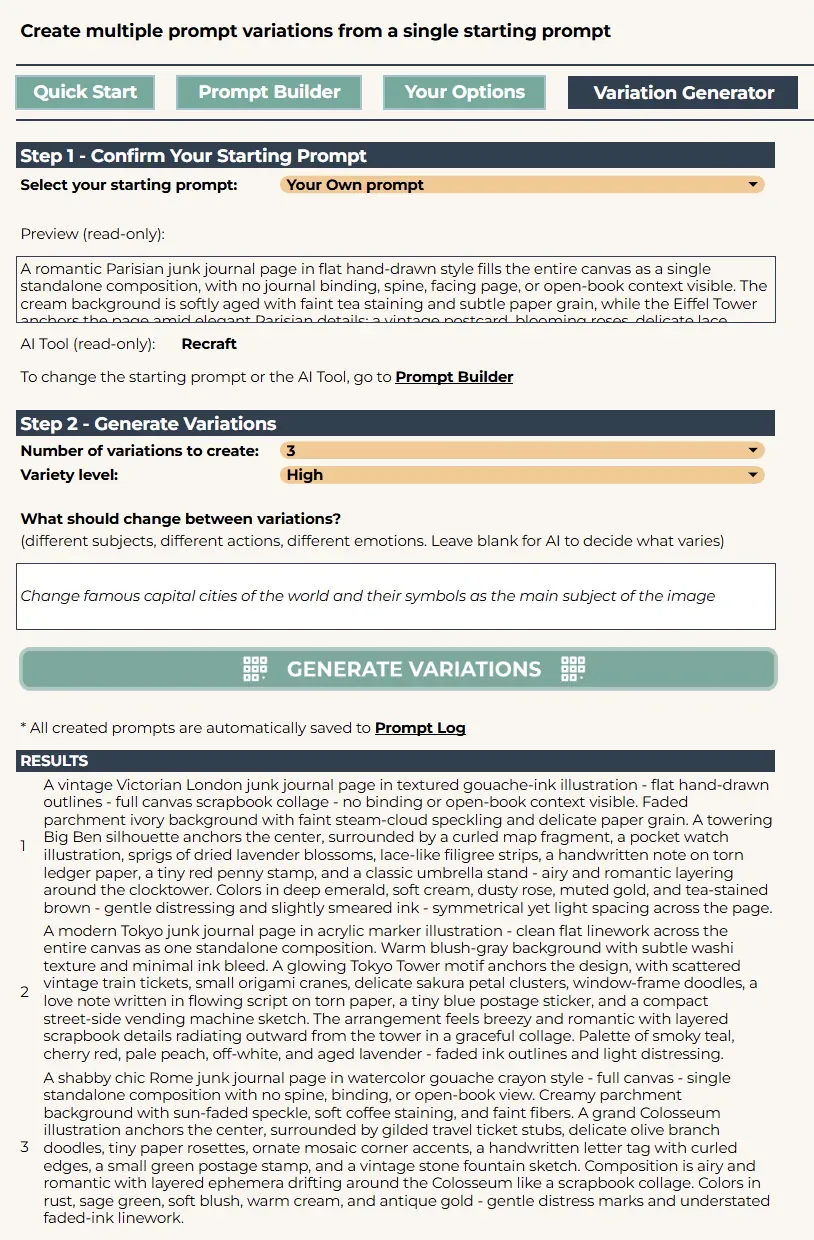
Here’s what this produced:

Original
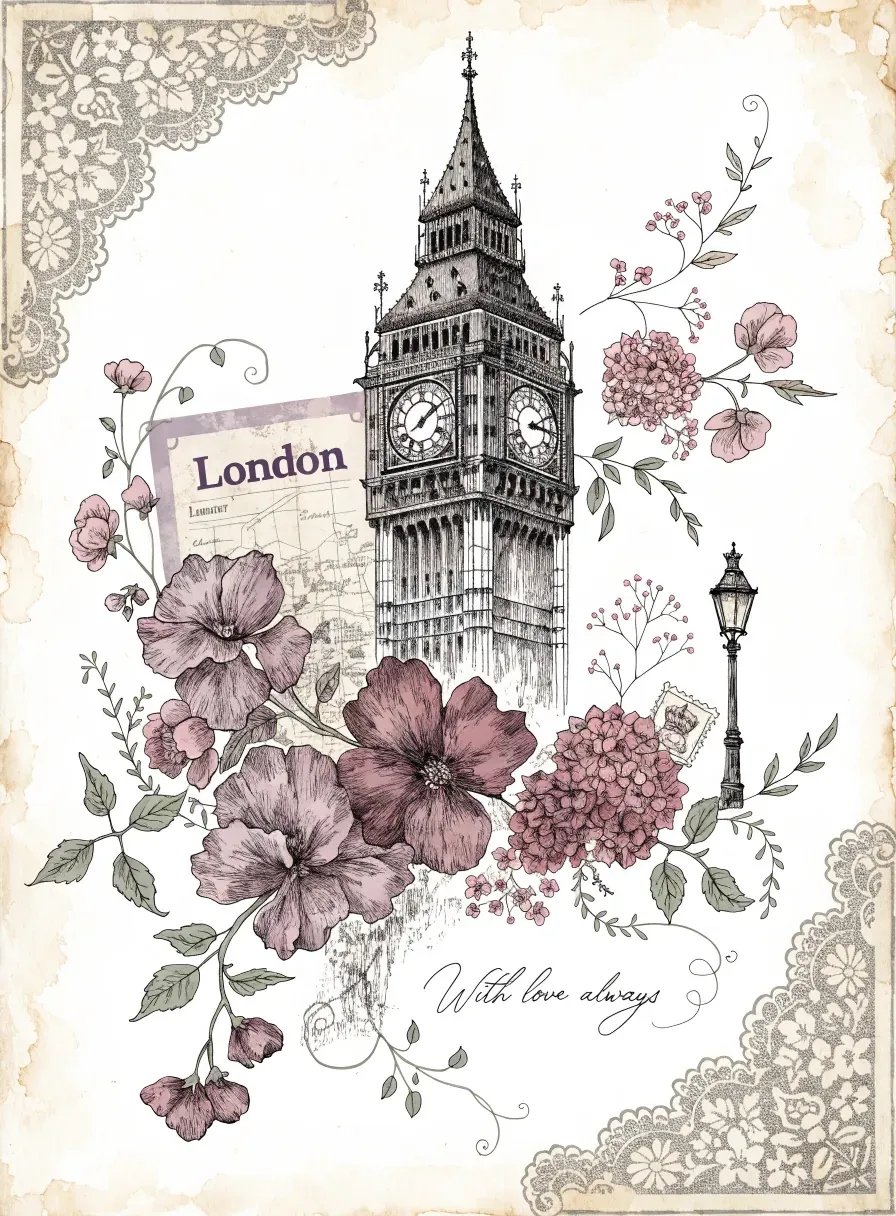
Variation 1

Variation 2
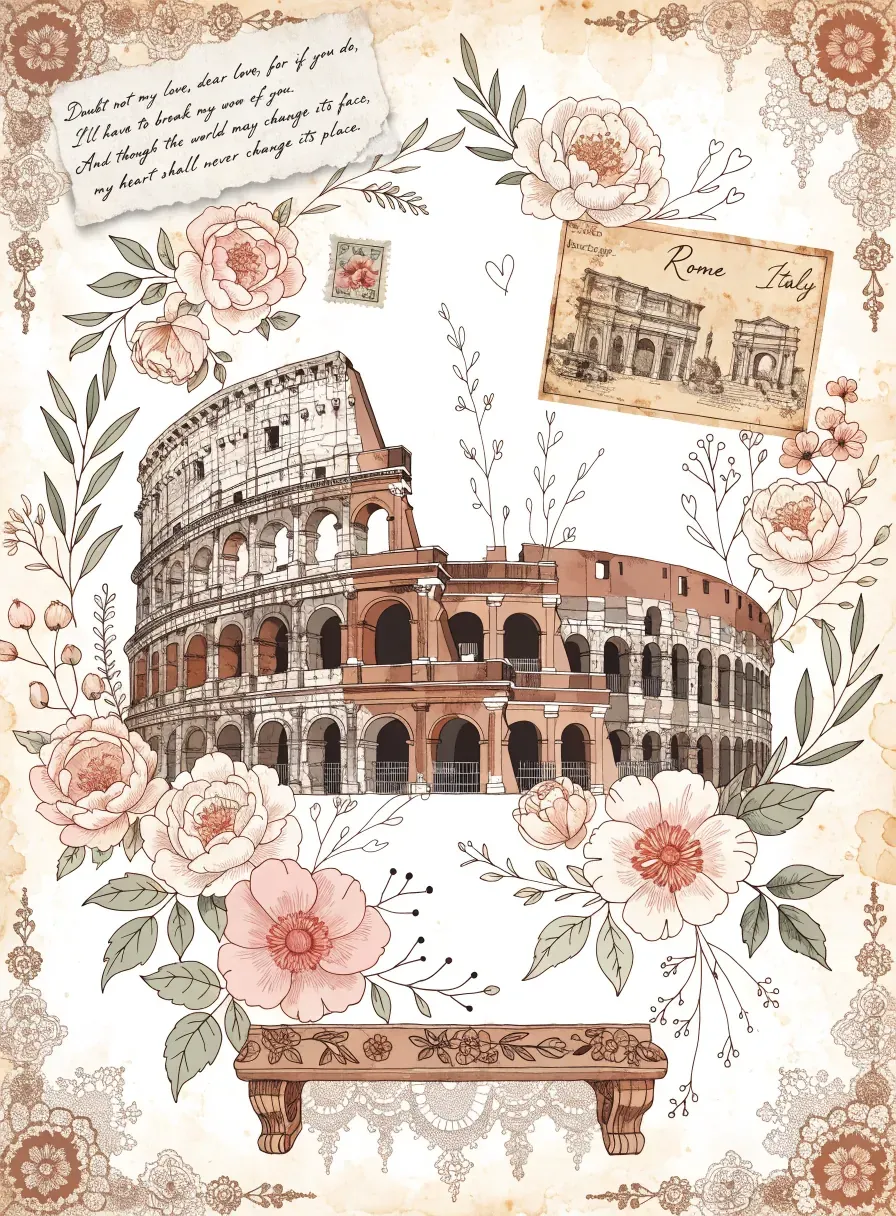
Variation 3


Prompt Log
Every refined prompt and every variation you generate is automatically saved to the Prompt Log - nothing gets lost, even if you forget to copy it.
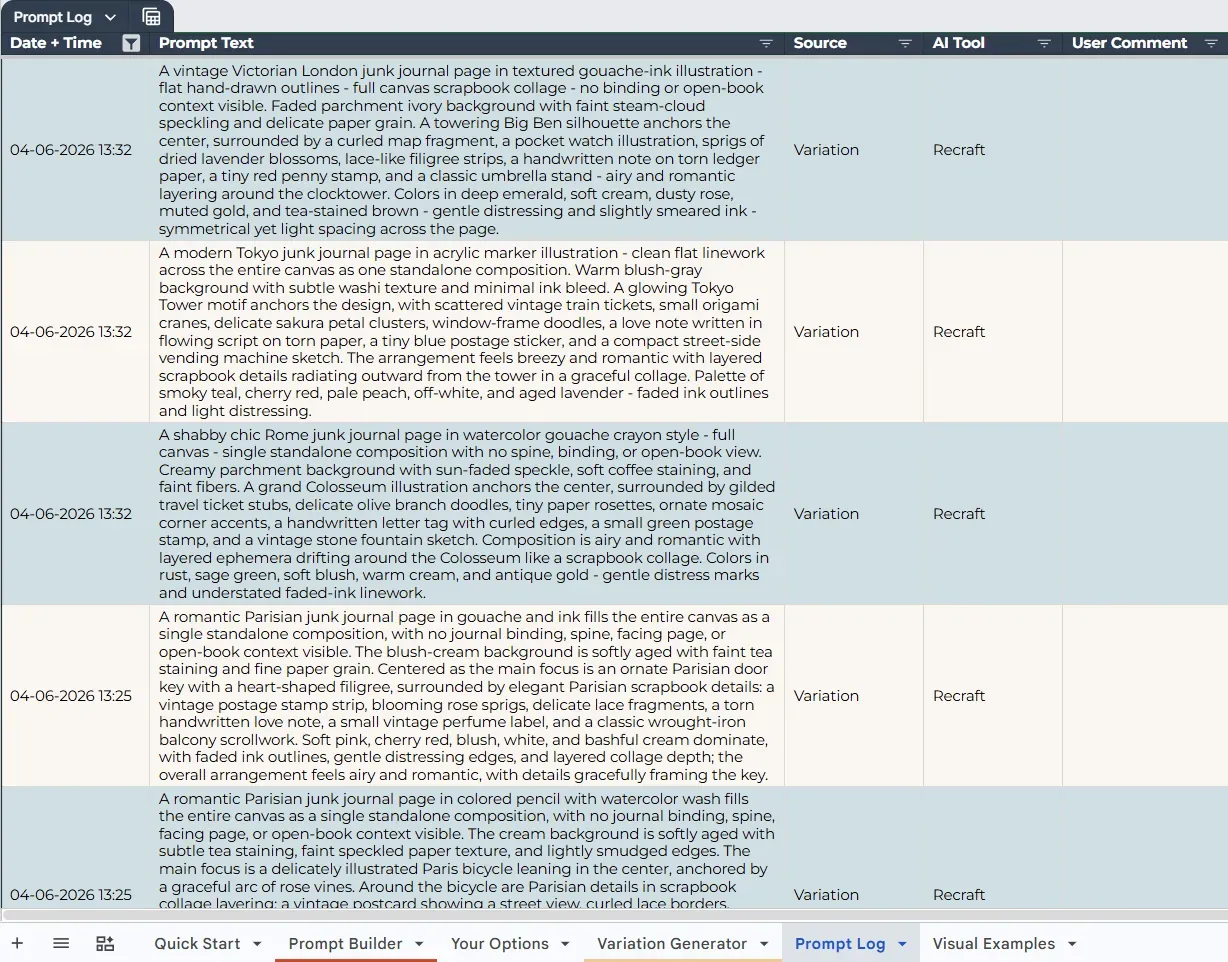
Prompt Log overview
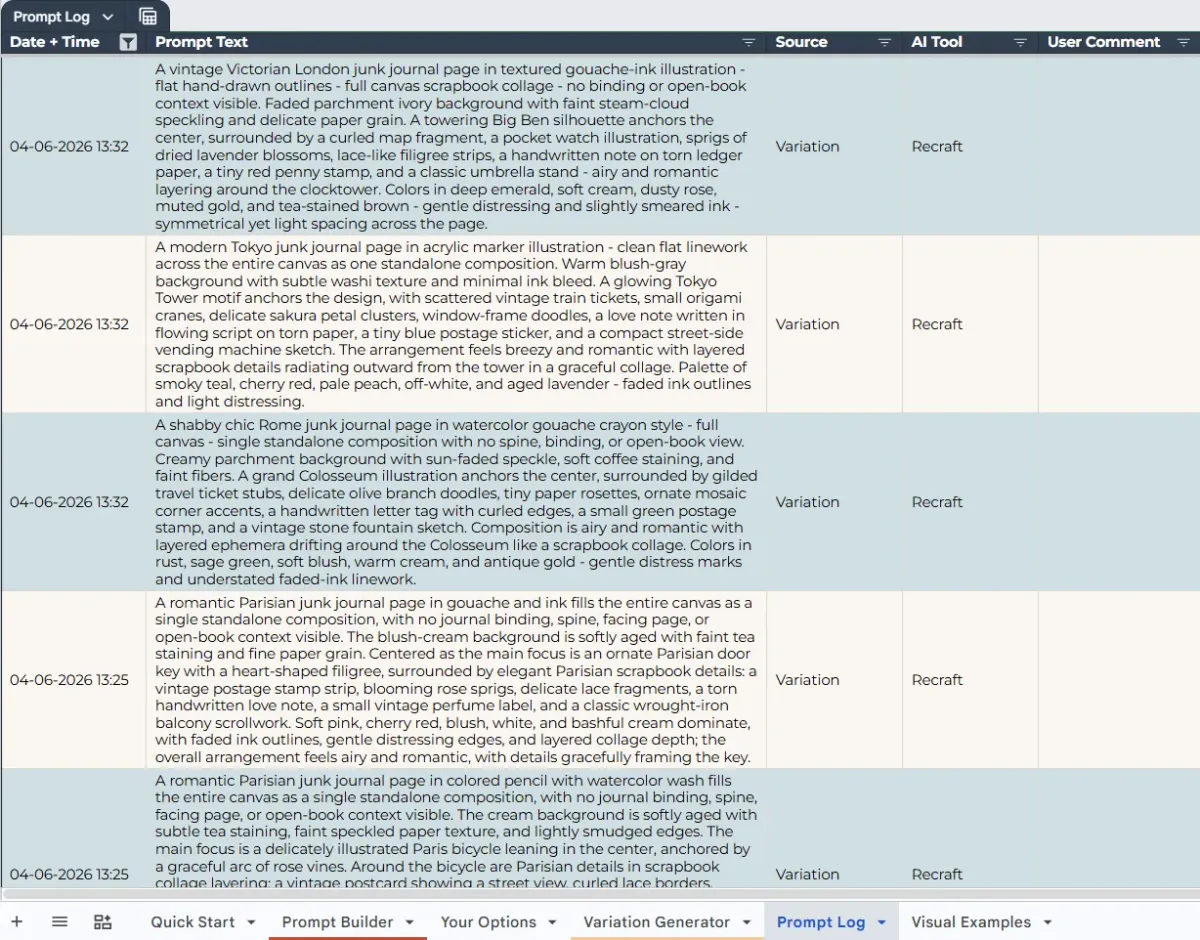
The table has five columns: Date and Time, Prompt Text, Source (whether the prompt came from Refine Prompt or the Variation Generator), AI Tool, and User Comment.
That last column is worth turning into a habit. As soon as you get a prompt you like, jump to the Prompt Log and leave yourself a quick note - “good base for collection”, “try with reference image”, or even just “ok”. It takes five seconds and saves you a lot of searching later.
The Prompt Log is also a natural starting point for continuing your work. Find a prompt you’ve created earlier, copy it, go back to the Prompt Builder sheet, select “Use my own prompt”, paste it in, pick your AI tool (the AI tool you’ve used for this prompt can also be found in the Prompt Log), and you’re ready to continue - whether that’s refining it further or taking it straight to the Variation Generator to build a collection.
Visual Examples
The Visual Examples sheet is your inspiration gallery - and a practical reference for understanding what each option in the builder actually produces.
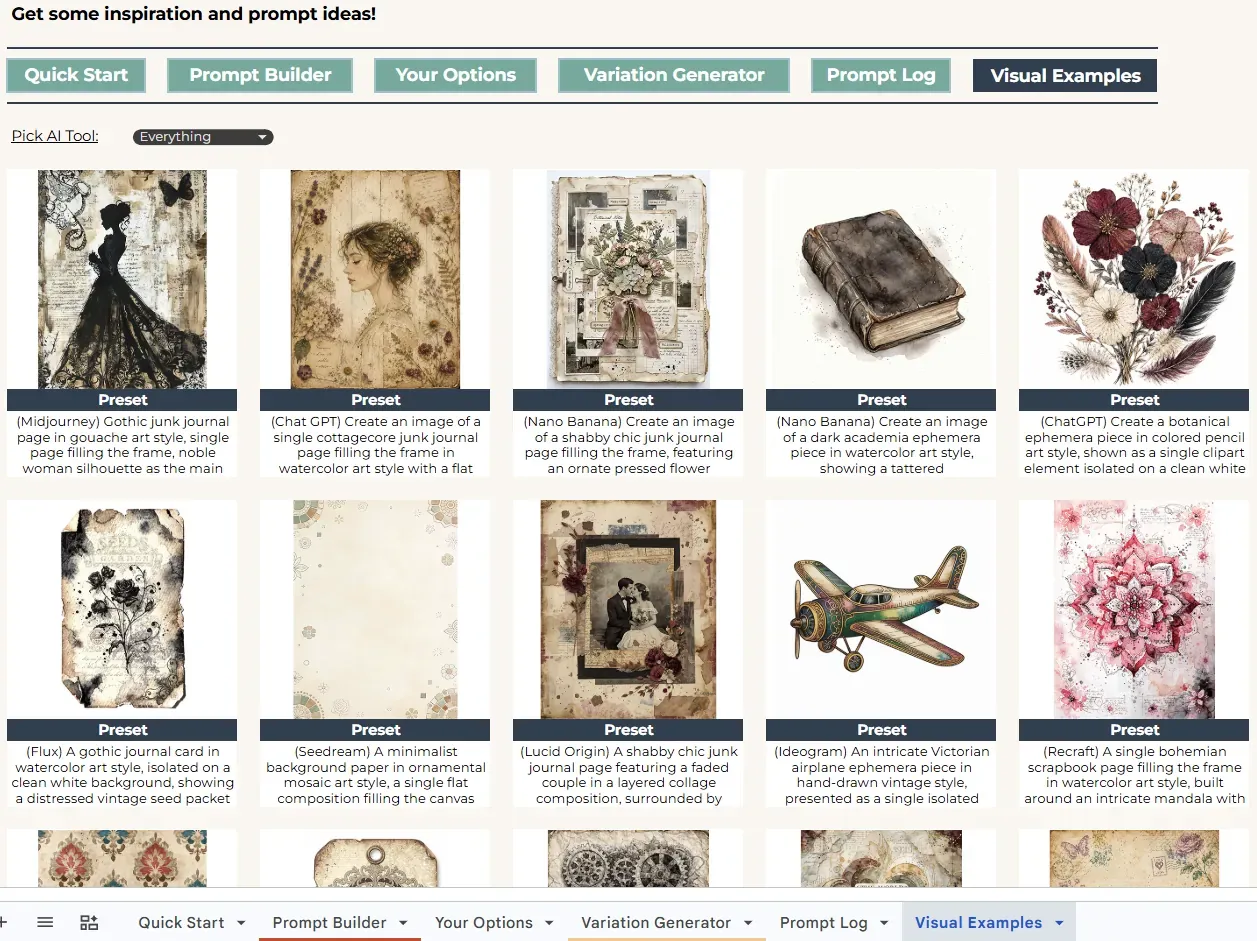
Visual Examples overview
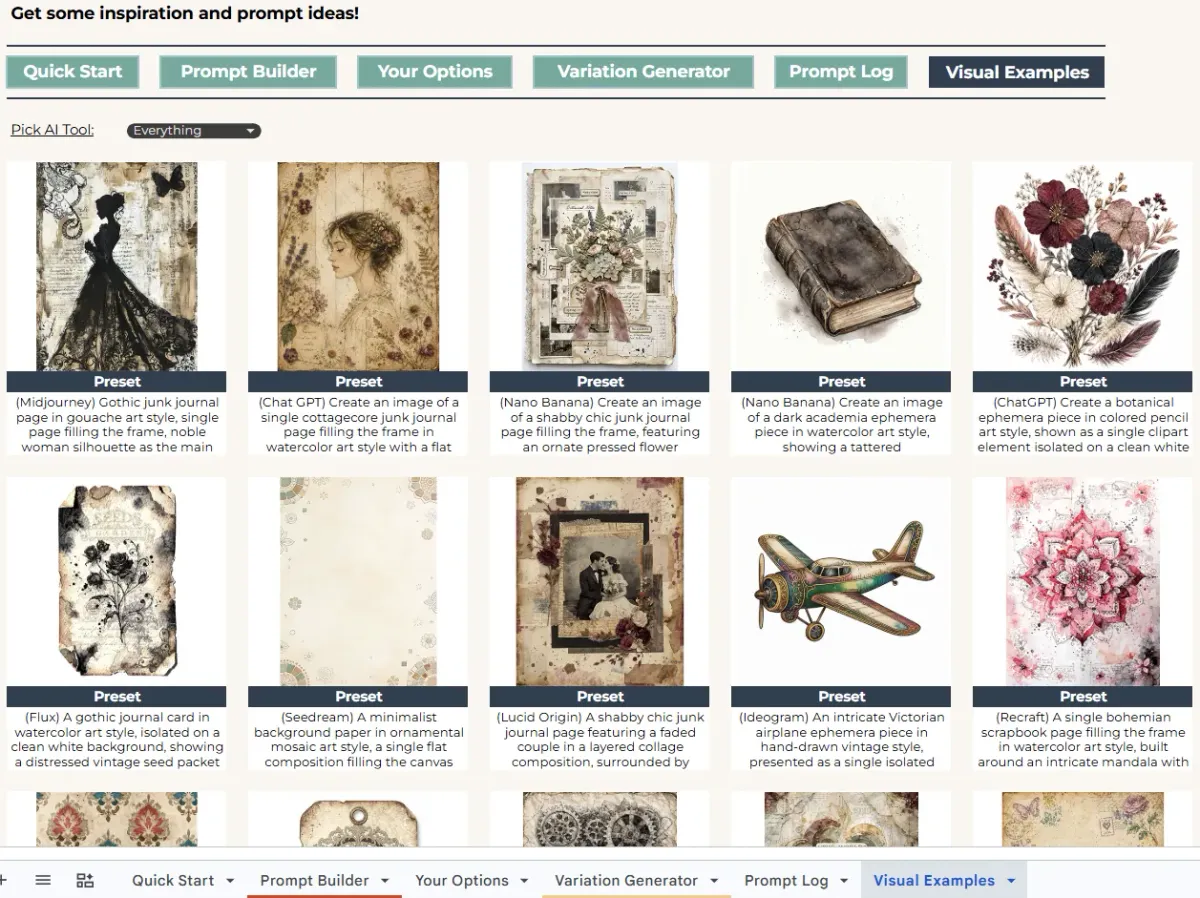
The gallery starts with all 15 Presets - each image card shows the prompt used and the AI tool. If you love one of these images, copy the prompt directly from the cell and paste it into your AI tool.
After the Presets come examples for each of the 8 AI tools used when building this: Recraft, ChatGPT Image, Nano Banana, Flux, Midjourney, Ideogram, Lucid Origin, and Seedream. This gives you a realistic preview of how each tool handles the same type of task.
- Filtering by AI tool. Use the dropdown at the top to filter the gallery by AI tool and see only results from that tool.
- Searching for something specific. If you’re looking for something more specific - say, only images with flowers, or only journal cards - make sure the dropdown is set to Everything first, then use the built-in Google Sheets search. Press Ctrl+F on Windows or Cmd+F on Mac, type your keyword, and any matching prompts get highlighted in green.
The order of AI tools in this gallery reflects our personal preference for this particular builder - the first tool is the one we consider best suited for the task.
Ready to Start
You now have everything you need to get the most out of your Prompt Builder - from your first dropdown selection to building full collections with the Variation Generator.
Your next stop is the builder-specific guide that came with your purchase. That’s where you’ll find the best dropdown combinations, PRO tips, and AI tool recommendations tailored to your particular builder.
And if you’re looking for inspiration, check out our free Inspiration Banks - all prompts there were created with our builders, so you can get a realistic idea of the outcomes you can expect.
Happy creating!